

In previous blog posts I’ve talked about the recent history and investigations we undertook prior to reconstructing the State Drawing Room wall of Hamilton Palace. In this post I am going to focus on the practical challenges of piecing the oak paneling and marble fireplace back together.
Words such as “challenging” and “painstaking” are often used to describe the work of conservators, but it is sometimes hard to convey precisely what our work actually entails. To give some insight into the size of the task involved in reconstructing the Hamilton Palace interior I like to use the analogy of a jigsaw puzzle which has had several owners.
Imagine that this jigsaw puzzle is no longer in its original box , the picture of what the completed puzzle looks like is missing, and also you don’t know how many pieces of the puzzle there are supposed to be. To make matters worse, someone has mixed up pieces from another puzzle in with the one you are trying to do! This is not to mention the pieces that have become damaged and now don’t fit as well as they used to.
In the case of the collection of Hamilton Palace room material the “jigsaw pieces” consisted of over 200 pieces of oak, ranging from large panels to very small fragments of moulding, and 50 pieces of marble, the heaviest pieces weighing 200kg.
It is easy to feel daunted by the physical size of the material and logistics of such a task. Over a period of six months, the work was carefully planned out and a trial construction built in the Conservation workshops at the National Museums Collection Centre. This was then dismantled, transported to the National Museum of Scotland and rebuilt in the Art of Living gallery. We are very fortunate to have these specially designed, generously sized workspaces at the Collection Centre, which enable us to work on particularly large and complex objects such as this.
The first part of the process was to create an inventory of all the pieces. This meant going through all the material that was packed into 13 large and antiquated shipping crates and physically laying out the material. Seeing the crates stacked always reminded me of the final scene in the warehouse in Raiders of the Lost Ark. Not only did we have parts from the Drawing Room but we also had acquired additional paneling and mouldings from the Picture Gallery. Fortunately Scottish Country Life magazine had photographed the interior of the Palace in 1919 and this one archive photograph became the primary aid in reconstructing the wall – our jigsaw box picture.
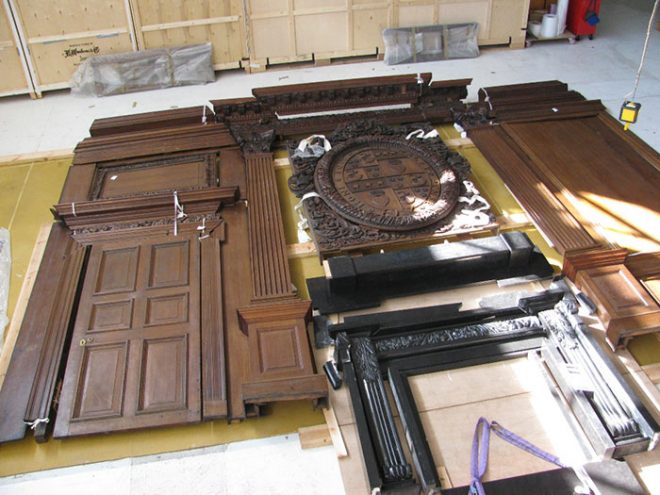
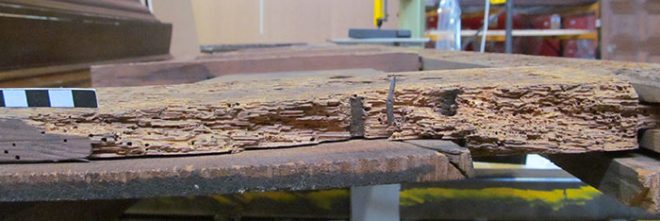
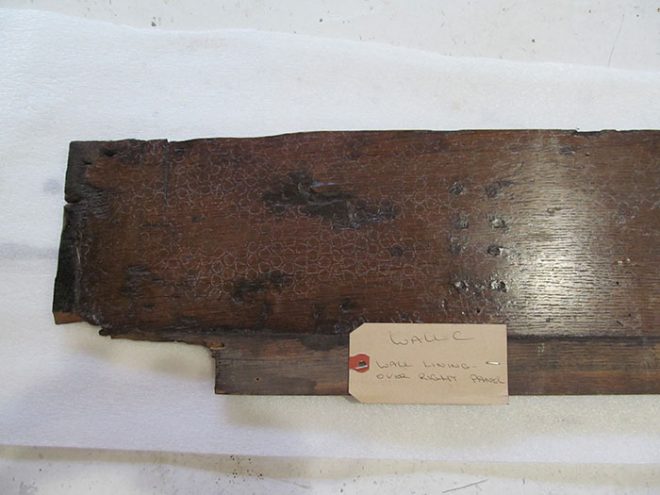
Once all the key parts were identified and laid out we could then begin the process of making a detailed condition assessment of each part and identifying key material that was missing and would need to be re-made. The majority of pieces were in good condition considering their age, although some of the panels had historically seen damage from water ingress and woodworm during their time in Hamilton Palace. There were also major cracks and splits in mouldings, most likely caused when the paneling was removed from the Palace and during the successive rebuilds that occurred when the interior was at auction. A process followed of making good the major damage, involving clamping, gluing and filling the cracks and splits. Areas weakened by woodworm were strengthened by filling and injecting resins developed and formulated by our conservation team specifically for the purpose. Our intent in Conservation is to always preserve and stabilise as much of the original material as we can. Our brief for the conservation was also not to “over restore” the wall and maintain as much of its lived in character as possible.
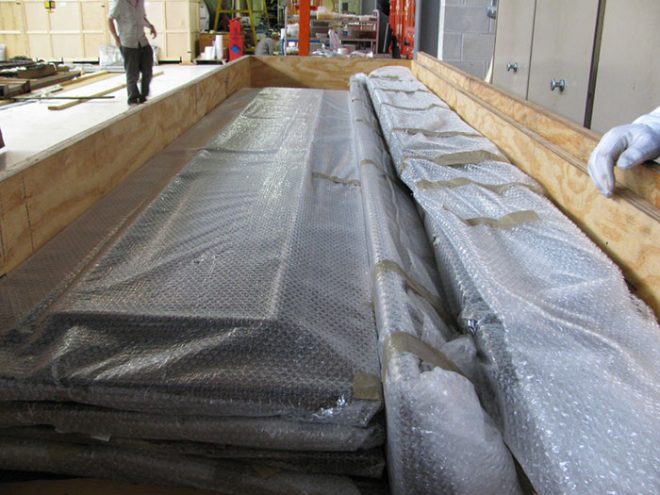
One tricky problem that had to be dealt with was caused by the paneling having been in long-term storage wrapped in bubble wrap. Bubble wrap can slowly degrade with age and chemicals from the plastic start to leach out; these chemicals had left a disfiguring white bubble patterned “bloom” all over the French polished finish of the oak. This “bloom” could not be readily cleaned off or wiped away without the risk of damaging the French polish. By test cleaning with a variety of chemical solvents, a method was found to safely remove these bubble marks without damaging or dissolving the original French polish.
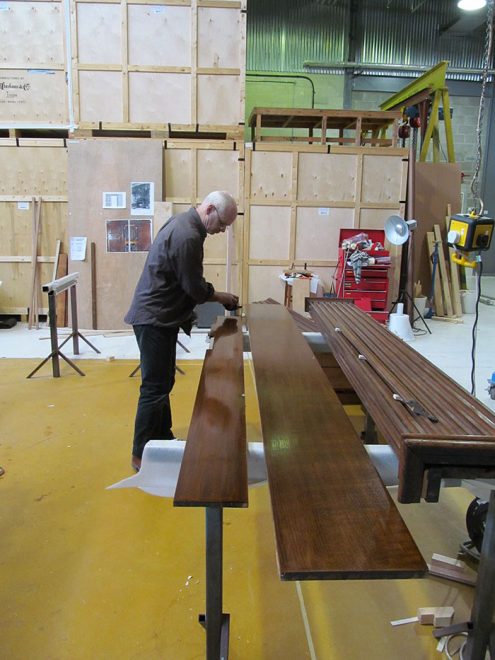
Whilst undertaking the conservation work we also identified panels and mouldings that were missing and had to be replaced. The paneling was originally prepared from quarter-sawn oak; this cut of oak produces distinctive grain figuring and also creates boards of wood which are less prone to warping. We worked with Archie McConnell from McConnell’s Timbers in Dumfriesshire, who was able to source new European oak which closely matched the original grain figuring. Mark Zygadlo, a furniture maker and restorer, was commissioned to reproduce the missing parts from this oak. The most significant losses were two full-height plain panels bordering the fireplace and overmantel.
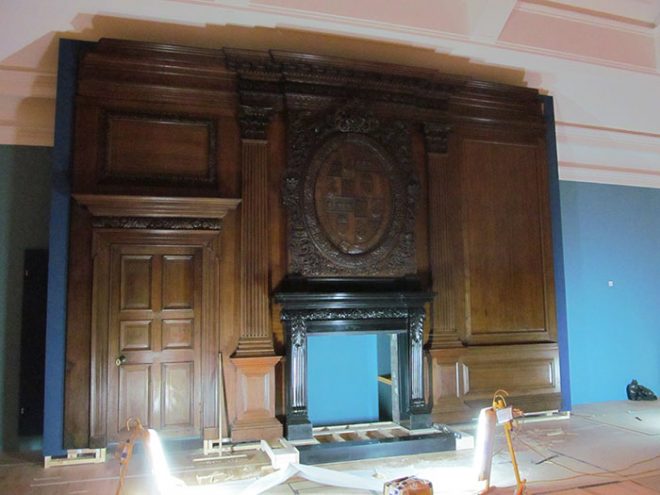
The next part of the project was to plan the method of building the wall and marble fireplace. To make this more manageable, the oak paneling and marble fireplace were initially worked on as two separate components.
We had to bear in mind that for gallery installation we would only have a short period of time to erect the wall, so an initial test run of the build would tell us how much time we would need for real. We also had to be ready to be the first objects installed in the gallery, as due to its size the wall would have to go in whilst the gallery was a bare shell without any showcases and plinths installed.
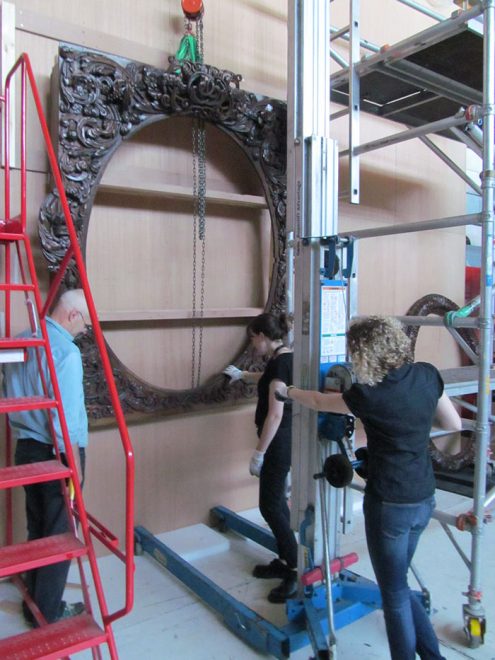
At the National Museum Collection Centre, I started working on a bespoke system of hanging the individual pieces, and the central overmantel, which could be readily dismantled and re-erected. To test this system we then had to build a complete mock-up 8 metre x 5 metre timber and plywood support wall, on which the paneling could be mounted. The design of this support wall would then have to be replicated as part of the fit out of the gallery. From the trial build we felt confident that we could build up the paneling in three weeks.
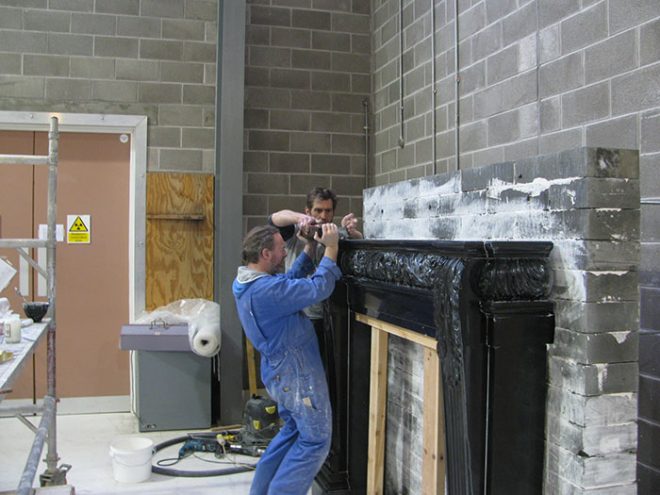
A similar trial build process was carried out for the marble fireplace, as we needed to ensure that the paneling and fireplace fitted together well. We decided to build the fireplace separately from the paneling and transfer the built measurements across. In the real build the fireplace would have to be built first, with the oak paneling fitted around it.
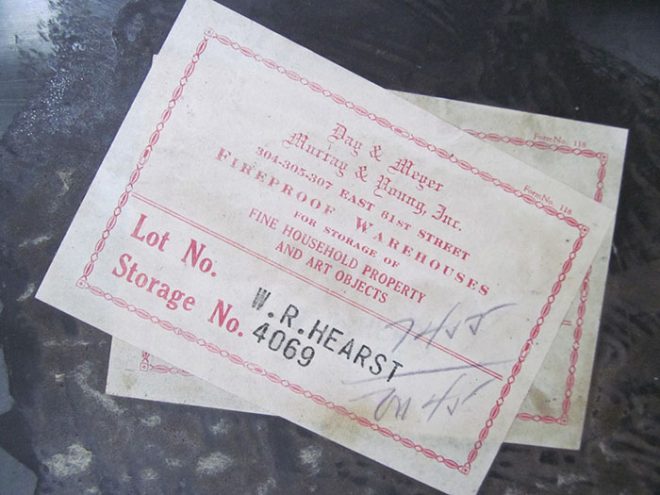
We contracted specialist stone conservators Skillingtons to build the fireplace, but before this build could begin the marble had to be cleaned. Each piece of stone still bore the original auction stickers bearing the name of the previous owner, American newspaper tycoon William Randolph Hearst. These labels were carefully removed and preserved.
Plaster of Paris had been used as a bonding agent for the marble sections, and this also had to be removed. The cumulative weight of the marble was in excess of 1 ton, so we needed to support and back the fireplace with a solid wall of cement block work to which the marble could be attached with steel cramps. During the trial build we had made repairs and strengthened a load-bearing lintel piece, however, when in place we found that the marble was still very weak and would have to be replaced.
With all the pieces erected in their temporary home at the Collection Centre, gallery fit out contractors came to measure up the wall and produce a construction drawing for the permanent support framework required in the gallery. This was based on our trial build prototype, and was built in the gallery ahead of the wall’s arrival.
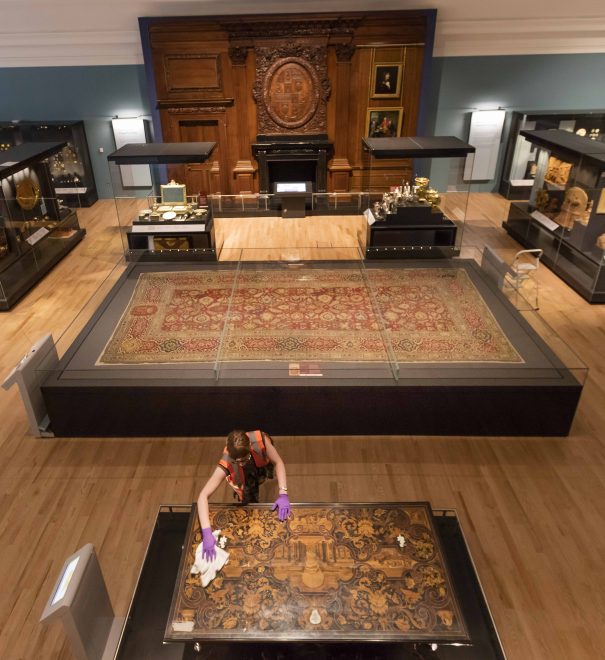
Finally in November 2015 we were ready to install the Drawing Room wall. With our unique hanging system we were able to dismantle the wall from its temporary home and pack it up in three days (with no bubble wrap in sight!)
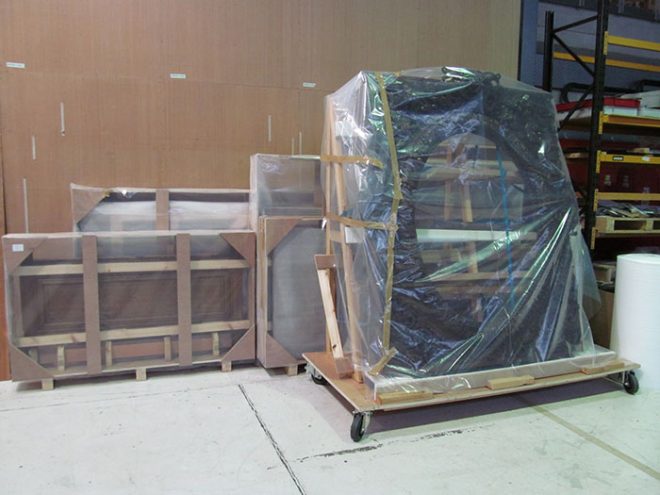
The stone conservators from Skillingtons returned and dismantled the fireplace and the whole consignment was shipped to the new galleries. The process of building it could begin for real, Skillingtons installing the fireplace in the first week, to then be followed by the paneling, installed by Mark Zygadlo and myself.
For this second install we were now well practised in the order of work, and we had also thought of ways of speeding up the process by creating jigs which control the exact position of the hanging system.
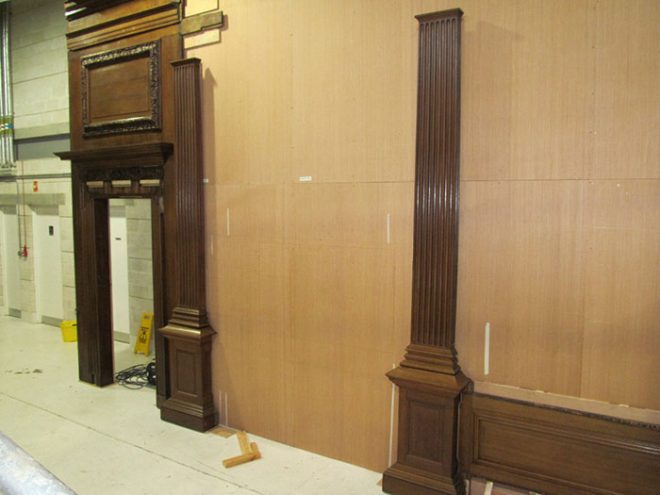
There were some aspects that we could not rehearse for. Firstly, the gallery installation included a plinth feature which elevated the wall about 15cm above the gallery floor level. However, we could not install the wall with this plinth in place so the solution was to build up the wall and fit the plinth afterwards, sliding it beneath the skirtings, pillaster bases and the recessed door.
Secondly, the new paneling that was made to line either side of the fireplace had to be precisely cut to fit to the complex shapes of the outer profile the marble. This scribing was expertly done with hand chisels by Mark Zygadlo: as we had just the one opportunity to get this right it was very much the adage measure twice cut once to make sure we had an exact fit.
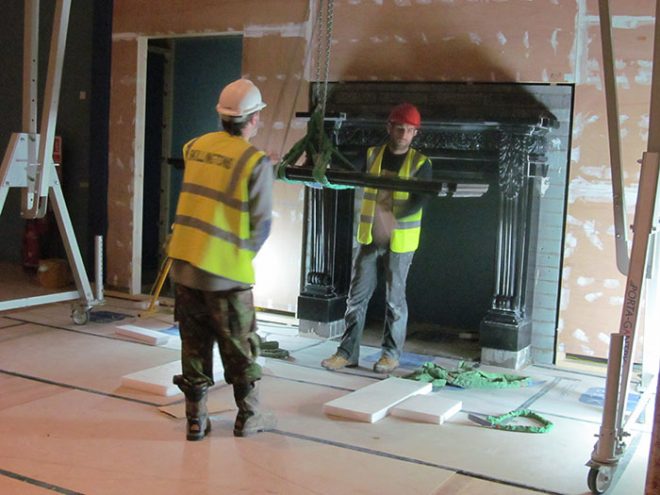
After 12 days, regularly fueled by Javanese coffee and chocolate cake, we had finished the installation of the wall. You can see a timelapse of the installation here:
I had seen through this project from the outset and lived and breathed it for two years, but it could not have been completed without the contribution and help of the many National Museums staff and external contractors. The list includes: Artefacts, Engineering and Paper Conservators, Curators, Photographers, Collection Technicians, Collection Centre Site Team, Analytical Scientists, Art Movers, Project managers, Designers and Exhibition Fit Out Contractors.
You can find out more about the rise and fall of Hamilton Palace and the new Art, Design and Fashion galleries at the National Museum of Scotland here.