The job of a conservator is really varied, with lots of technical, detailed and sometimes challenging tasks. These can range from measuring out the correct quantities of a methyl cellulose adhesive to consolidate friable pieces of 3,500 year old papyri, to holding one’s breath whilst delicately inserting a patch of superfine silk habotai into the shattered lining of a 19th century frock coat, or applying adhesive to the ends of tiny thread splints used to reconstruct an essential part of the mesh on a Korean ‘samo’ hat, or working in a team to put a fashion garment on a mannequin.
But what happens when conservators are away from the bench? What do they do when they can’t treat and conserve precious museum objects?
Unfortunately, we can’t take museum objects home to work on, whether we are under the current nationwide lockdown or not. With home-working from a computer currently being our ‘new normal’ we have adapted and found ways to apply the conservation techniques we use in the lab to our daily lives at home, so we will be ready when we finally get back to the museum.
Colour Matching – the laboratory versus home
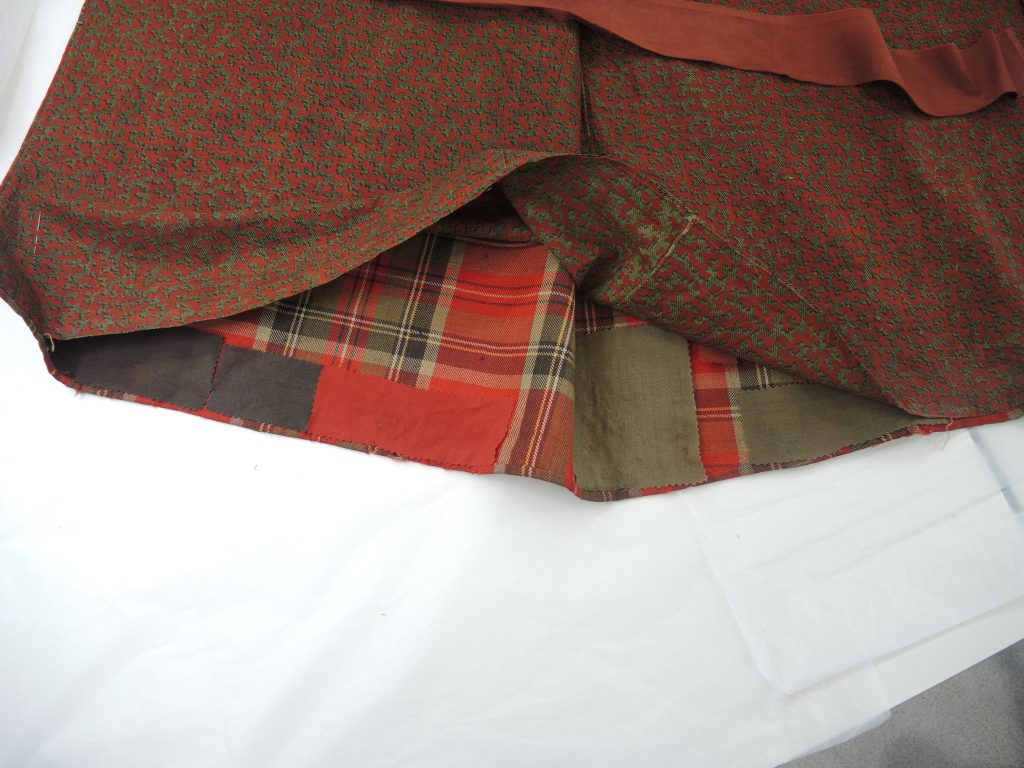
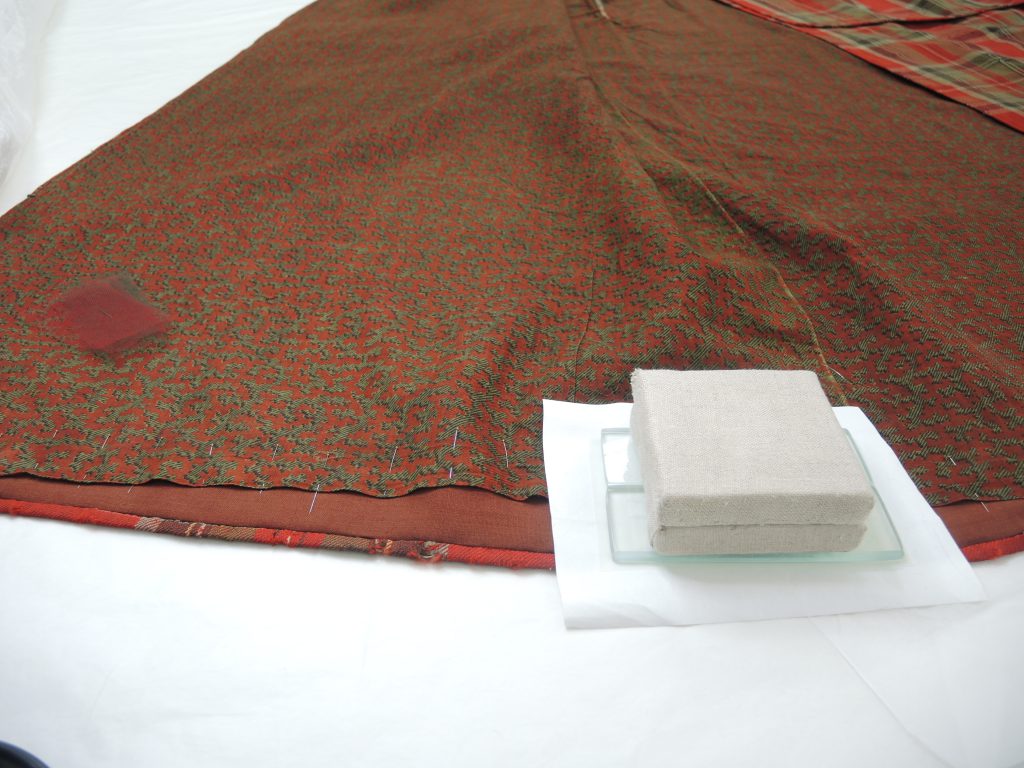
One of the key things to get right when choosing a support fabric for a damaged textile is matching the texture, weight and most importantly the colour of the support to the textile being conserved. This minimises the visual impact of the damage whilst providing support to the weak areas of the textile. In the lab we select support fabrics from a catalogue of dyed samples of wool, silk, cotton and nylon net, or use our dye recipes to prepare a matching colour.
These skills were used to match brown, red and green wool samples to the damaged hem of this late 19th century women’s tartan cloak in preparation for a stitched treatment.
At home textile conservator Lynn has been applying her colour matching skills to a 1,000-piece jigsaw puzzle of Venice at sunset. The sky is varying shades of red and orange, so concentration is required as much as colour matching skills – much like most conservation treatments!

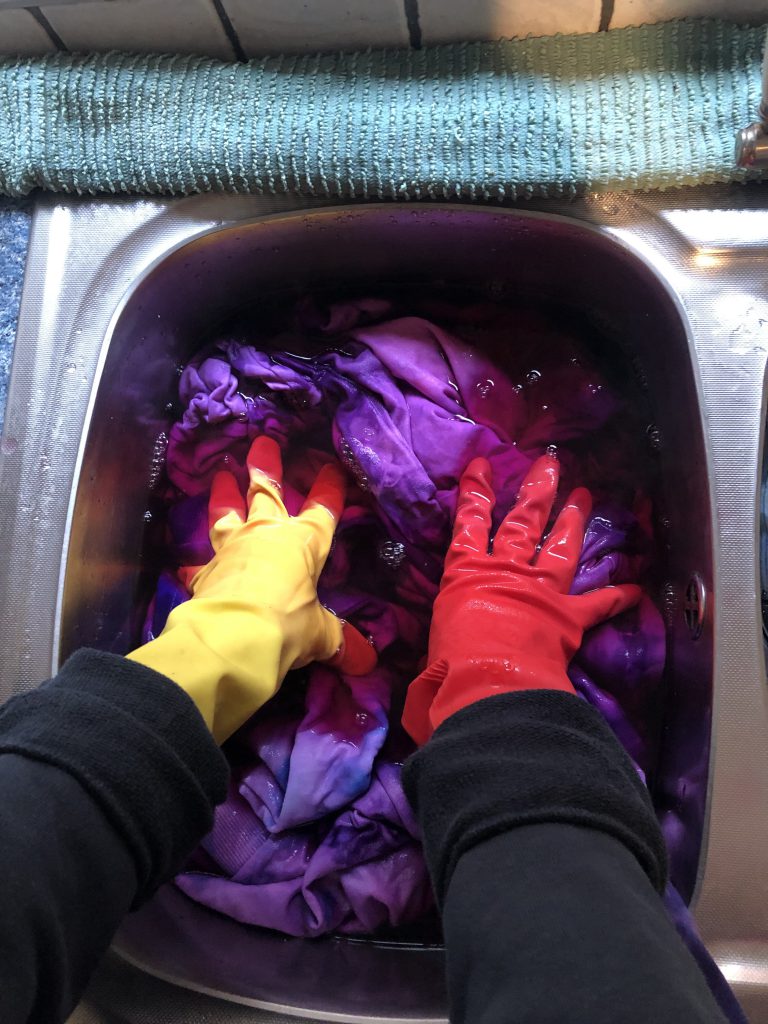
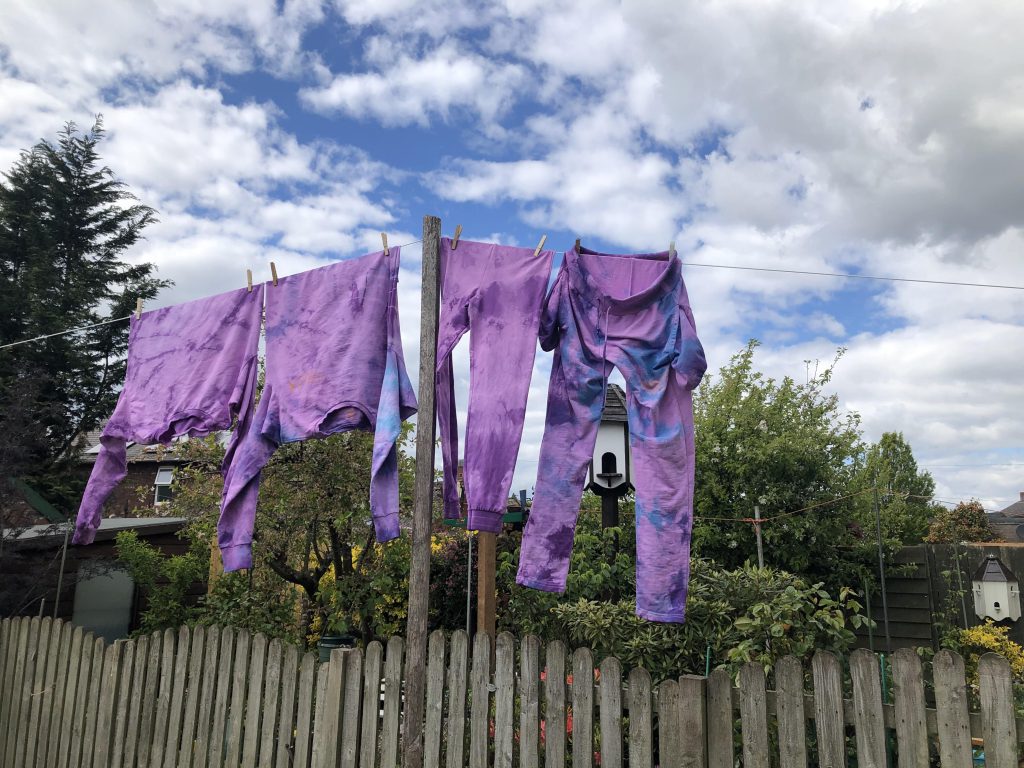
Dyeing – Conservation versus Tie-Dye
As mentioned, textile conservation treatments often involve the need to dye fabric to provide support to areas of damage and weakness. This is done using a complex set of dyeing methods and conservation grade dyes to achieve colour matches. Multiple variations of the chosen fabric are dyed using a recipe, often only altered by miniscule amounts down to a tenth of a millilitre. Textile conservator Rosie is dyeing silk in the dye lab, wearing the required PPE.

Rosie has taken on a different sort of dyeing at home, embracing the current trend for tie-dye with home dyes to achieve colourful and bold updates for old clothing. Probably not colours we’d use often in conservation… but cheerful nonetheless, and good to see health and safety still being observed.
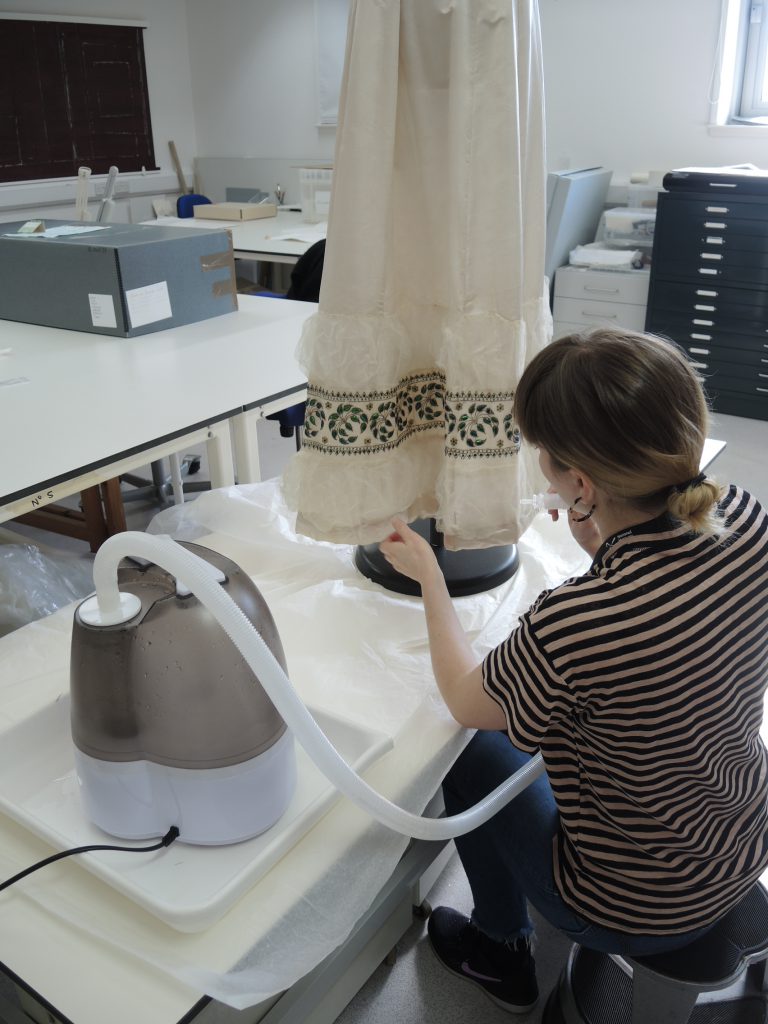
Crease removal – conservation versus domestic
We often need to remove creases from historic textiles. These can have formed during the object’s life before it came into the museum, or from an old and inappropriate storage system. We store our objects in the best way possible to provide support and minimise the risk of damage and use materials such as acid free tissue paper and boxes to house and protect. However, we still face the challenge of removing existing creasing from fragile textiles. A commonly used method is the cold poultice, used to gently remove localised creasing. The method works with a semi-permeable membrane, layered with cold, damp blotting paper, followed by a weight. This is left in place and monitored regularly until the crease is reduced sufficiently.
We do have other tricks up our sleeves, and as an alternative to the poultice method can use an ultrasonic humidifier to introduce a small and controlled amount of cold vapour to relax the creasing, as seen here for a 19th century dress made from silk satin and net.
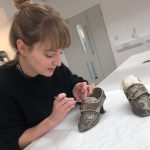
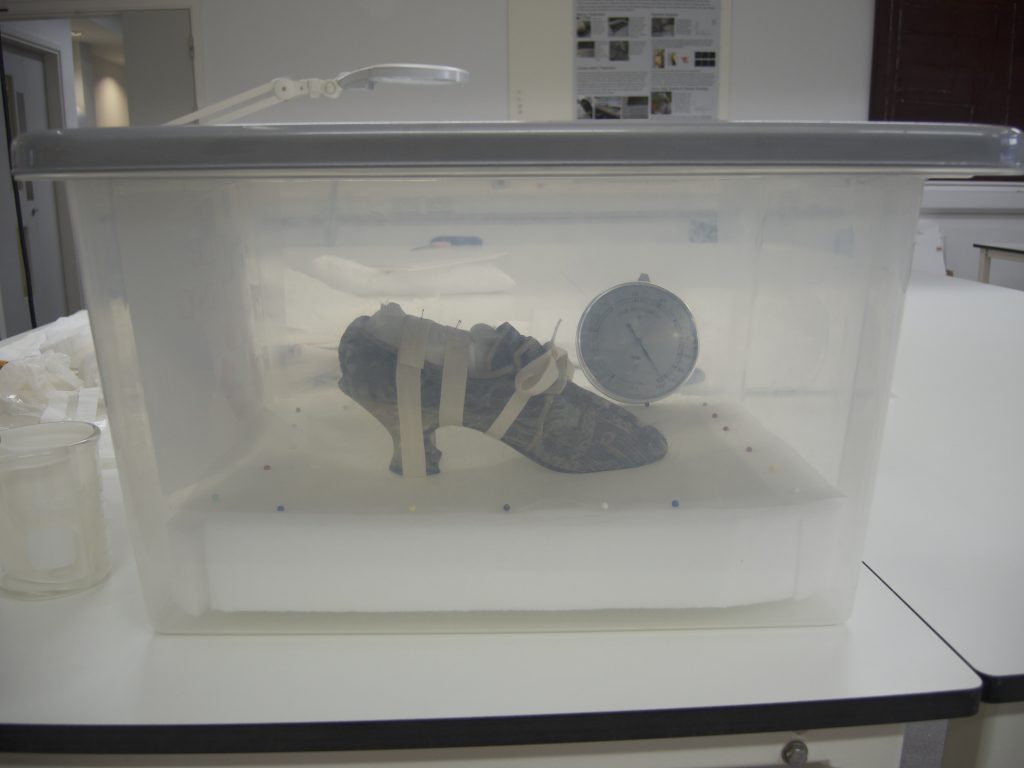
And sometimes we use a humidification chamber to introduce a very controlled amount of moisture into a whole object. This is useful for 3-D objects like this 16th century shoe, where the deformed heel fabric needed relaxed before being re-shaped.
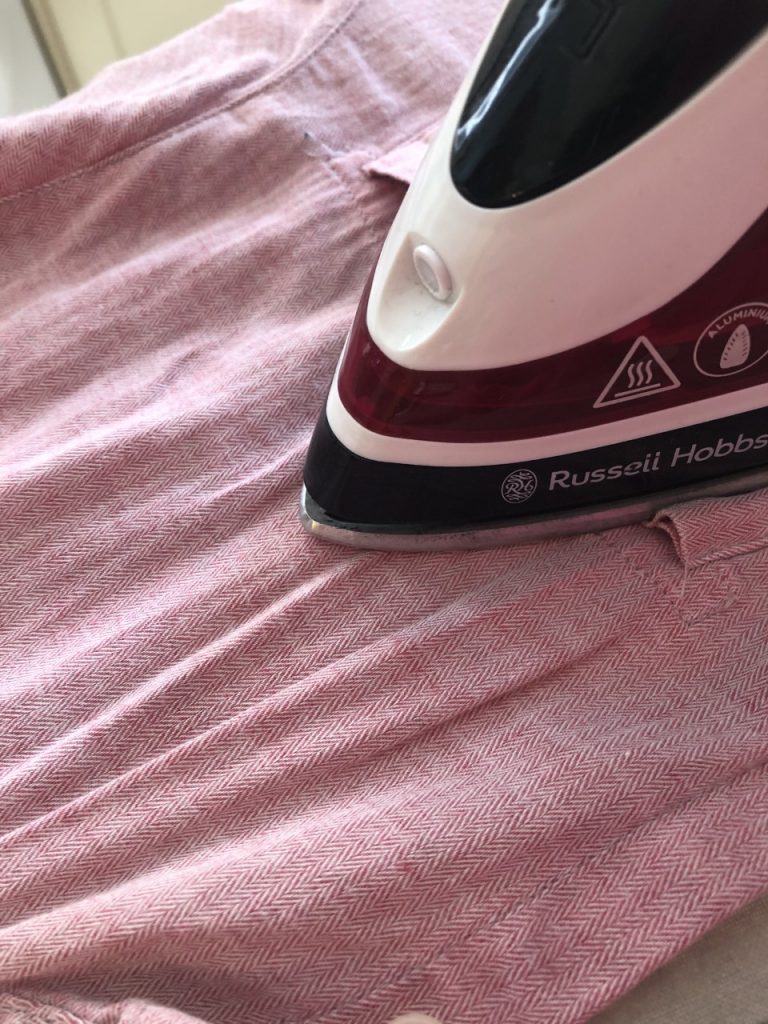
We can hear you saying why not just give things an iron – that will surely give it a nice smooth finish?
And indeed a domestic iron, which can set be to high temperatures to remove creasing by applying heat, pressure and hot steam, would relax the fibres and remove the creases. But heat with pressure is one of the enemies of fragile museum textiles. As with many things, textile fibres weaken over time and can become structurally vulnerable. Damage caused by heat occurs at different temperature, depending on the fibre type, and the older the fibres are the less they are able to recover at a molecular level. Ironing would result in even more weakened and brittle fibres, and so is not a process we use. And no textile conservator could face the consequences of an iron mark burned onto a historic textile!
Repairs – old versus new
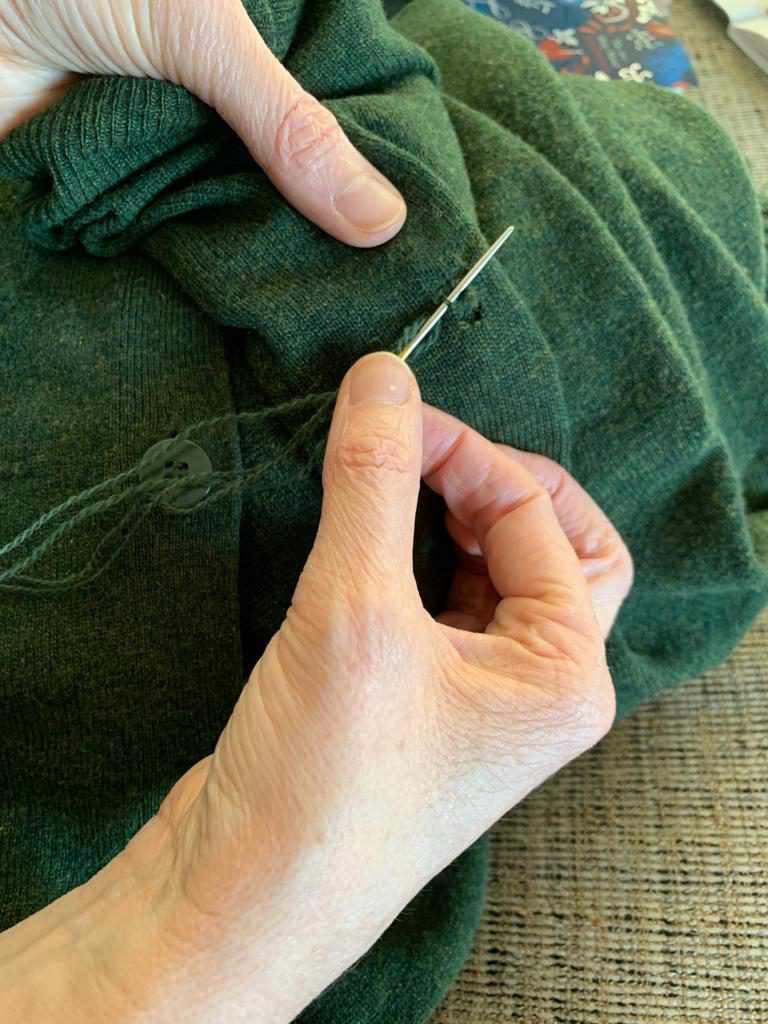
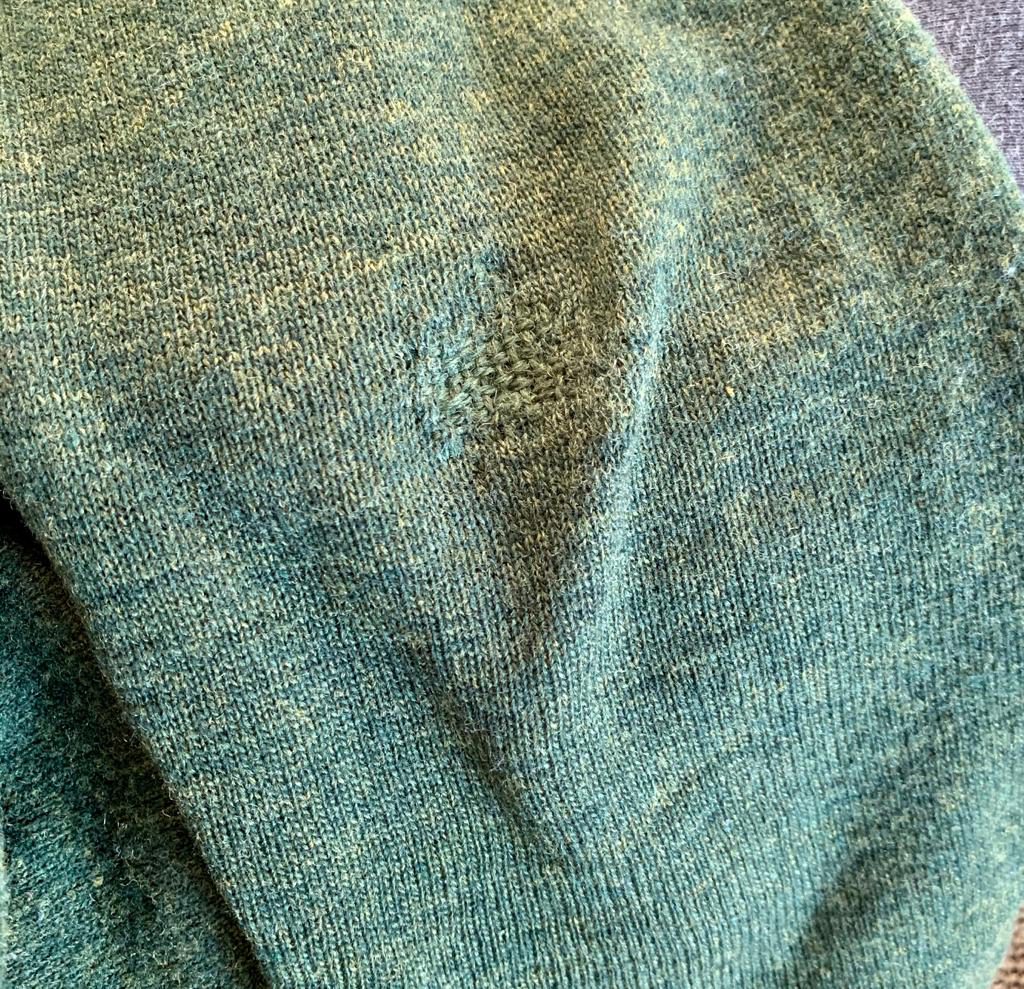
We often encounter old repairs such as darns on historic textiles, and have to decide whether they are part of the history of the object or whether they should be removed and supported differently. At home it’s an easier decision, a hole in a knitted jumper can usually be repaired by darning, and Lynn has made a pretty good job of this home darn.
Making it – conservation versus home
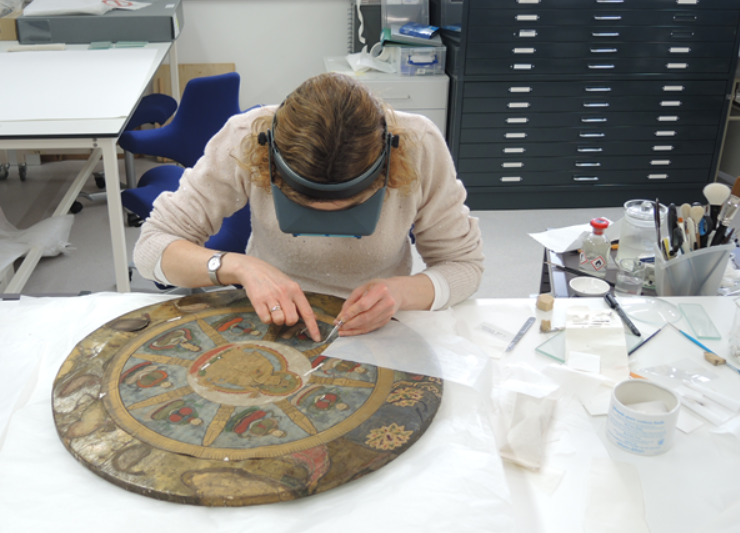
Our paper conservators have been busy too. Before lockdown paper conservator Vicki was doing some intricate work on a circular Buddha painting, using fine tweezers to insert a paper fill into the smallest of losses.
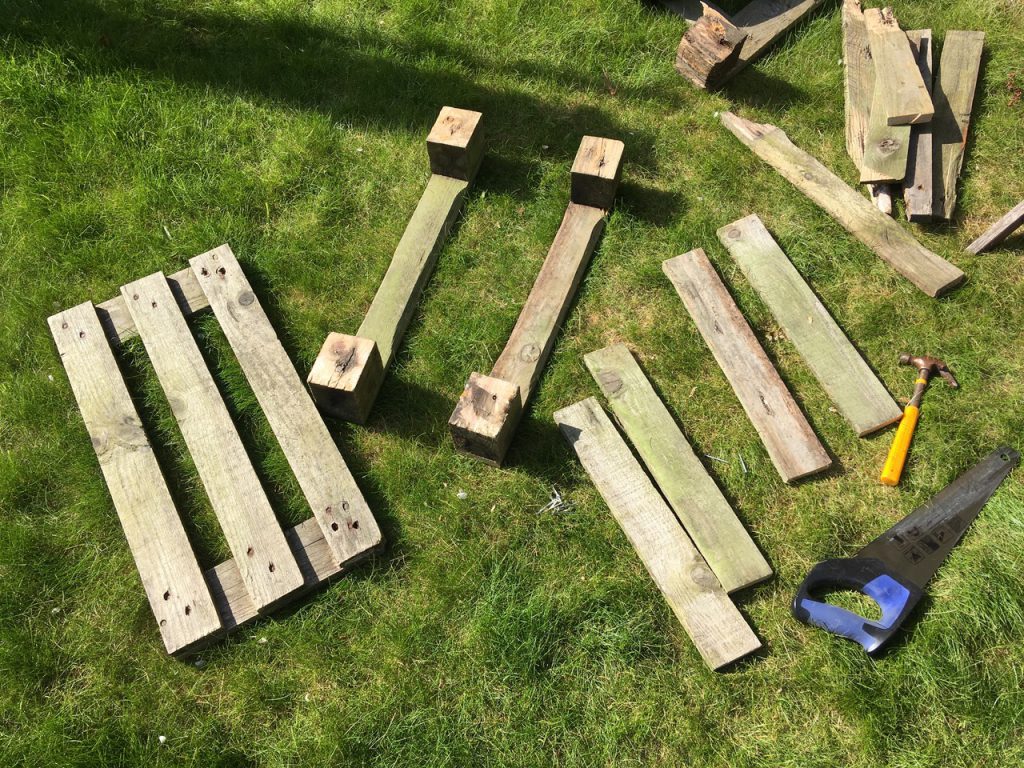
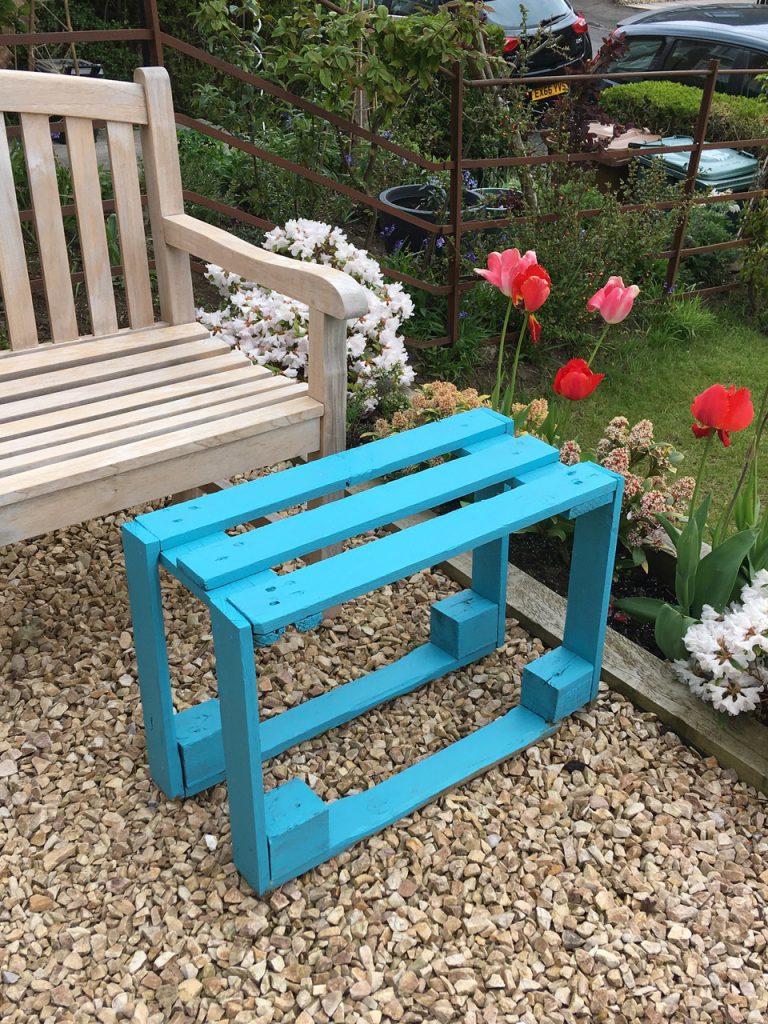
During lockdown she has taken on something on a completely different scale, with very different tools, making a table from an old pallet and painting it a jolly shade of blue.
A simple scalpel is a vital tool in the work of a Paper Conservator. One technique we use often is removing wood pulp board backings from works of art that were adhered prior to framing. The backboards become acidic and discoloured over time and this acidity and discolouration can migrate into the artwork if the backing isn’t removed. Sometimes the only way to do this is to painstakingly pare down the backing with a scalpel until you reach the back of the artwork.
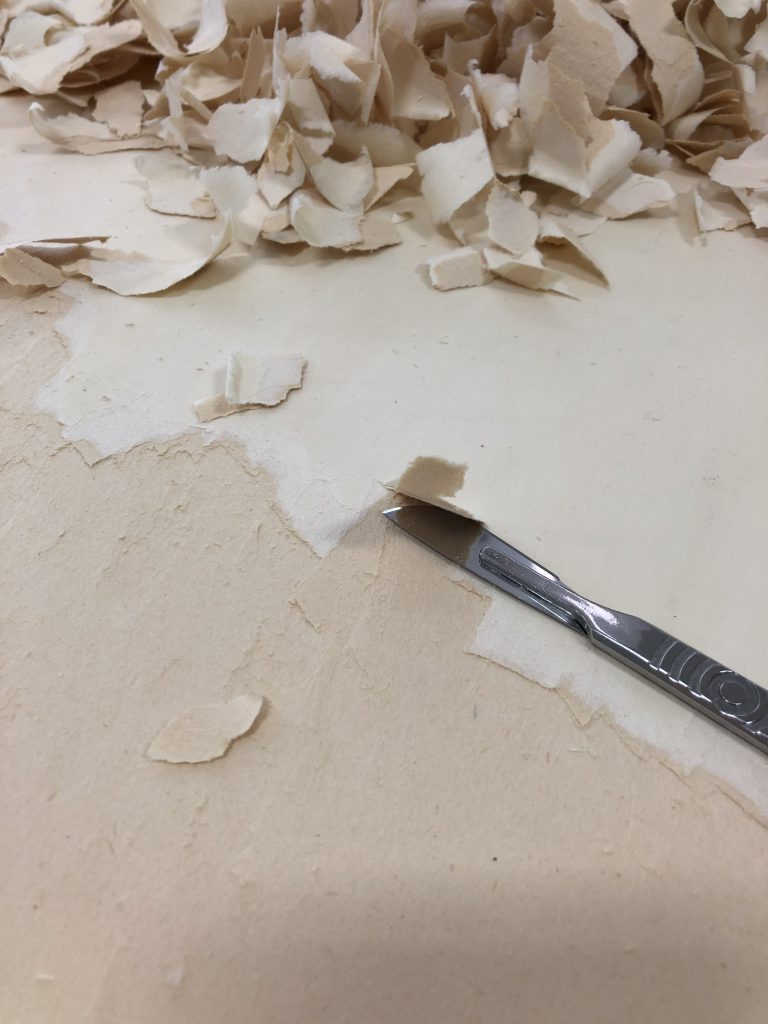
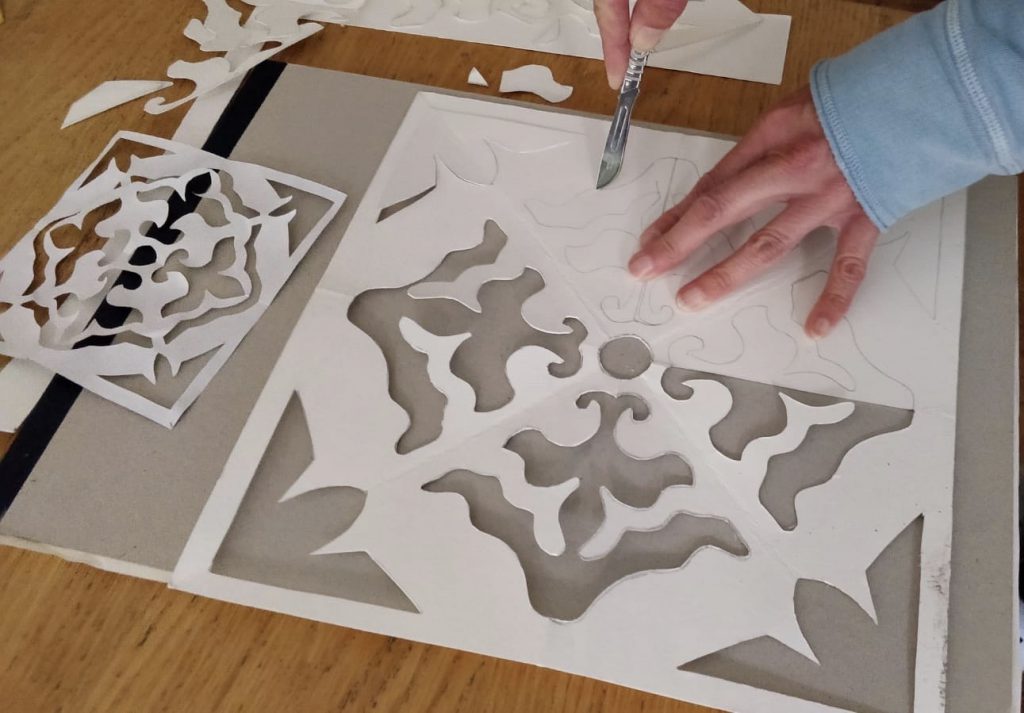
This can be quite scary so keeping up our manual dexterity skills will really help once we return to work. Paper Conservator Lisa has transferred her skills used for the historic object above to using her trusty scalpel to cut tile stencils whilst at home.
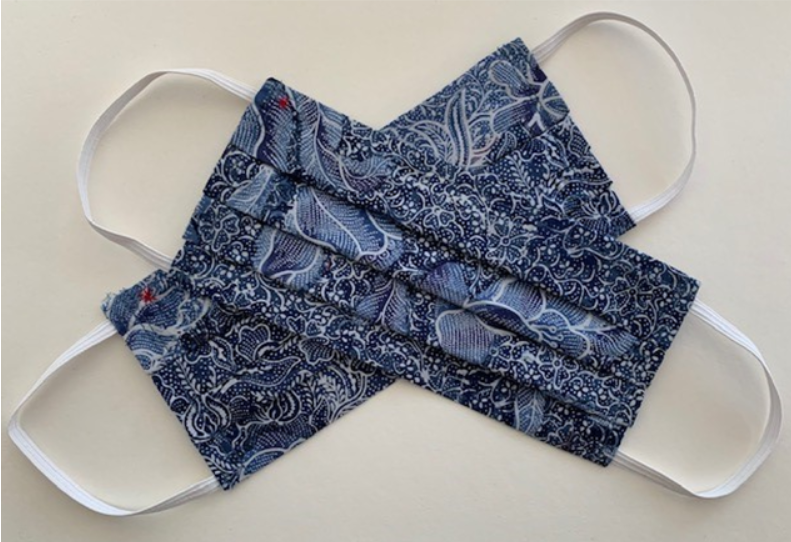
We hope to return as soon as possible to our jobs, preparing museum textiles and paper to go on display. In the meantime, as well as keeping our skills up, we are sticking to the guidelines for lockdown and making cotton masks for when we need to be out and about.
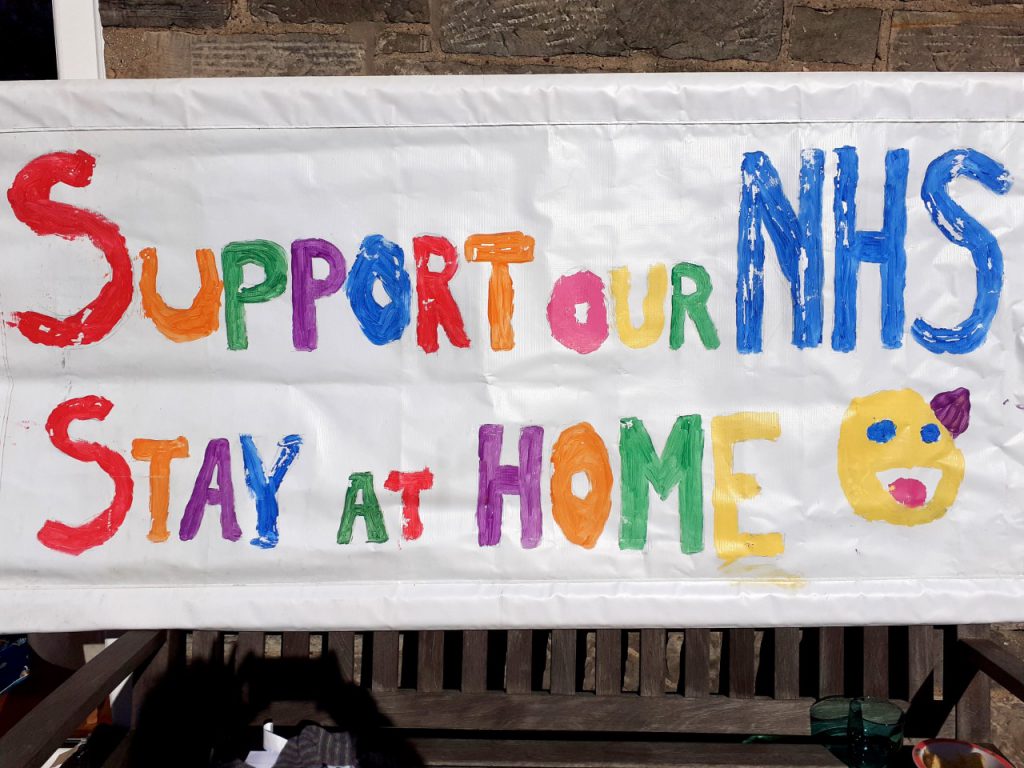
And Miriam and her family have been getting creative to support our marvellous NHS workers, having made the heart at the top of this blog and this terrific banner. We wish you all well, and hope you are staying safe.