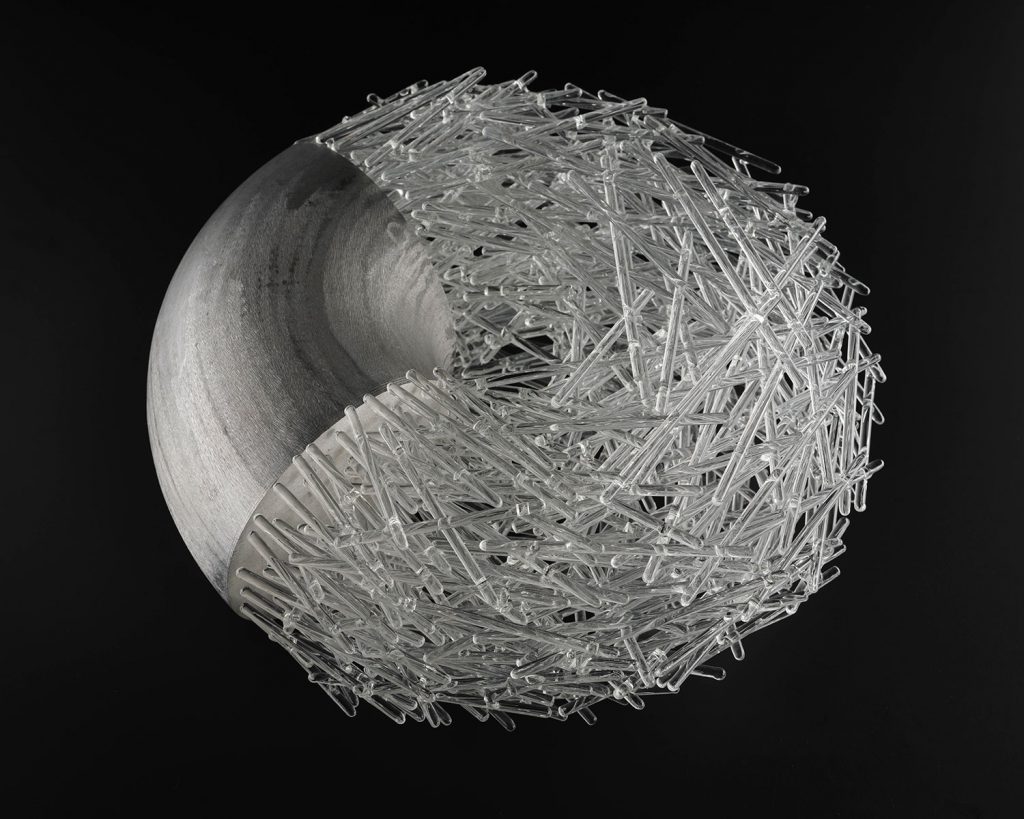
As part of the Dan Klein conservation project, I worked on the sculpture Living as Two made by Lesley Wildman in London in 2000. This stunning piece of art belongs to the Dan Klein & Alan J. Poole Private Collection of Modern Glass, which was donated to National Museums Scotland in 2009.
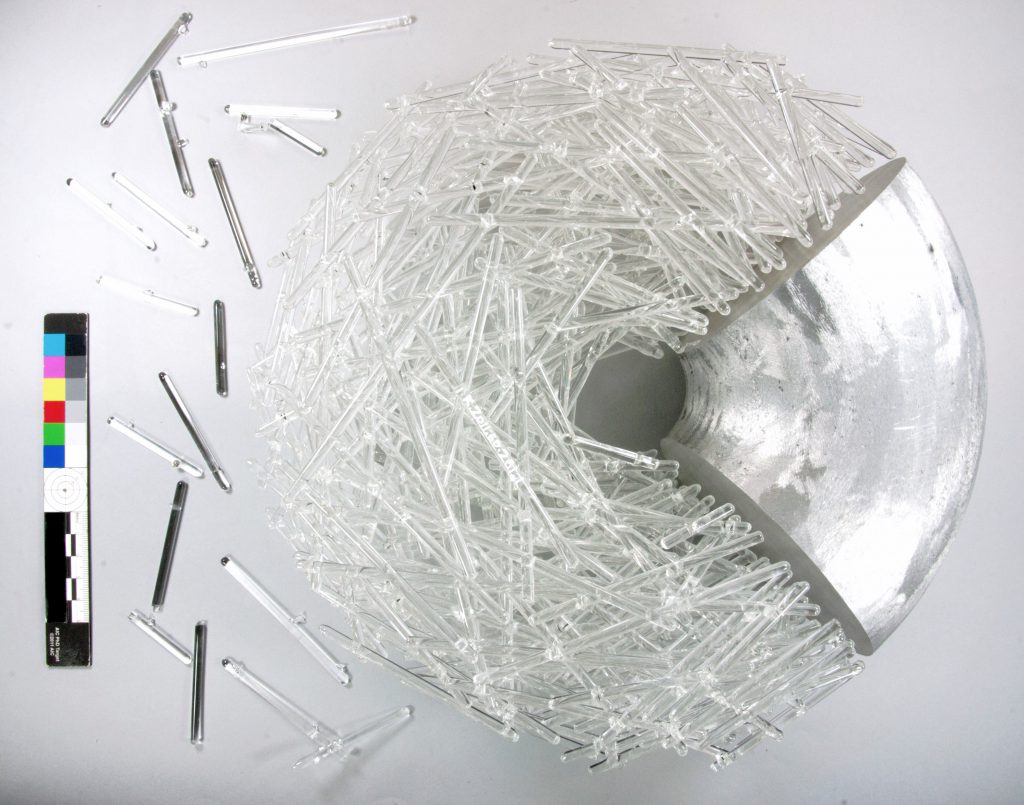
The object is formed in the shape of a ring and consists of two parts, a quarter segment, made of solid aluminium, and a three-quarter segment consisting of delicate clear glass rods with a diameter of only 4mm. The glass rods are lampworked and stacked on top of one another to form a 12 cm high and 26 cm wide object. As you can see from the image, these tiny fragile rods formed an impressive composition which somehow reminds me of a hurricane – the glass rods are floating and swirling around a calm centre. And the task of counting them all proved to be impossible!
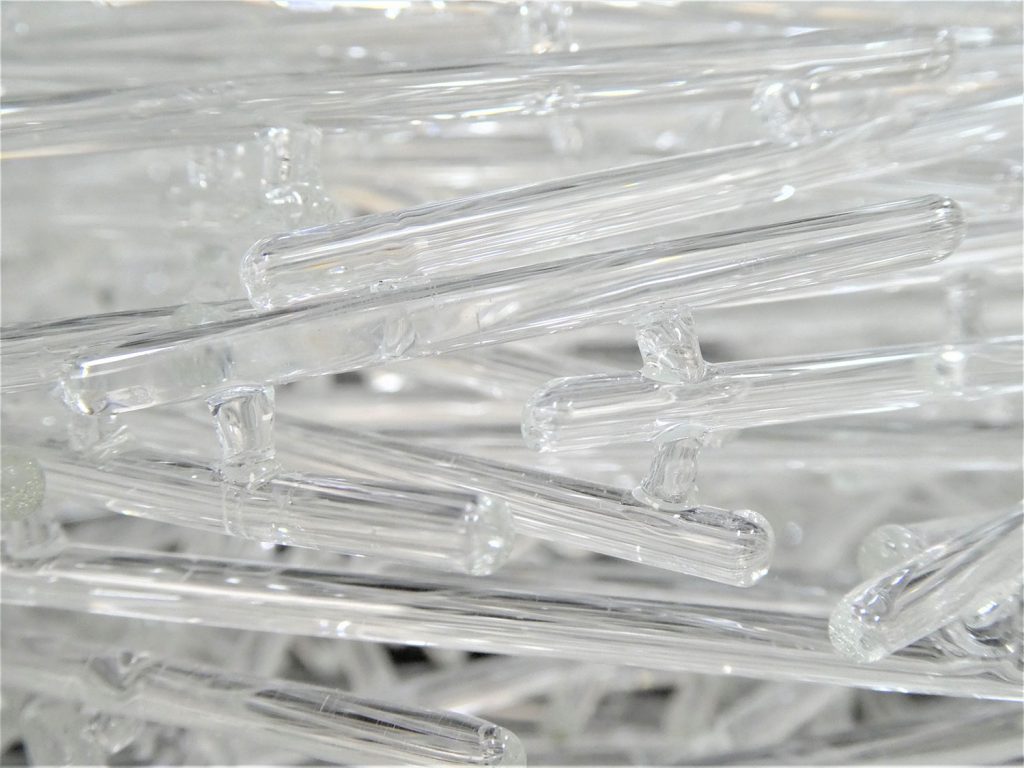
Severe damage had occurred to this sculpture in its past, with 18 of the fine glass rods broken off, mainly along the edges of the ring.
The first stage of the treatment was to identify all the broken edges and match them with the detached rods. This sounds easier than it was. The translucent and reflective quality of the fine and clear glass made the small break edges hard to spot. To keep track of them, I used a permanent pen in green to mark these and labelled the detached rods with numbers in the same way. Painting with a permanent marker on an object does sound in the first instance contrary to what conservators would do – but don’t worry. The ink can be removed without a trace and without harm to the object with specific solvents.
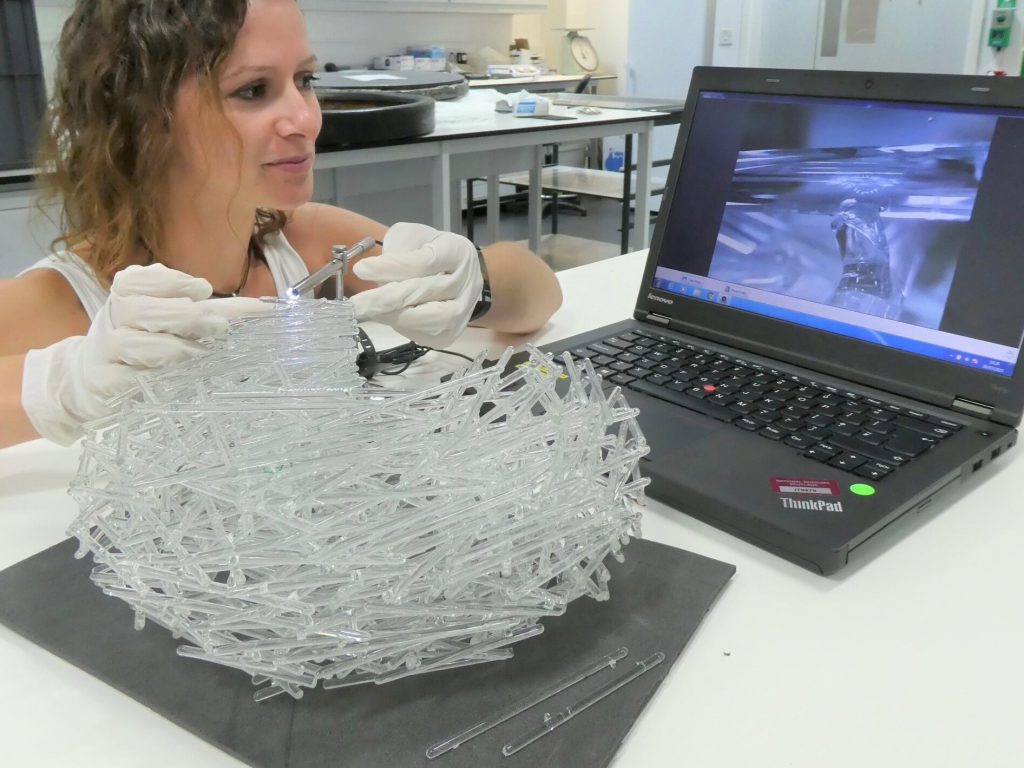
The next stage was to match the detached glass rods to the now identified break edges. This was the trickiest part in this project. Imagine a 3D puzzle where every piece looks the same and has nearly identical edges. The glass break edges are usually very smooth, sometimes with fine rings due to the amorphic characteristics of glass. In this case I had to identify small break edges 4 mm in diameter, which nearly all looked the same! You can imagine how hard it was to determine, for example, if glass rod number 7 was a match – or number 18. As it was tricky by eyesight alone, I needed digital support to have a closer look at the edges while I tried to locate each potential rod to its break edge. For this purpose, I required a microscope device which would be flexible enough to access the break edges along the sides and deep in between the network of rods.
I found all those properties in a small endoscope camera, which you can buy from the ‘online shopping jungle’. Connected to a screen it enabled me to look at the magnified break edges with ease.
Some areas were hardly accessible, even with my new super tool. I decided to mould and cast these inaccessible break edges using a silicone rubber and plaster. I used the replica casts of the break edges to try and see if I could match them with the original detached glass rods away from the object.


Both of those methods – the endoscope camera and the plaster cast trials – enabled me to allocate accurately nearly all the detached rods.
The next step was to re-adhere the rods back into place. As the break edges of a glass are very smooth, the joins that they form have a very tight fit. This required the adhesive to be introduced into the join using a capillary action. In this way, the adhesive would not bulk up the join, which is specifically important in one area, where six rods had detached. It was crucial to mend them as neatly as possible, so that the last rod would perfectly fit and match its break edges.
The infiltration of the join and the curing of the adhesive takes a full day. Meanwhile, the detached element needs to be held in place with another method. In glass conservation we use a specific type of wax for this purpose. A drop of this wax is melted at the tip of a hot spatula and placed across the join to form a “support stitch”, which prevents the join from moving while the adhesive is curing. The entire progress was monitored with the endoscope camera to ensure the join was perfectly aligned, as the glass elements tend to slip away on the smooth breakages.

Due to its suitable properties and similarity to the glass refractive index, epoxy resin HXTAL is a preferred adhesive to use within glass conservation. It has been tested over many years and proved to achieve good results in the long term. A minimal amount of the resin is applied with the tip of a fine needle at the surface along the join. The adhesive has a very low viscosity, so it travels with ease inside the crack and fills out the entire join.
A slideshow captured with the endoscope camera gives a good idea about the process of adhering one of the rods back into place.
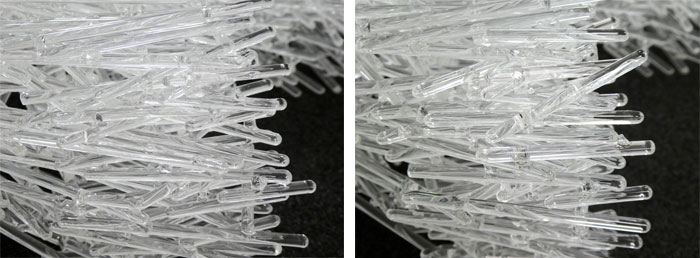
Here is one section of the sculpture shown before and after conservation. Can you spot the six reattached glass rods?
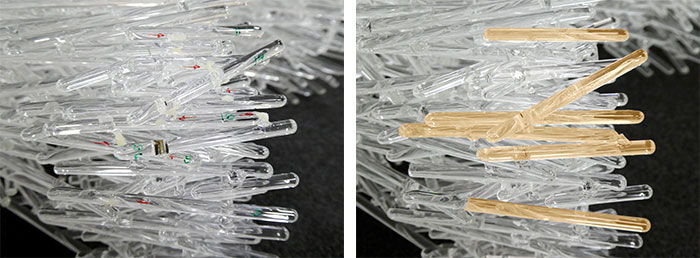
I will give you a hint with a photograph taken during conservation. The green and red marks as well as the droplets of wax stitching are visible, which helped me to keep track of repairs while the adhesive cured. In the next image the reattached rods are highlighted to make it a bit clearer.
Thirteen of the glass rods were successfully reattached, however the joins and repairs are still very fragile. Handling and movement could cause further damage to the object. To prevent this, I made sure to document all the areas of repair and any other vulnerable parts of the object, which were then highlighted in a guideline for its safe handling, packing and transport in the future.
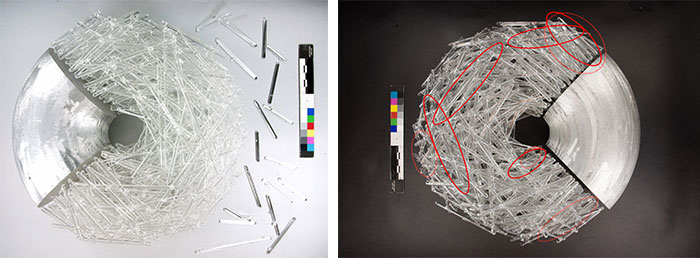
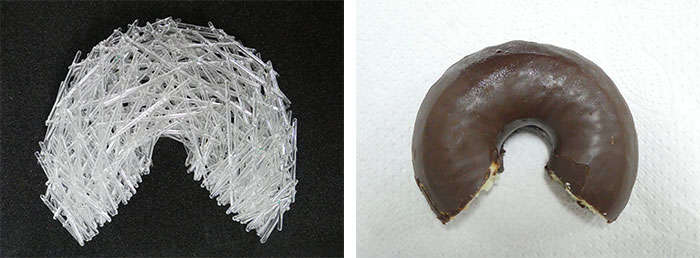
Working on this sculpture provided me with a new challenge in glass conservation. And though frustratingly I could not find a perfect match for every rod, I still love 3D puzzles and got fond of this piece of art. Even after completing it, there are some things that keep reminding me of it in my daily life, or maybe that’s just my craving for chocolate donuts!
