
Part 3 of a series documenting the conservation of silver artefacts for Scotland’s Early Silver exhibition.
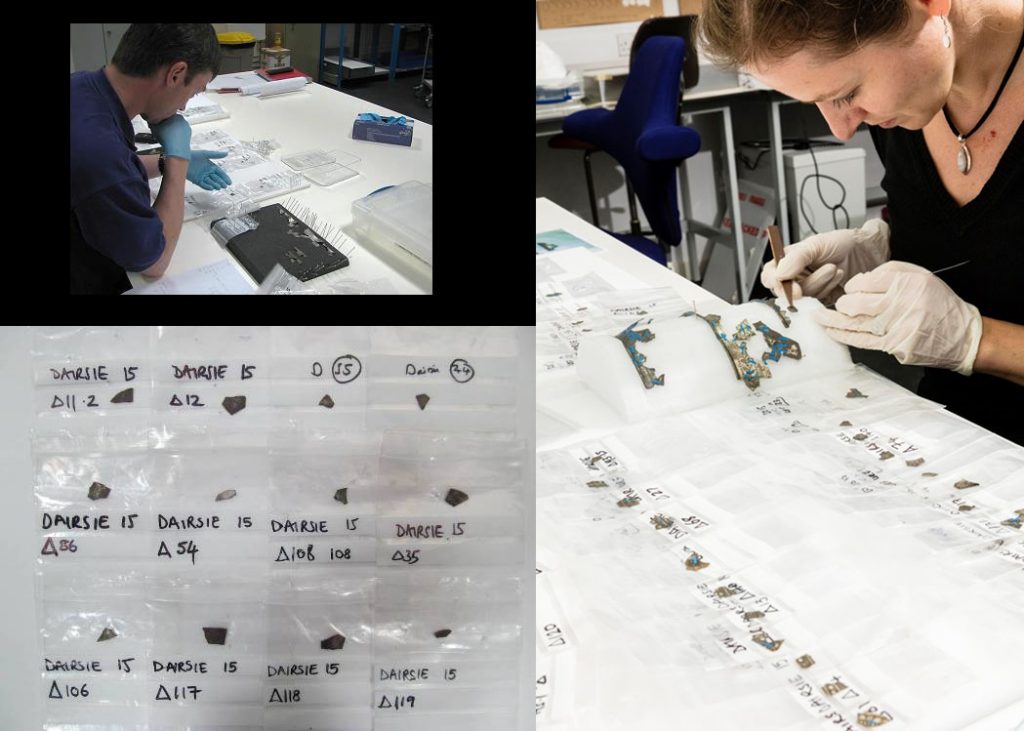
It doesn’t happen every day that conservators get to work on freshly excavated archaeological material, especially a treasure hoard. But our team was in luck this time! One of the several hoards we got to conserve for the Scotland’s Early Silver exhibition was found by a metal detectorist at Dairsie in Fife in 2015, hence its name. You can read more detailed information on the hoard discovery and its historical interpretation in this earlier blog post written by curator Fraser Hunter.
Our story begins from the moment this hoard arrived in the Artefact Conservation lab…
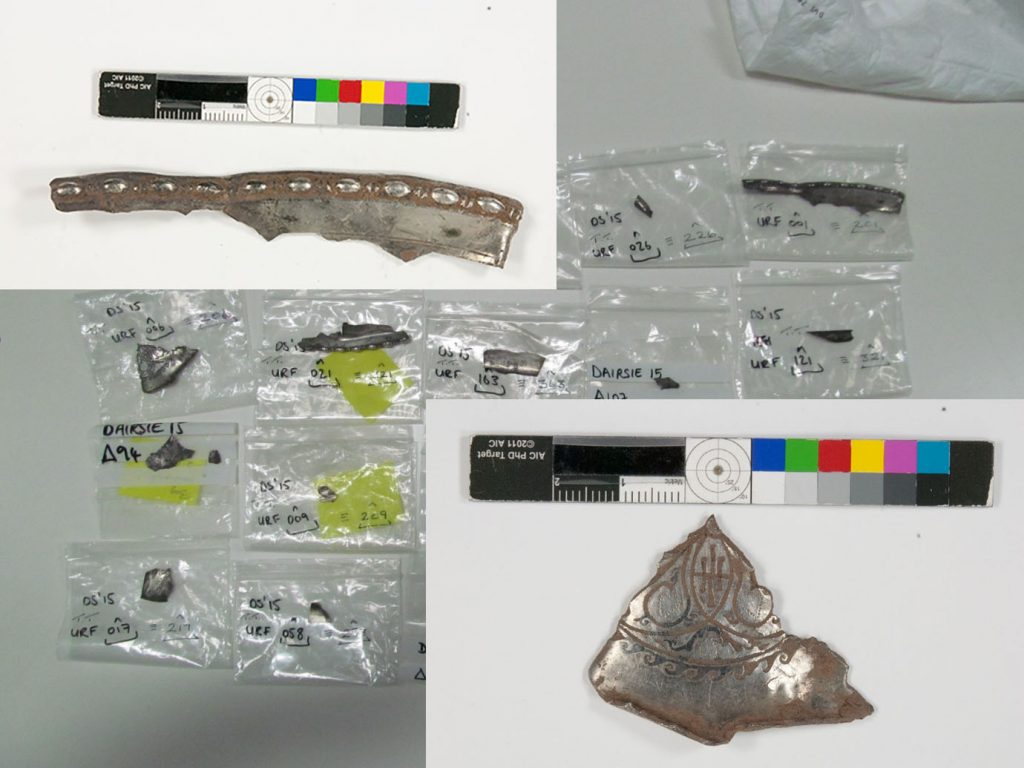
By this time our curators Alice Blackwell and Fraser Hunter had already had a head start in sorting the finds – a total of 400 fragments – identifying different vessel groups and trying to make sense of it, a long and difficult process requiring a lot of patience and concentration.
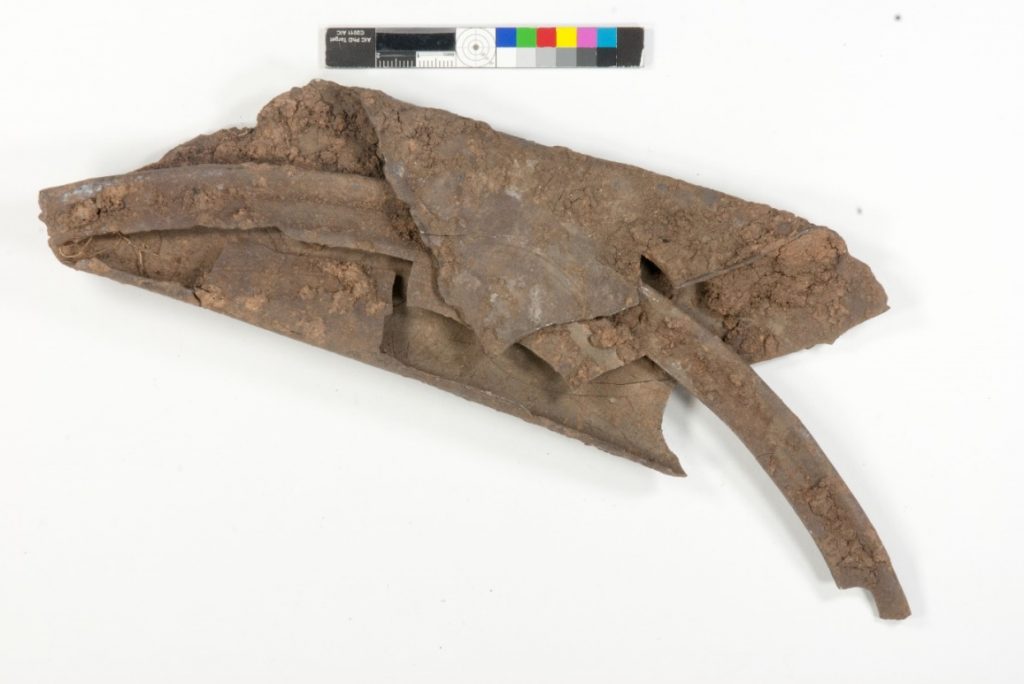
All the fragments arrived in the lab with their surfaces heavily obscured by burial deposits, soil and tarnish, which made it hard to identify any surface detail or further damage, apart from the obvious.
Before starting any actual conservation work, we had to examine the objects for anything invisible to the naked eye. This could be damage such as internal cracks and breaks, the surface condition under the layer of burial soil or loose fragments hidden between the folded metal parcels. We were also looking to find any potential hidden surface decoration. To do this we used x-radiology, examination under microscopes and spot tests.
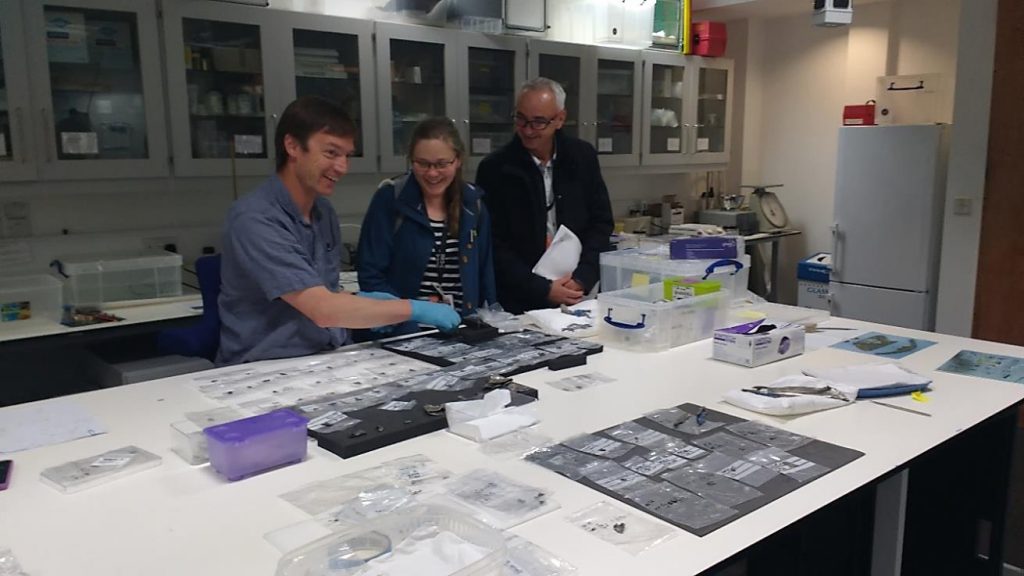
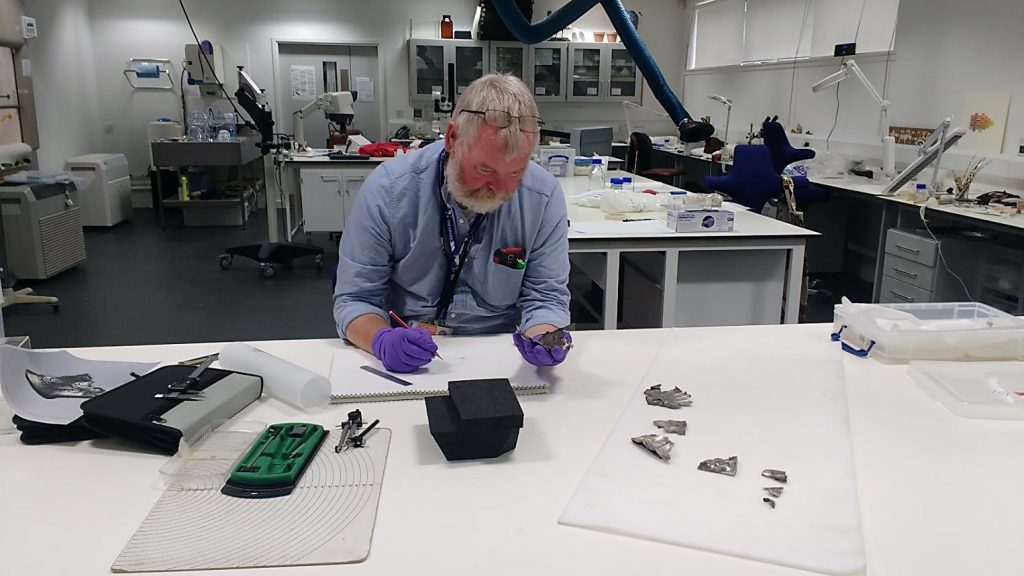
Once we had gathered all the information needed about the condition of the fragments, we were able to develop an appropriate strategy for the actual conservation. All conservation work was carried out in partnership with our curators, who guided us throughout the whole process to make sure the reconstruction was accurate in terms of the vessels’ shape and context.
Our work generally involved: mechanical and solvent cleaning of all fragments to remove the burial soil and reduce the tarnish; bonding to reconstruct the shape of each vessel as much as possible while preserving their original folded/hacked state; and, finally, the lacquering of all surfaces to preserve the objects from further degradation and external pollutants. Here I’ll look at the work we carried out on three different vessels: a bead-rimmed platter, a fluted basin and a repoussé-decorated bowl
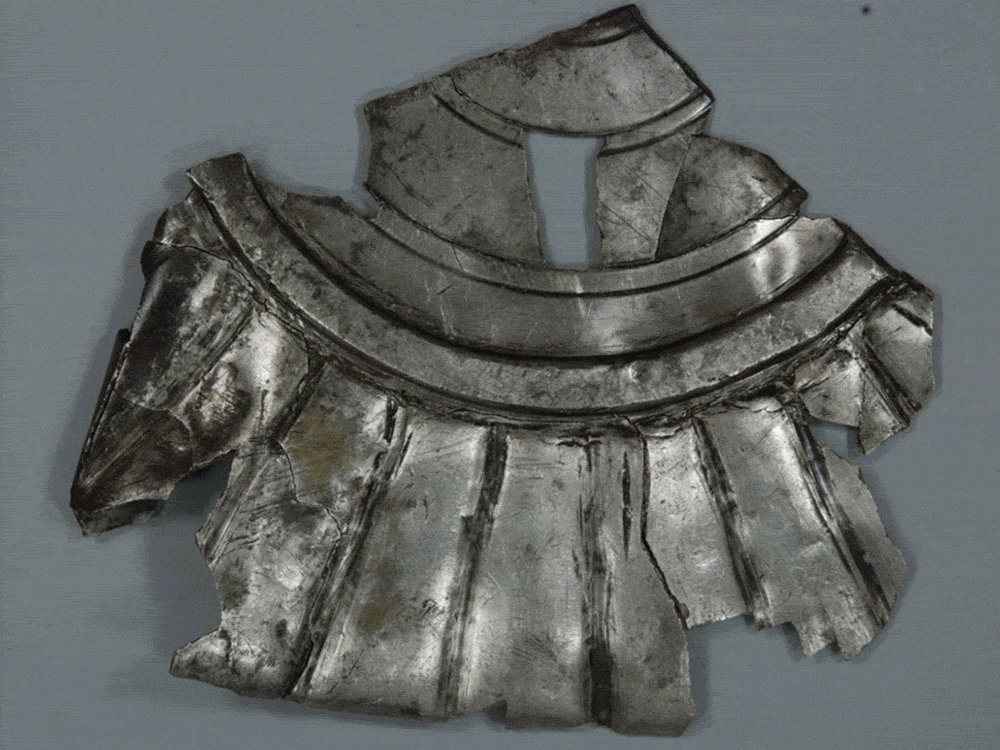
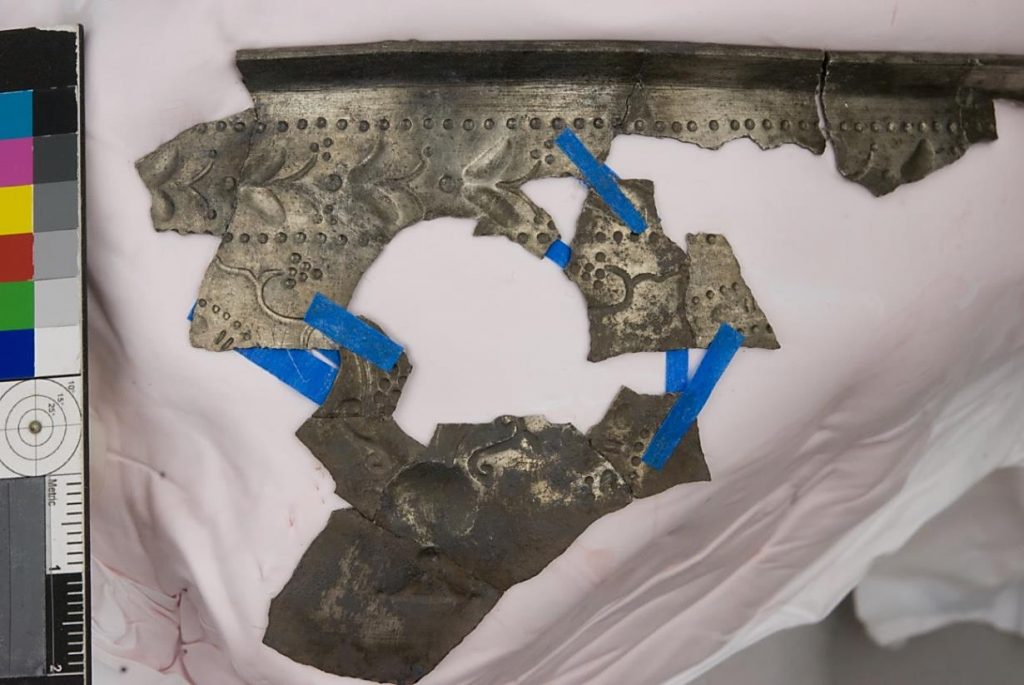
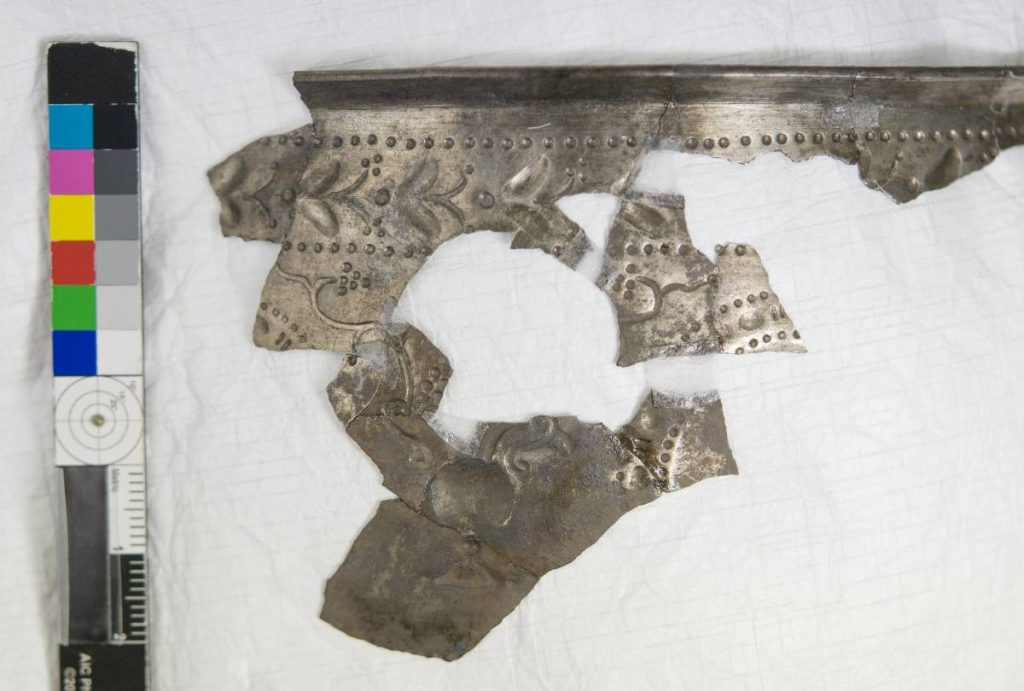
A bead-rimmed platter
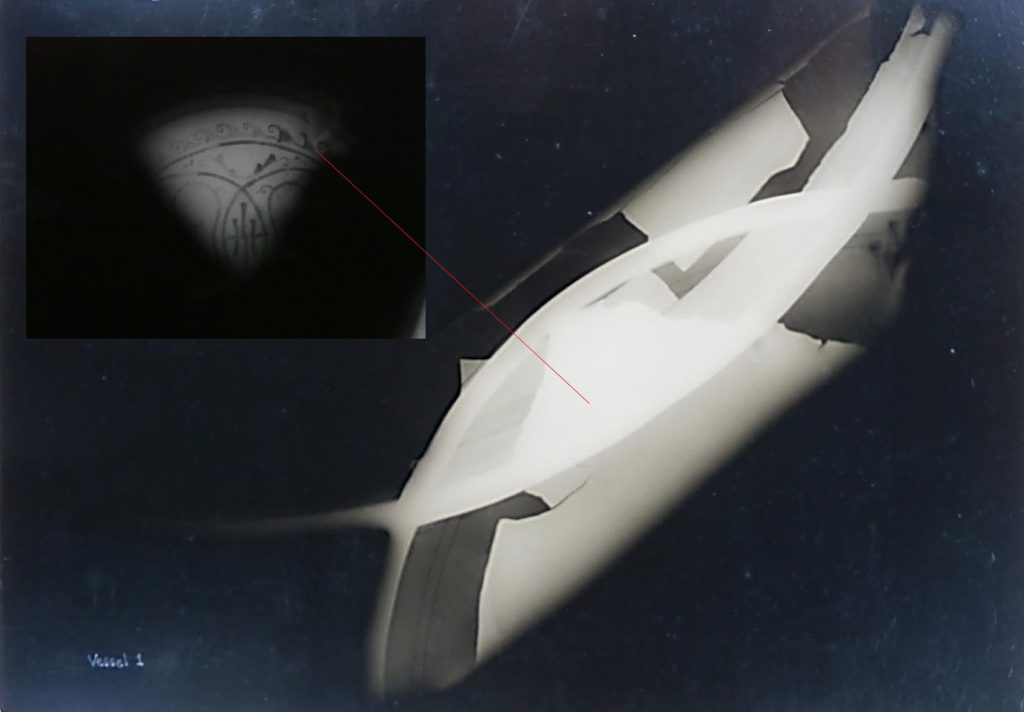
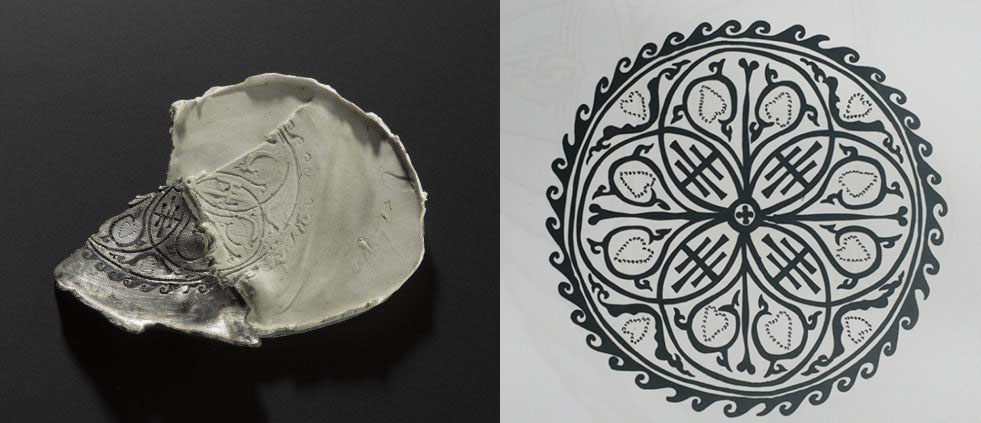
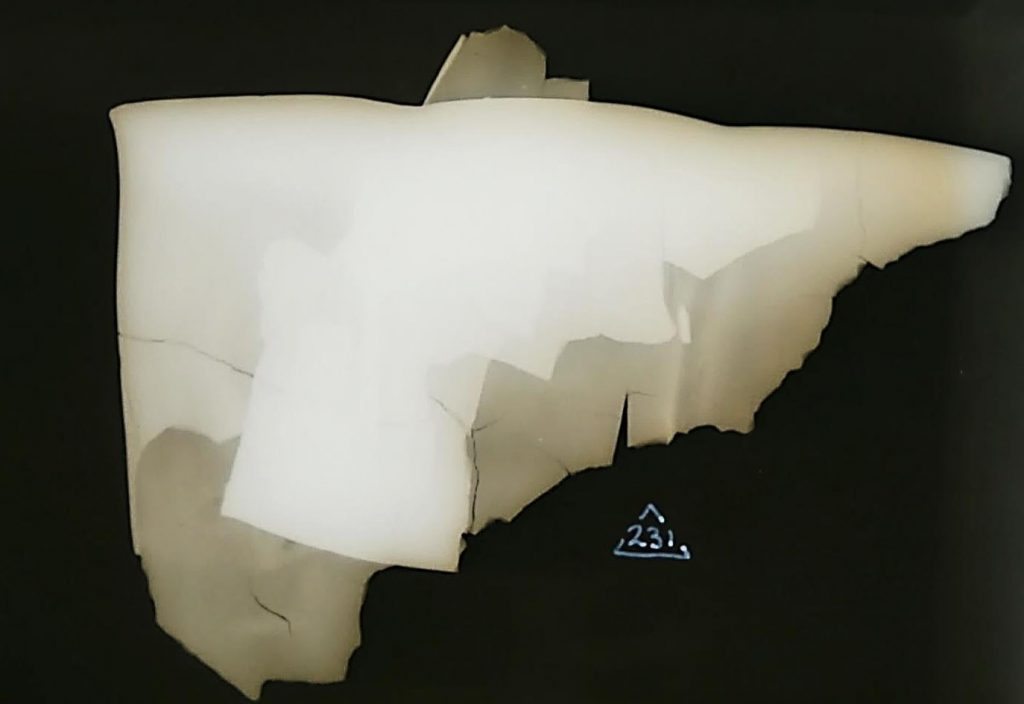
X-radiography was used to examine this vessel prior to conservation, to investigate structural stability. This revealed preserved niello decoration at the inaccessible folded central medallion of the vessel, which was also essential for further curatorial research and interpretation. The x-radiogram also showed the full extent of damage within the fold, which we couldn’t initially see.
It was not initially clear how much of the niello decoration was preserved under the layer of soil. The x-radiography confirmed for us that the lead inlay was still present, which helped with our treatment approach.

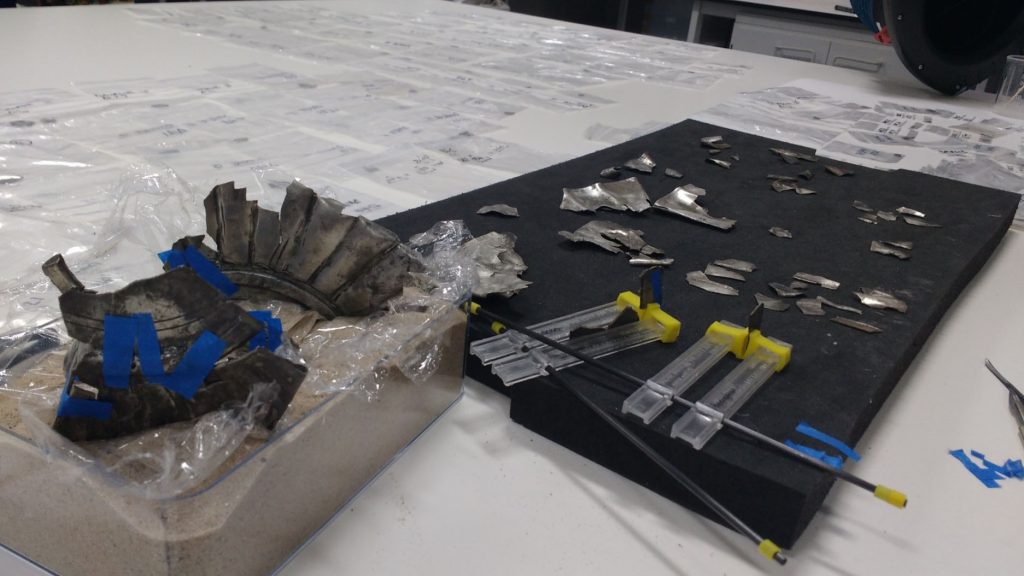
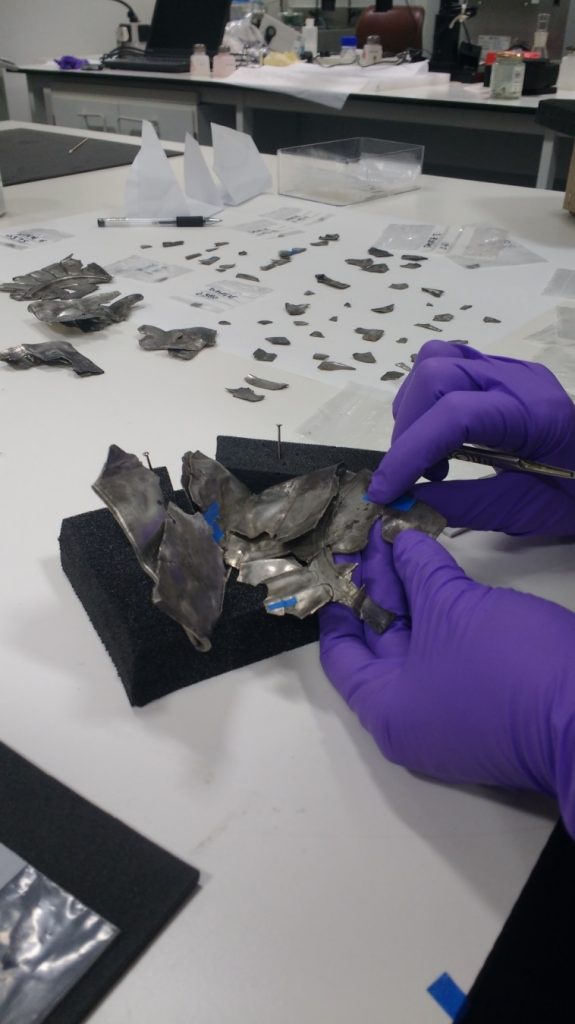
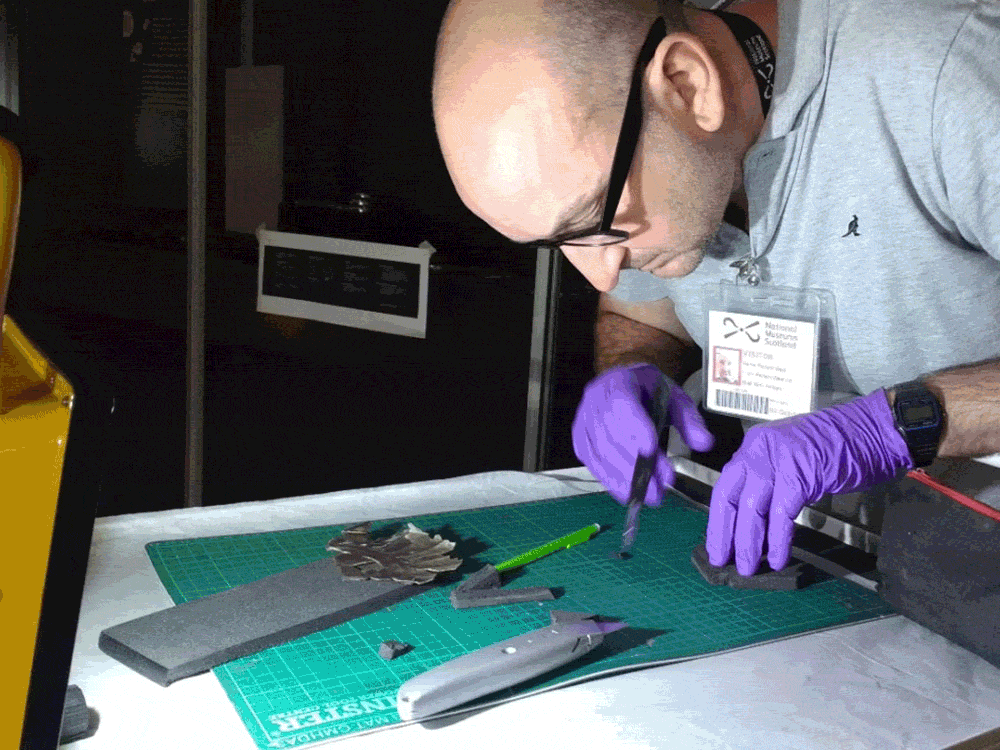
Often we use sand to support fragments in the process of bonding. Instead of holding the joins together for hours and hours, we just leave gravity to do the job for us. And we used countless slithers of blue glass tape to hold the fragments in place while creating our jigsaw puzzles – the lab was covered in them. This tape is very useful as it sticks firmly but leaves no residue when you remove it. In some areas we had to create padded supports for the fragments to help hold them in place while building the jigsaw – you can see a white one in the slideshow above.
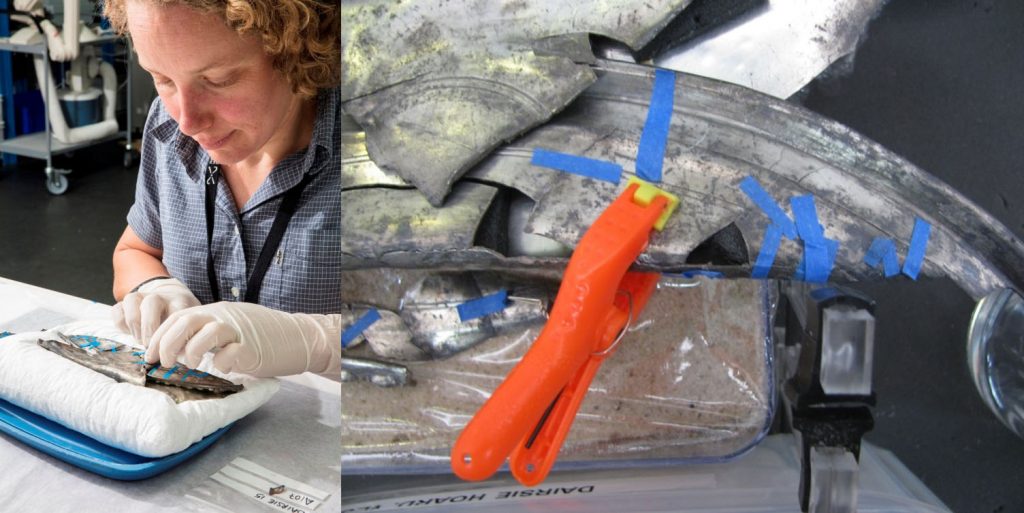
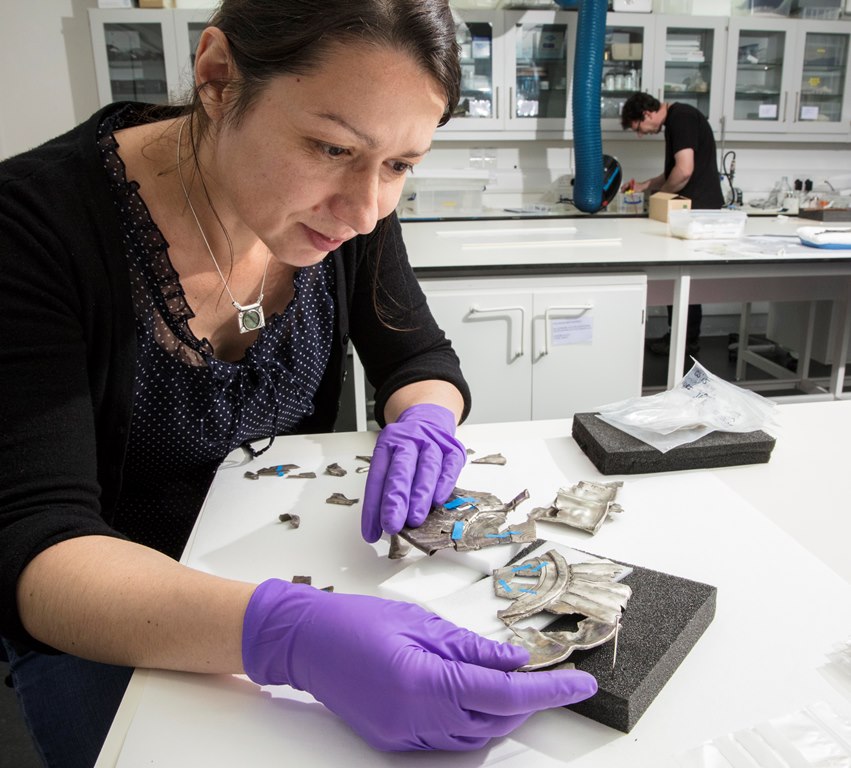
Once we had worked out the alignment of all the fragments we could start attaching them with adhesive. We used clamps in some areas to hold the fragments in position while the adhesive set. Any movement at this stage could mean the whole vessel would be misaligned!
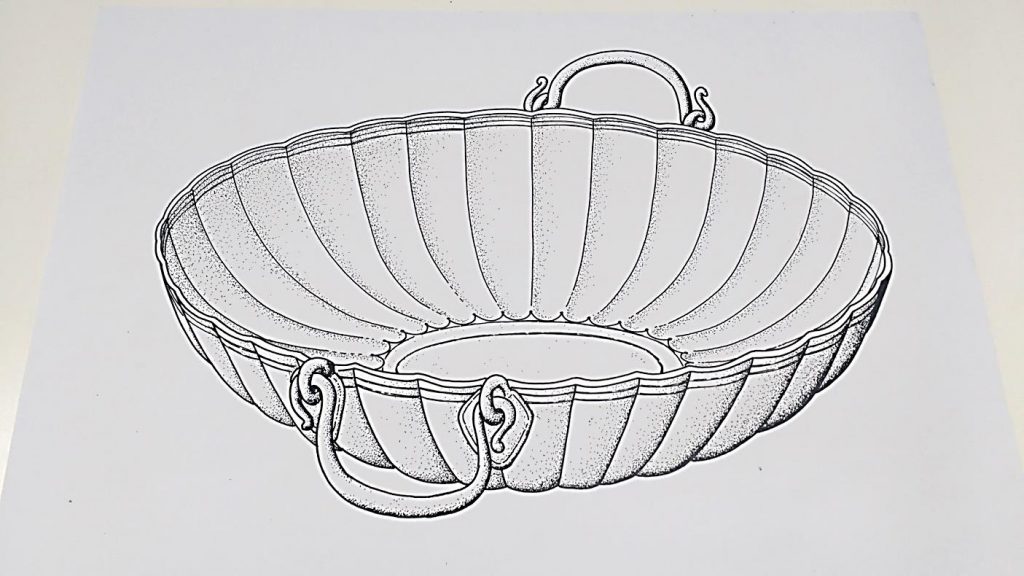
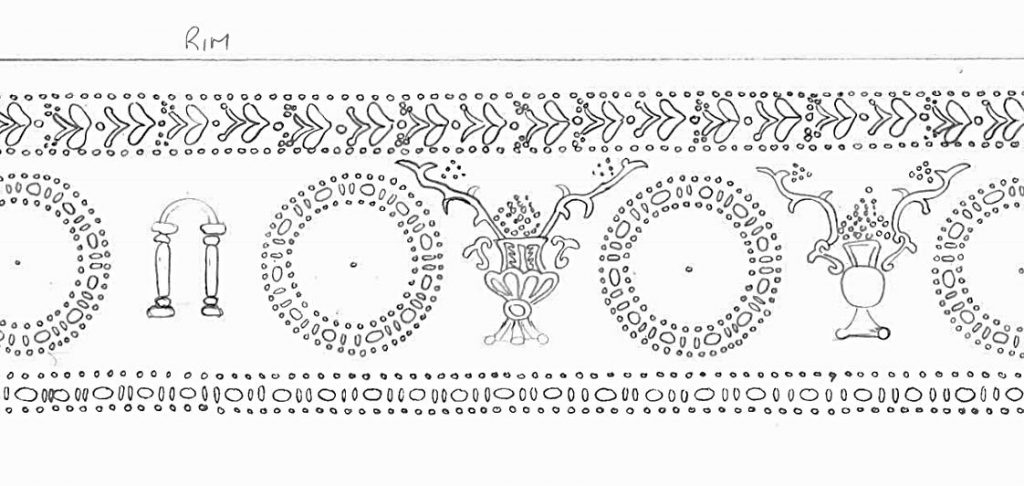
We decided to take an impression of the niello central medallion still remaining under the fold of the vessel, which after final bonding would be hidden from public view and inaccessible for further research. We used soft art putty to take the mould and made the cast from fine dental plaster. This not only gave us a visual record of the hidden decoration but also helped our archaeological illustrator and curators with more accurate interpretation, as you can see in the illustration below.
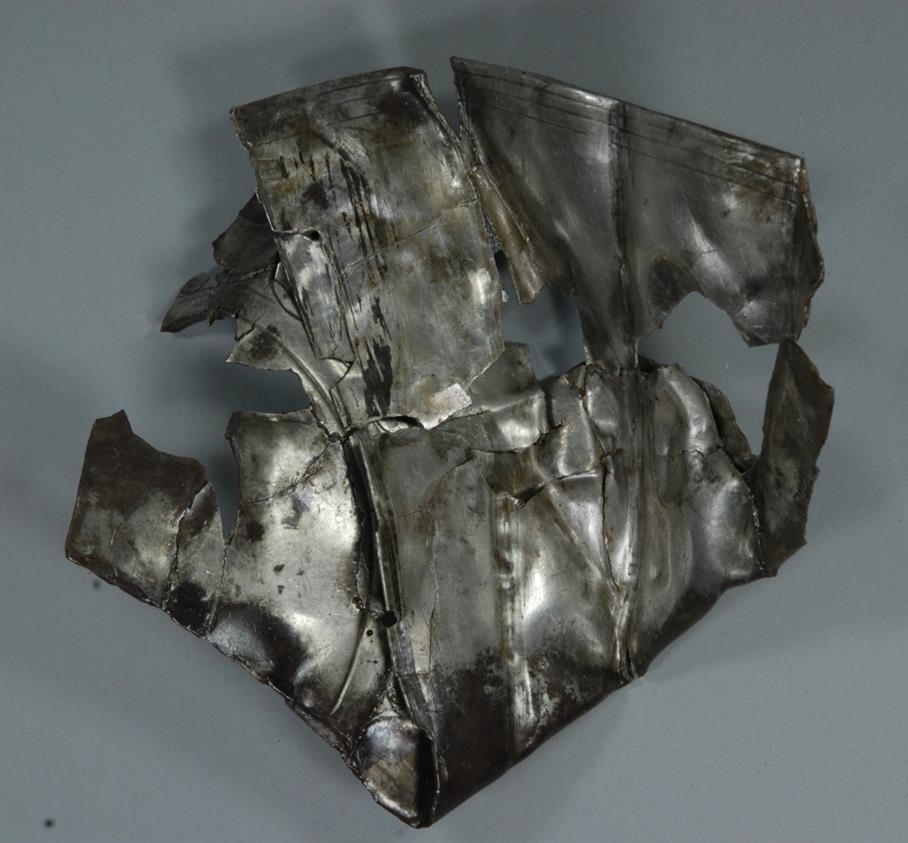
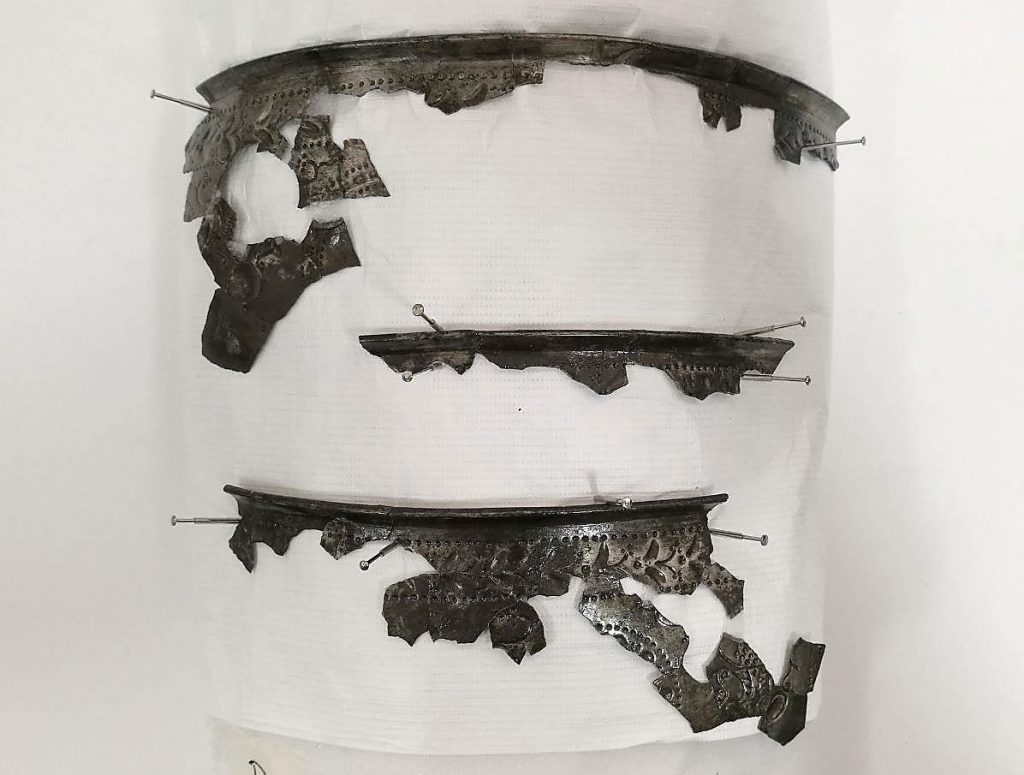
A fluted basin
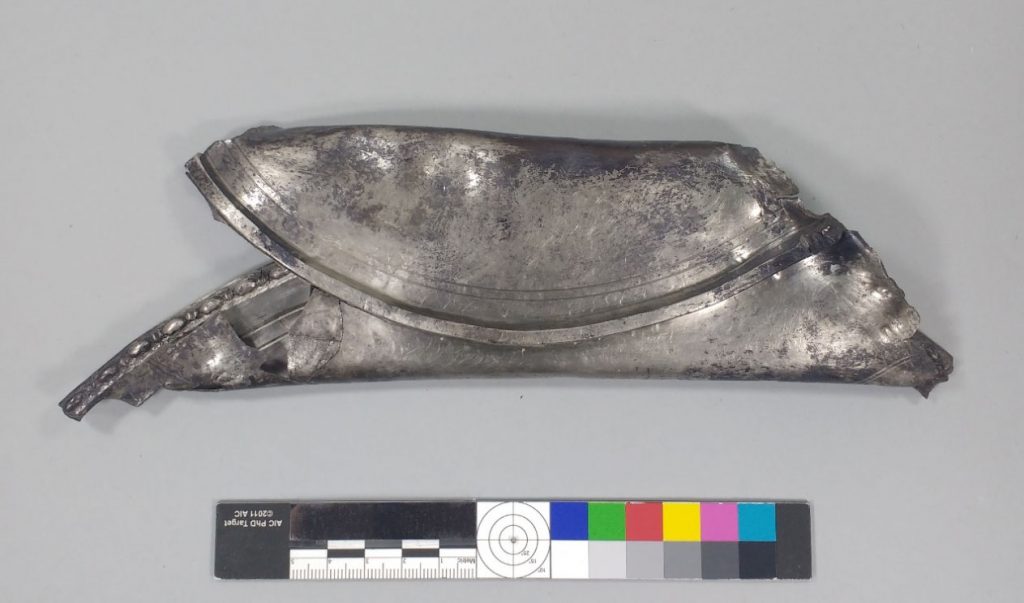
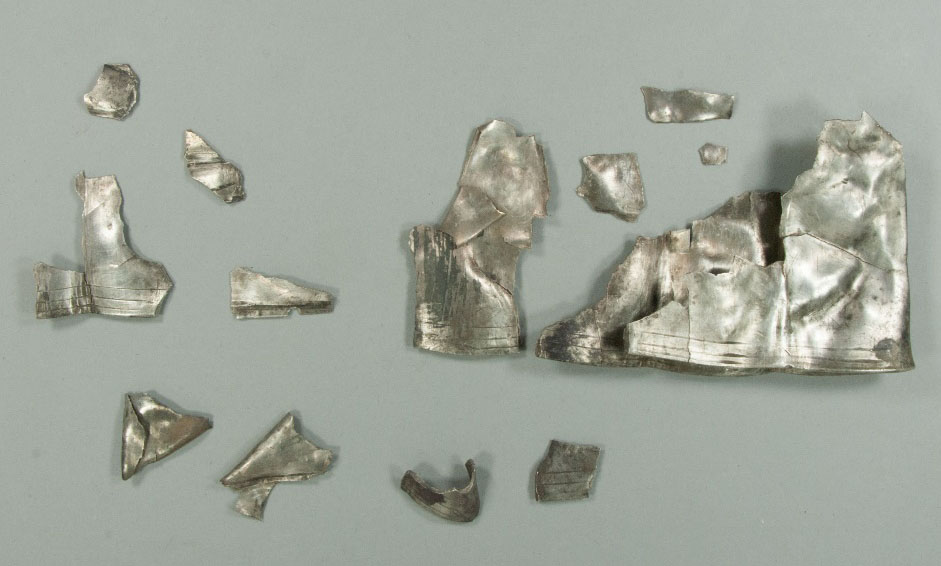
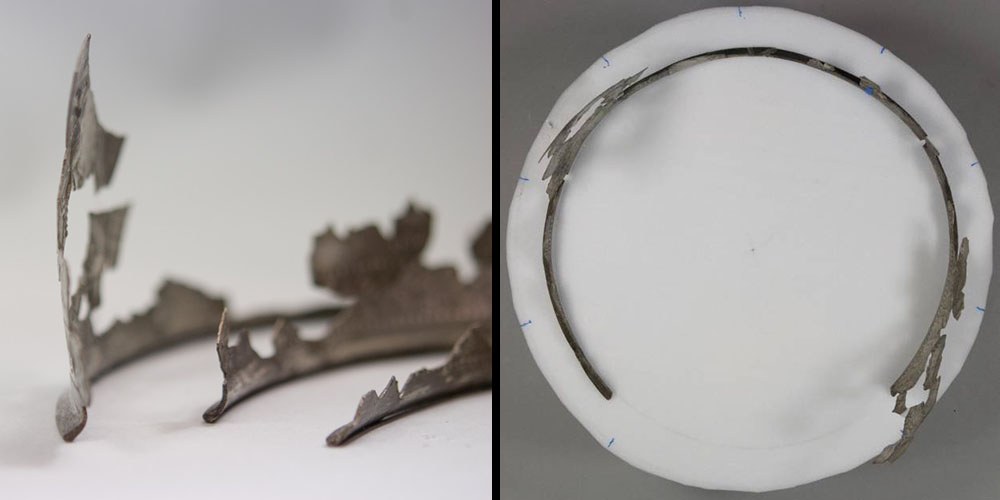
This vessel was one of the most puzzling ones as it had multiple folded parts. But how they connected didn’t make any sense to us initially. We had a total of 137 fragments to play with and no idea whether we have enough pieces to form a recognisable vessel…
As all the folded parts were full of soil, we once again had to x-ray them to look for any internal damage and hidden loose fragments.
The initial reconstruction process was slow. Every new join was opening more questions than giving answers. There was still a missing link between the main folded parts which could give us answers on the shape and size of the vessel… And most importantly we still didn’t have solid evidence to show the folding sequence, which was of great importance for the accurate contextual interpretation of this vessel.
Not willing to give up, even though there was not much time before the opening of Scotland’s Early Silver, we continued bonding and adding more pieces to the puzzle.
And Eureka! Finally, we found the missing link to the puzzle!
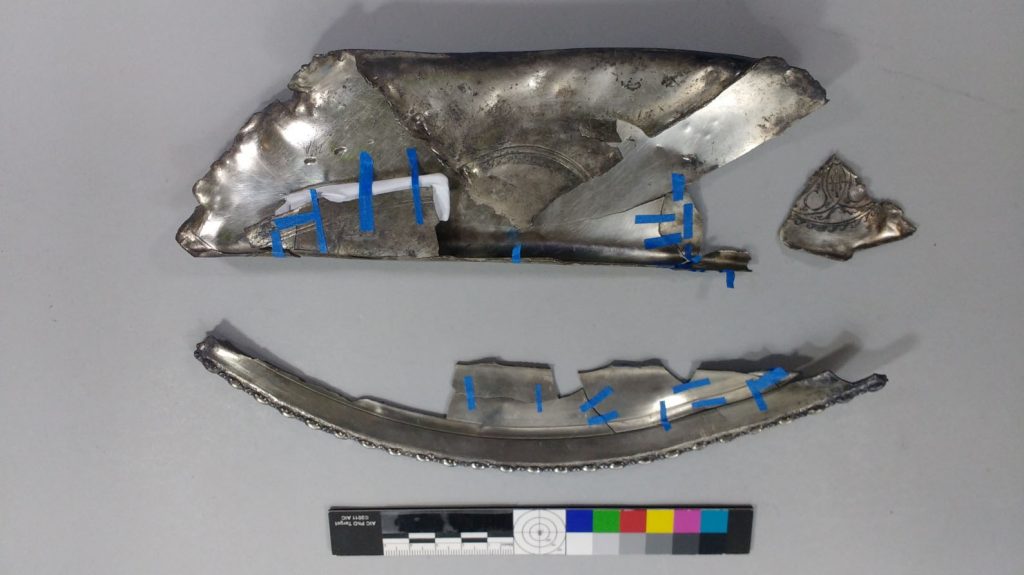
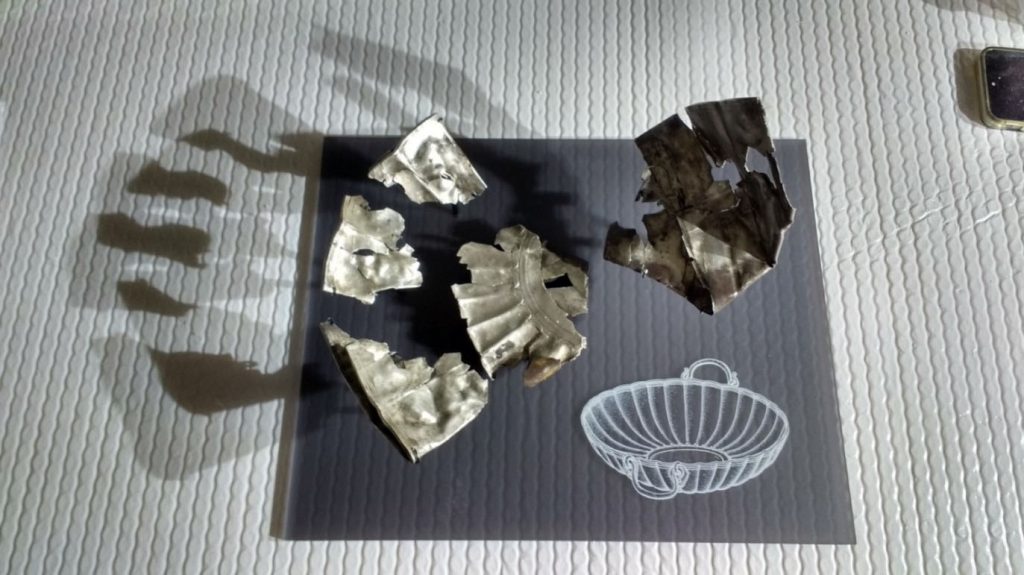
As you can see in the photo below, the reconstructed quarter part of the vessel gives us evidence of its full length from rim to base, as well as showing clearly the hacked edges and the folding sequence.
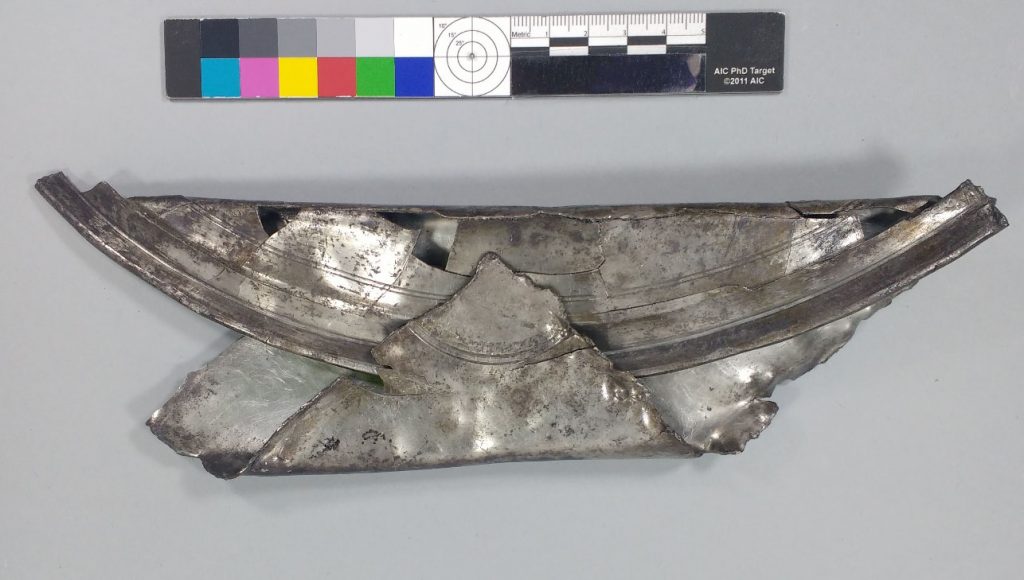
But the discoveries didn’t stop there! Very often in conservation we battle with the question: to clean or not to clean. Below is a clear example of how important it is to know when not to clean.
This particular vessel had very intriguing black tarnish marks, which we decided to preserve as they could help us find other matching fragments and new joins. And the expert eyes of our curators and the illustrator for this project saw in a spot of tarnish a pattern left by a handle!
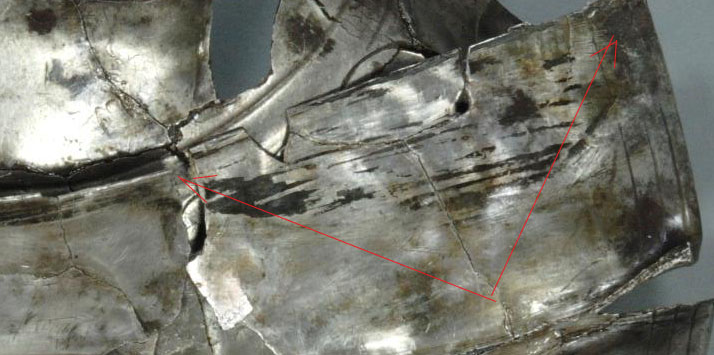
This was an amazing discovery, which added the final element to the interpretation of the object. We’ve compared similar tarnish marks to other fragments from this vessel and the conclusion was that our vessel had two opposite handles.
The limited time and missing fragments did not allow us to fully reconstruct this object. Although the conservation work was complete, the vessel was still in several parts. We had to make sure that the object was displayed so that exhibition visitors could recognise it as a vessel while looking at the multiple parts.
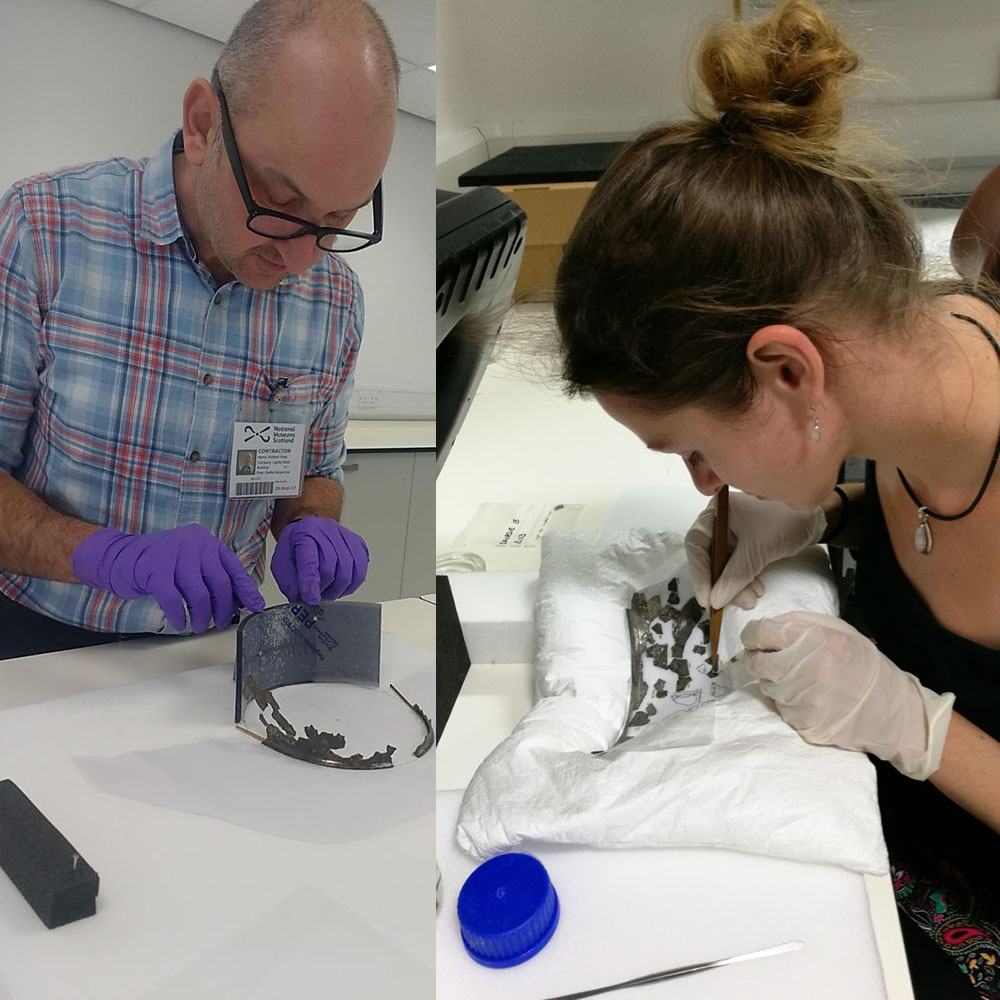
Here our mount maker Richard came to rescue! A special mount was created so that each individual piece was safely supported while on display.
Under the strict eye of the curator, the mounting options were tested several times until the correct angle, height and distance between the fragments were set with the required accuracy. Our Exhibition Officer Hannah Boddy made sure everything was taken care of to the very last detail. Last dust of object and mount and we’re ready to go!
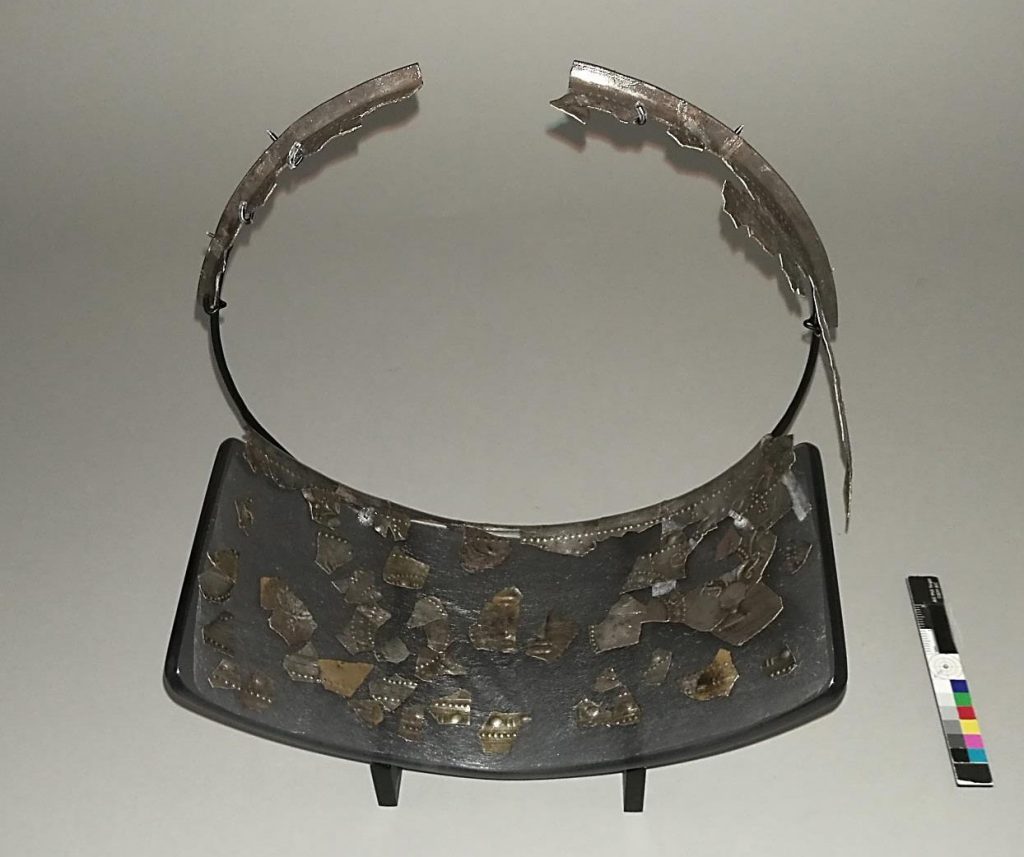
A repoussé-decorated bowl
And here we are with the third vessel from the Darsie hoard.
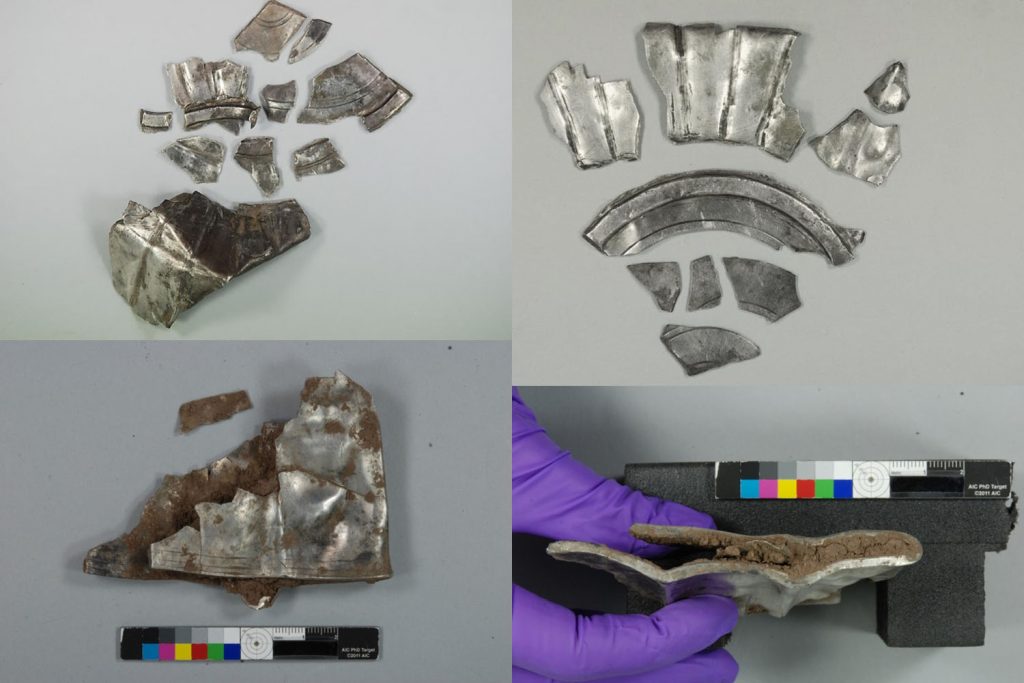
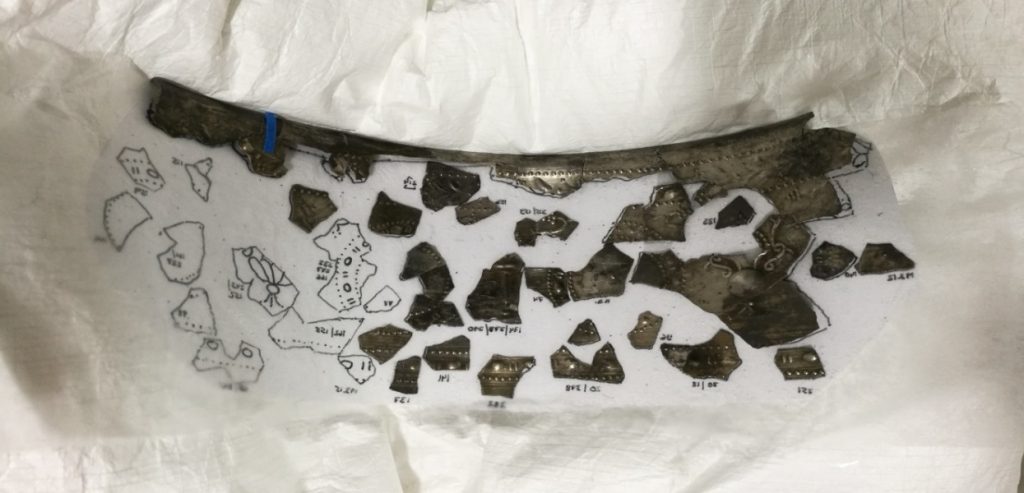
143 tiny fragments of silver from this vessel, each only 1mm thin, had been shattered by the plough and scattered across the field. The delicate, fragile nature of this vessel made our work even more challenging! How do you bond such thin pieces to be stable enough to withstand handling and mounting for display?
Working on this final vessel was a painstaking task, with curators and conservators working hand in hand to find matching fragments and celebrating every new join.
As the fragments are so thin, the joins needed additional reinforcement to prevent them from failing. As you can see in the photo, some joins were literary hanging by a thread. To secure those areas and give the construction of the vessel more strength, we used strips of Japanese tissue paper coated with acrylic resin then bonded across the joins. We used the same method to create support “bridges” between areas with missing links.
Due to missing fragments, the sequence of some of the decorative elements was unclear at first. Curator, conservator and illustrator put their heads together to figure out the diameter of the vessel and to identify the number of possible patterns (roundels and pillars) and their alignment. Advanced skills in mathematics and geometry were required, in addition to figuring out and reconstructing the final layout of the decorative pattern.
For the reconstruction of the decorative panel, we used fragments we couldn’t join. There were there still a lot of fragments missing from this bowl. We created this panel for display to give visitors a chance to see as much of the vessel as possible, and to have a glimpse of the beautiful original decoration, even though fragmented.
Once again curator, conservator and mount-maker worked closely together to create a wonderful mount to hold the three parts of the rim and give it the shape of a vessel again.
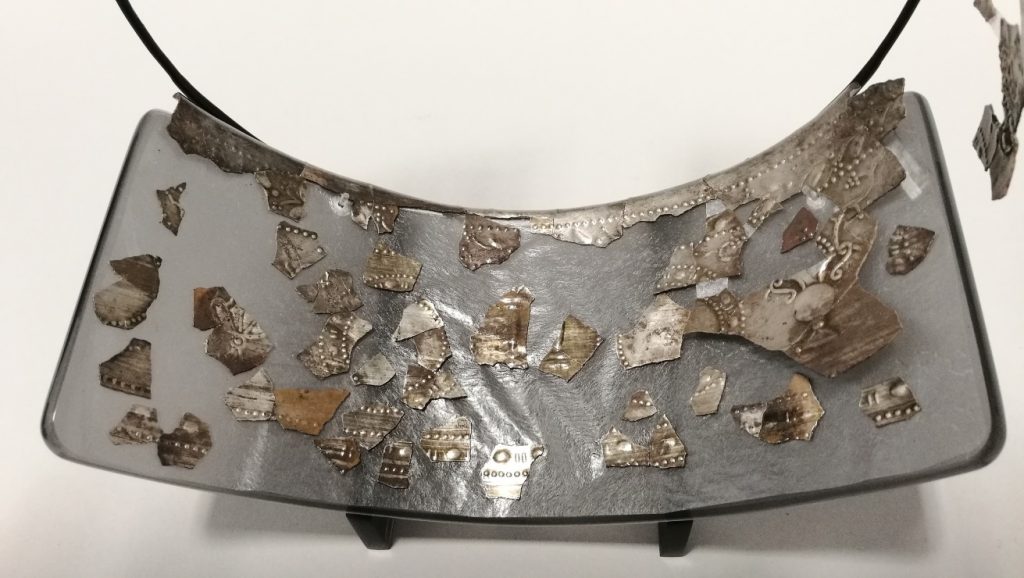
A cradle-like mount now holds the “reconstructed” decorative panel we’ve mentioned earlier. The fragments are bonded onto a sheet of Japanese tissue, which was then placed onto the cradle stand. This panel beautifully completes the vessel and gives us the unique opportunity to visualise how the vessel originally looked.

The Glenmorangie Research Project aims to extend our understanding of Scotland’s Early Medieval past and was established in 2008 following a partnership between National Museums Scotland and The Glenmorangie Company. The current phase of research, Scotland’s Earliest Silver: power, prestige and politics looks at the biography of this precious metal as it was used and reused in Early Medieval Scotland.
Scotland’s Early Silver exhibition is on at the National Museum of Scotland until 25 February 2018 and follows three years of research supported by The Glenmorangie Company.