
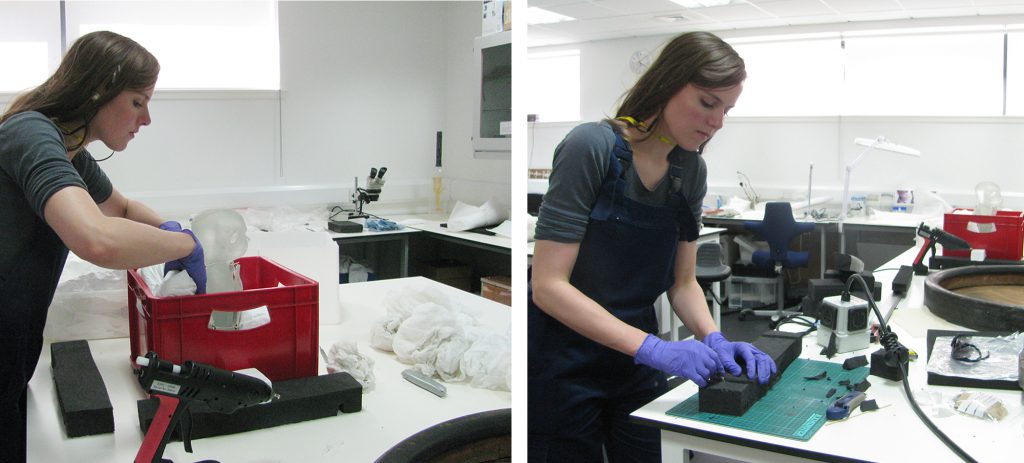
How do you mend broken glass? When it comes to conserving delicate works of art you need a range of techniques, a steady hand and a lot of patience! Former Artefact Conservation Intern Thea Christophersen reflects on the challenges of repairing five unique glass objects at National Museums Scotland.
For the best part of 2019, I was an Artefact Conservation Intern at the museum, alongside completing my MSC degree in conservation from UCL. The Artefacts section of the conservation department treat objects as diverse in their biographies, construction and materials as the collections represented at National Museums Scotland. Among the different objects I worked on were a group of remarkable contemporary glass artworks as part of the Dan Klein Glass Conservation Project. These included:
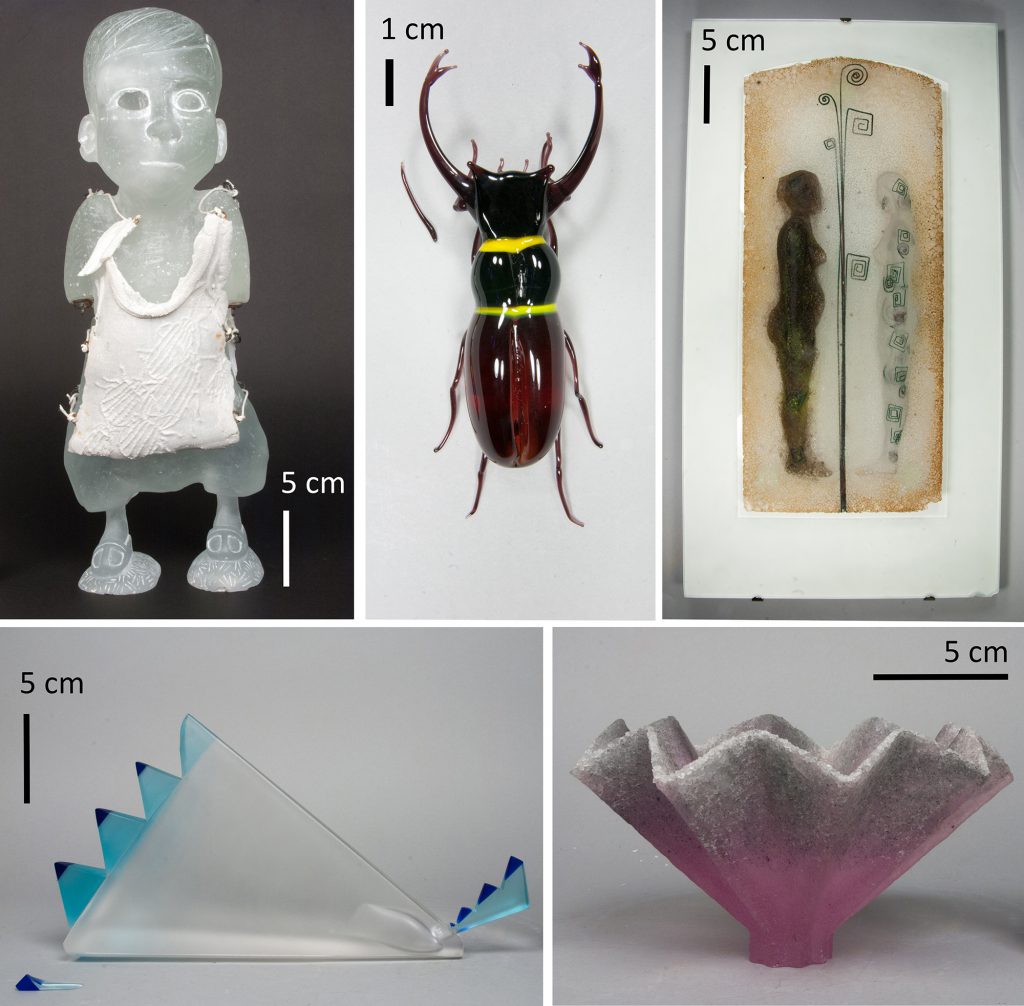
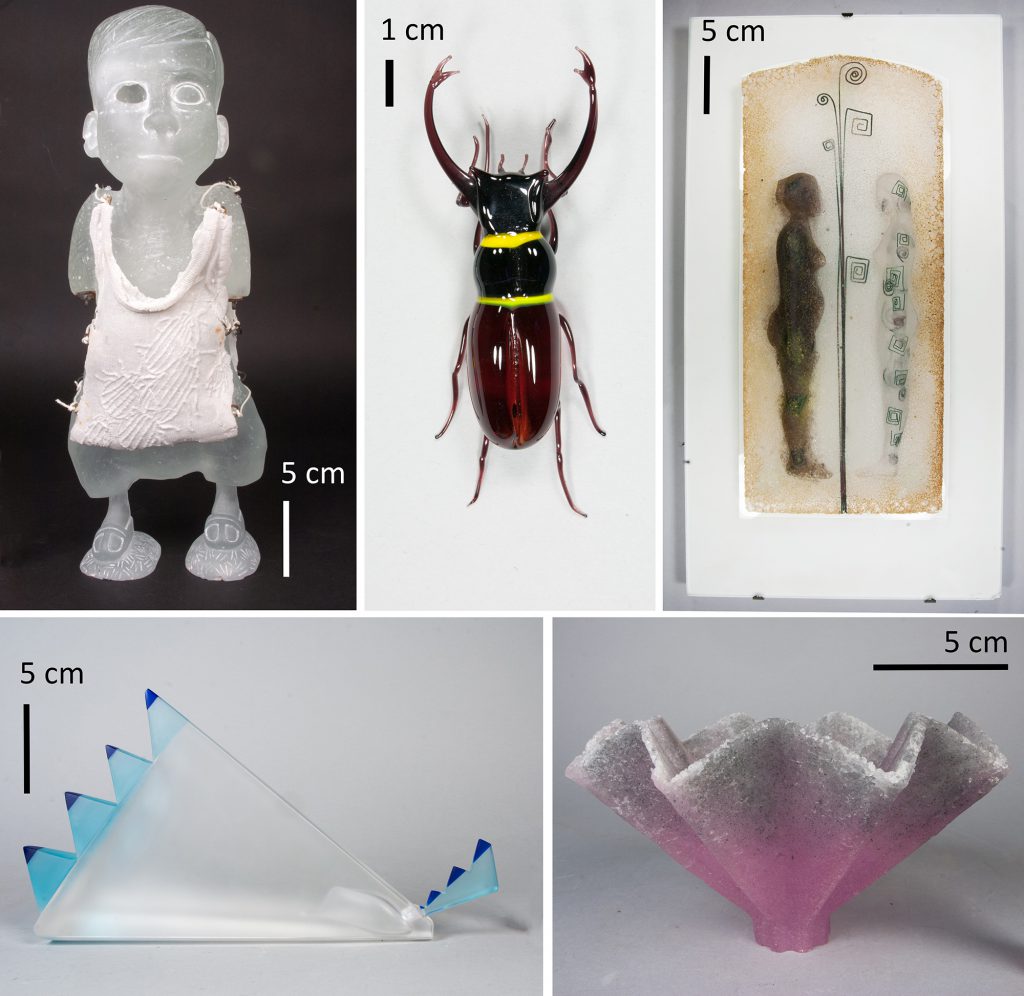
- Bug Boy, a cast glass and mixed media sculpture by Karen Akester (Object record K.201160.5)
- A lampworked stag beetle figure by David M. Beard (K.2011.60.13)
- Facing Up to Realities, a pâte de verre wall panel by George Jackson (K.2011.60.147)
- A David Taylor scent bottle (K.2011.60.250)
- And a pleated cast pâte de verre bowl by Tessa Clegg (K.2011.60.45)
Pâte de Verre
All the objects were either wholly or partially constructed from cast pâte de verre glass, with the exception of the scent bottle and beetle figure. Pâte de verre is a kiln casting method that involves applying small glass granules (frit) with a binder into a negative mould. After firing, the fused glass has a sugary texture with a distinct lustre and a highly brittle structure that is prone to breaking.
Bug Boy
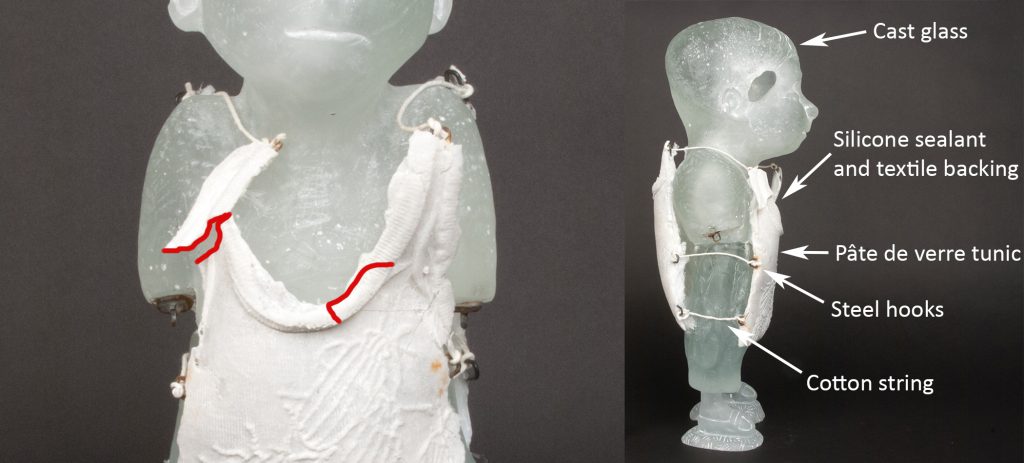
The fragility within the technique of pâte de verre was evident on the Karen Akester work, Bug Boy (K.201160.5), especially the damage sustained to the tunic. This had broken in two places on the front, forming two large fragments, one of which was held in place only by silicone sealant and a textile behind the proper right side of the tunic. This fragment was bonded with an acrylic adhesive and strips of skin tape were used to support the joins while the adhesive cured.
The second fragment on the front centre of the tunic was partially broken. However, an empty pocket behind the fragment caused movement, making it more susceptible to further breakage and potential complete detachment. To prevent this, the pocket was filled with a mix of acrylic adhesive and glass microballoons. These microballoons are hollow, making for a lightweight filler that adds structural support. They also have a bumpy glassy texture similar to pâte de verre, which was ideal for making a fill sympathetic to Bug Boy’s tunic.
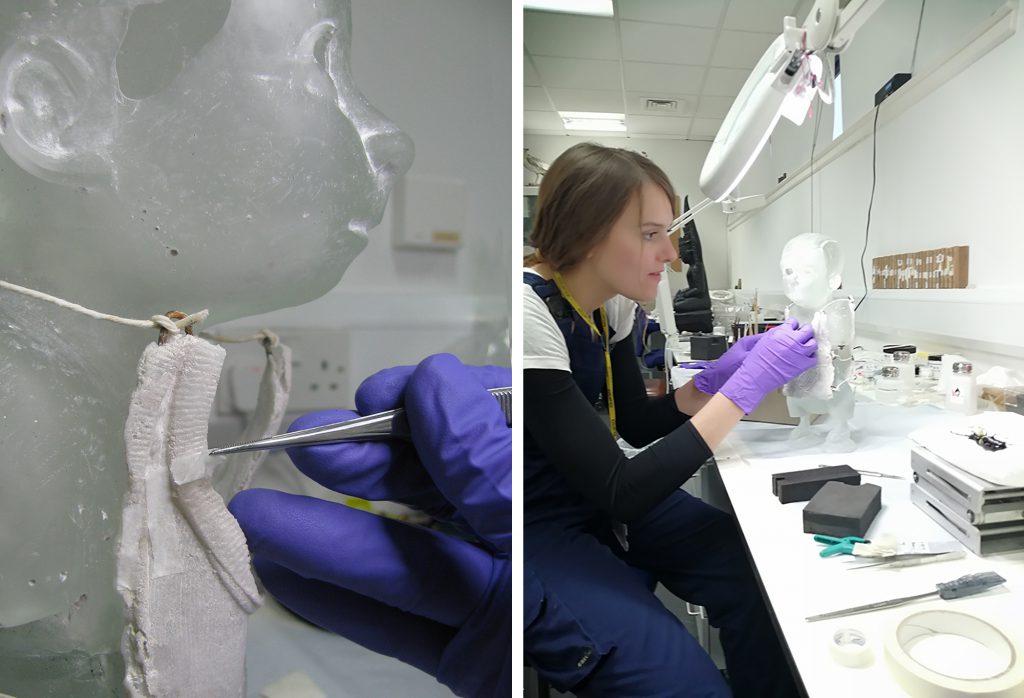
Even following conservation, Bug Boy’s tunic would be susceptible to damage from handling due the heavy weight of its cast glass body. The sculpture therefore received a new temporary packing in the form of a strong, rigid box. To prevent applying pressure to the fragile tunic, the box was made with rigid foam inserts that provided support only by direct contact with the cast glass body. I also provided instructions for the safe handling of the sculpture in the future, highlighting the areas of the cast glass in which it should be held by to avoid contact with the delicate tunic.

Facing Up to Realities
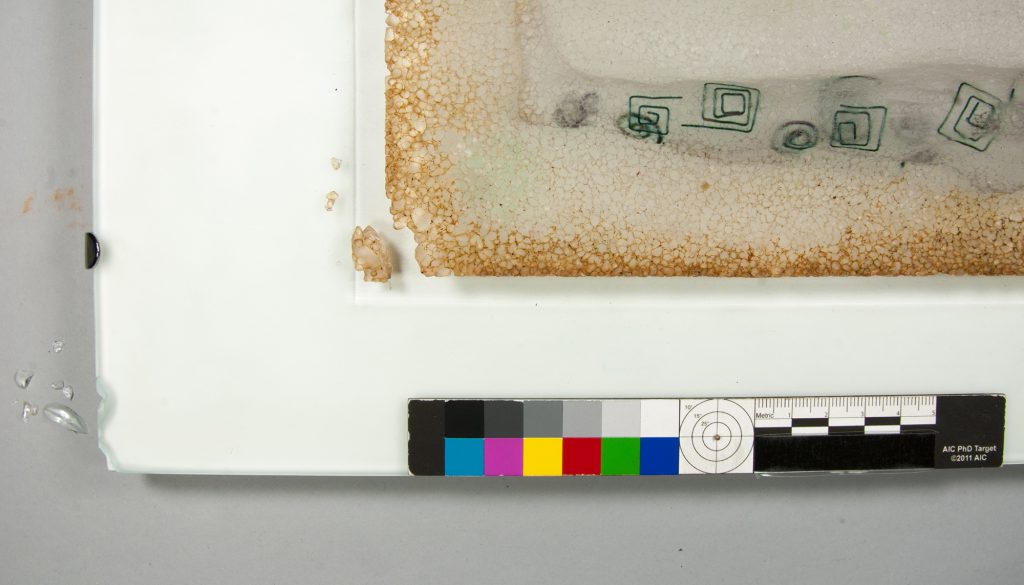
Next, I moved onto Facing Up to Realities by George Jackson. This is a wall panel made up of a floating pâte de verre plate that depicts figures separated by a stylised tree on a frosted glass back. The wall panel had suffered a physical impact at some point in the area of the bottom right hand corner, where part of the pâte de verre panel and its frosted glass mount had broken away into multiple fragments.
With both the pâte de verre and frosted glass elements, the many fragments had to be meticulously checked and fitted together on the object like a complex jigsaw puzzle. They could then be bonded back together with confidence in their original position. Owing to the more coarse and larger structure of the pâte de verre fragments, it was easier to reconstruct them on the wall panel. As with Bug Boy, the fragments were secured on the object with a re-treatable adhesive. Retreatability is always an important factor in conservation to ensure that any applied treatments can be removed in the future if they should no longer be valued as part of the object.
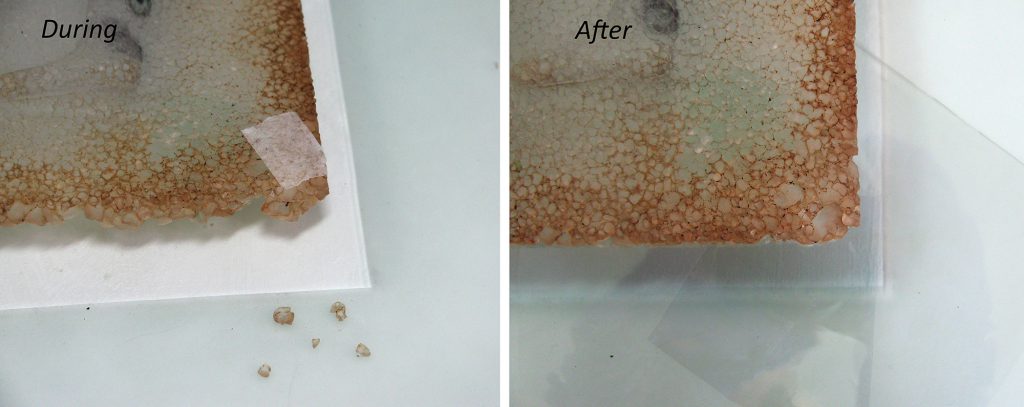
After applying the adhesive, the frosted glass fragments were secured to the wall panel’s mount with an epoxy resin. The resin has a refractive index that is close to glass – ideal for making seamless joins when bonding transparent and translucent glass fragments. It was also used to fill a gap in the mount to compensate for any lost fragments.
Pleated bowl
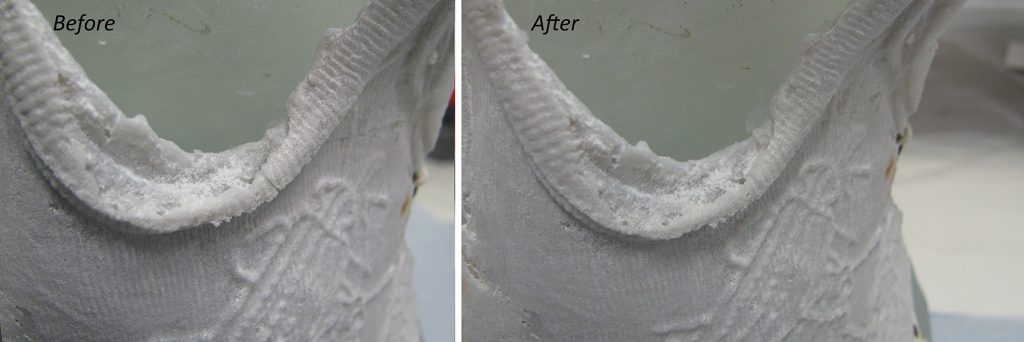
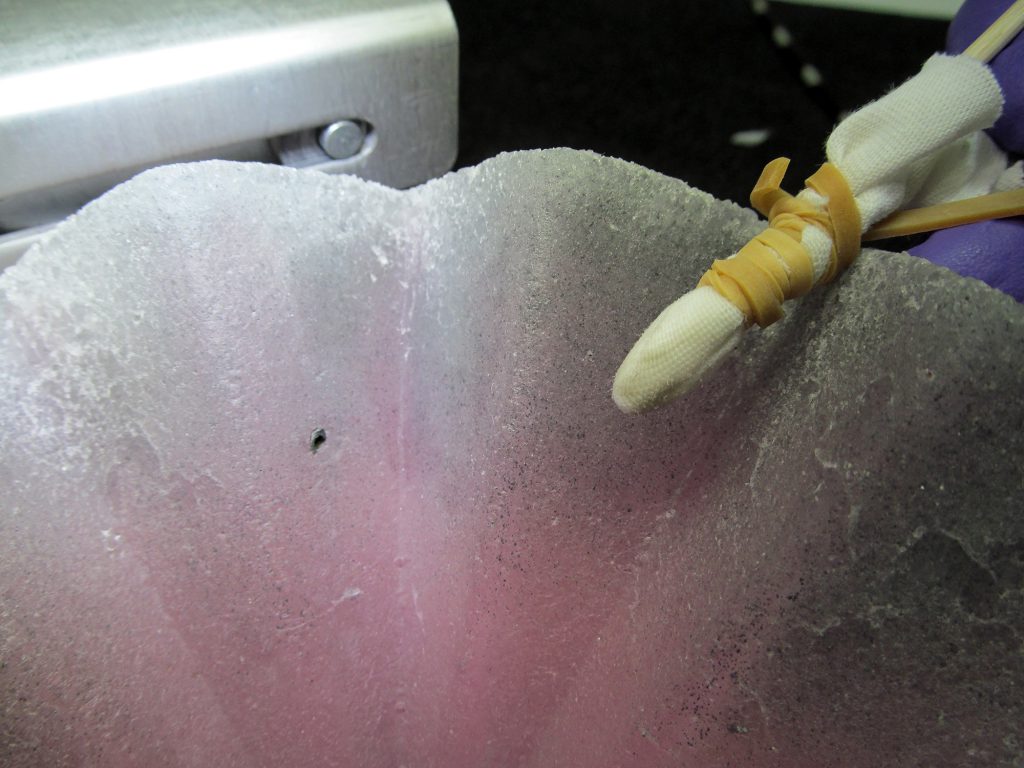
Luckily, Tessa Clegg’s pleated bowl had not suffered similar structural damage. However, the bowl had a light layer of dust on the surface which gave it an appearance of discolouration. Speaking to the curator, Sarah Rothwell about a possible solution, I proposed removing the build up by brushing and vacuuming, followed by swabbing with a 50:50 mix of alcohol and water. The cotton swab was layered with Jersey to prevent cotton fibers catching on the granules. The process may be time consuming, but the result was worth the effort, to see the pink and grey glass sparkle again!
Scent bottle
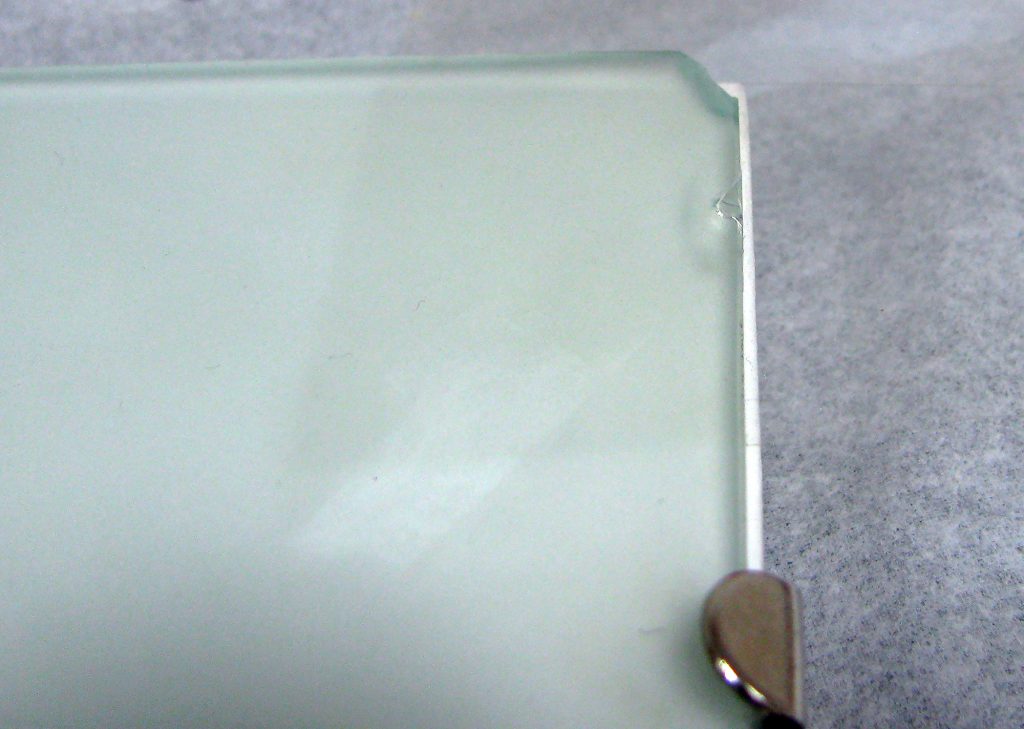
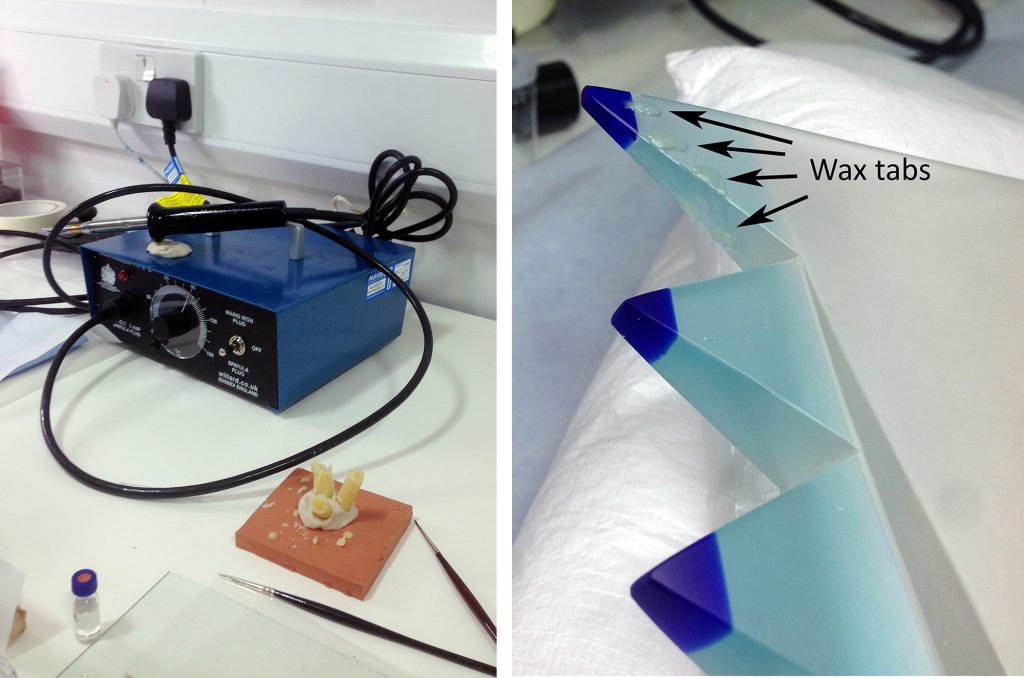
I also had the opportunity to work on a mould blown and cut translucent scent bottle by David Taylor. This unfortunately had one of its blue tipped fins broken away.
To start the repairs, an invisible join was created by first securing the broken tip to the bottle with wax tabs which were applied whilst hot. Freshly prepared epoxy resin was then used at the edge of the join. This slowly spread into the join by a capillary action to secure the pieces together. After curing, the wax and excess resin was gently removed with a scalpel and acetone swabs, leaving the bottle with a clean, transparent repair.
Stag beetle
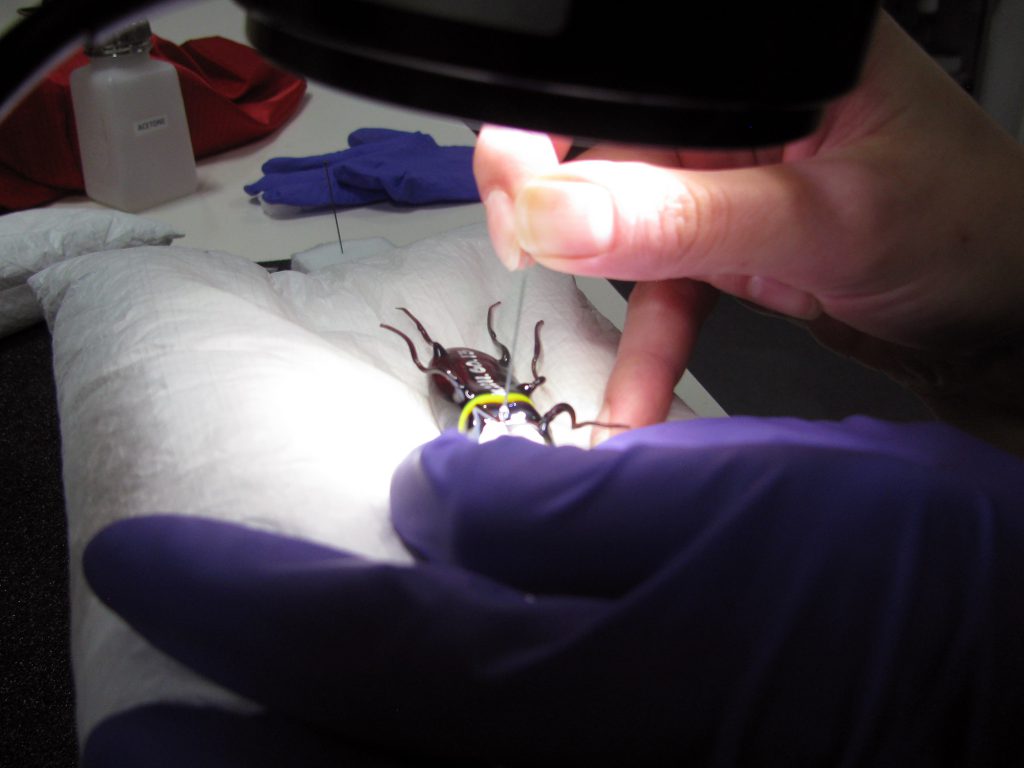
The final object that I worked upon was an incredibly delicate lampworked stag beetle. The beetle had six exceptionally thin legs and one had broken off right above the knee.
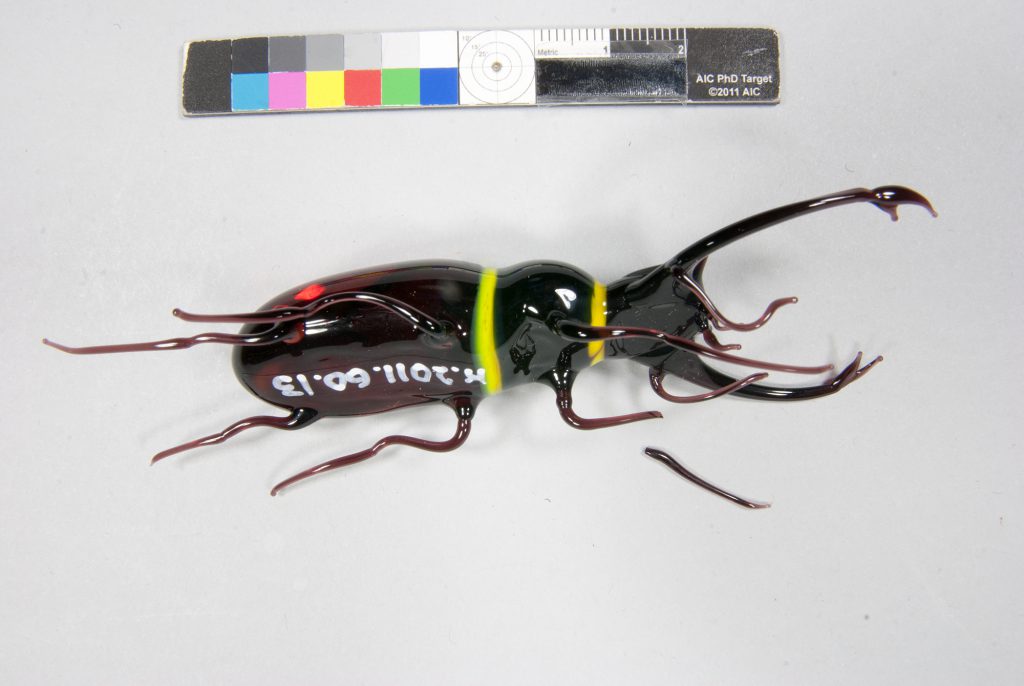
breaking.
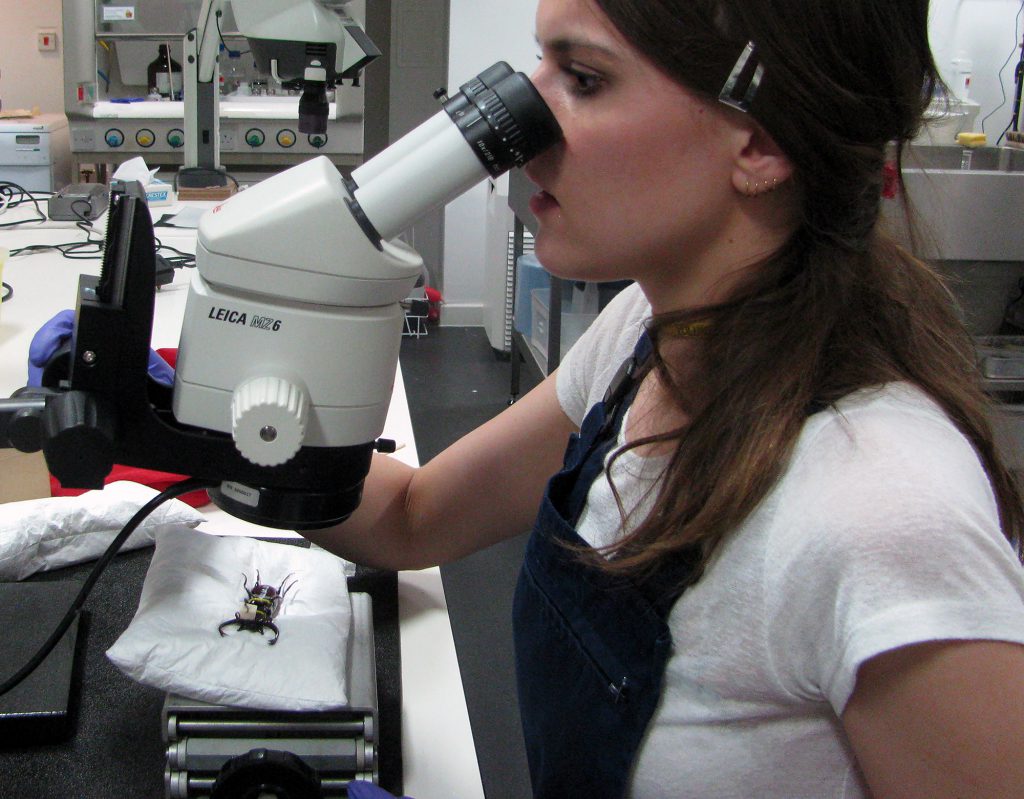
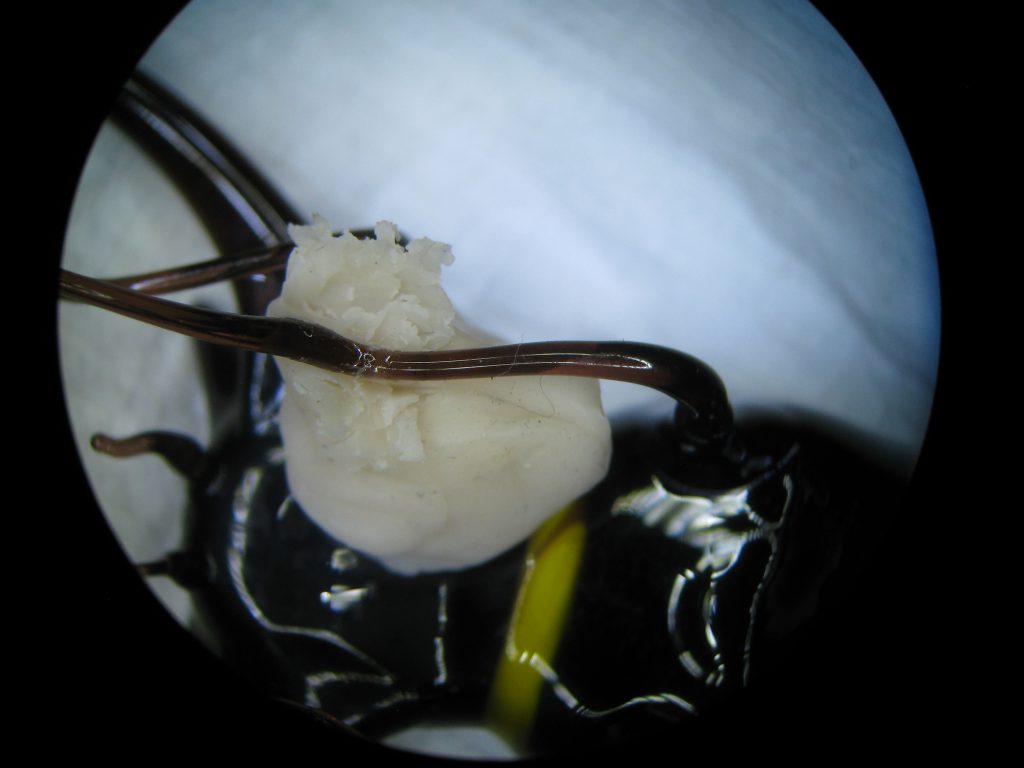
To undertake the repair, the use of a microscope was essential to work at the right level of detail. First off, the leg fragment was supported with a piece of modelling wax. I then carefully aligned the fragments together to make a tight join. A drop of epoxy was then applied to the join using a thin needle under the microscope. This process takes a steady hand and a lot of patience!
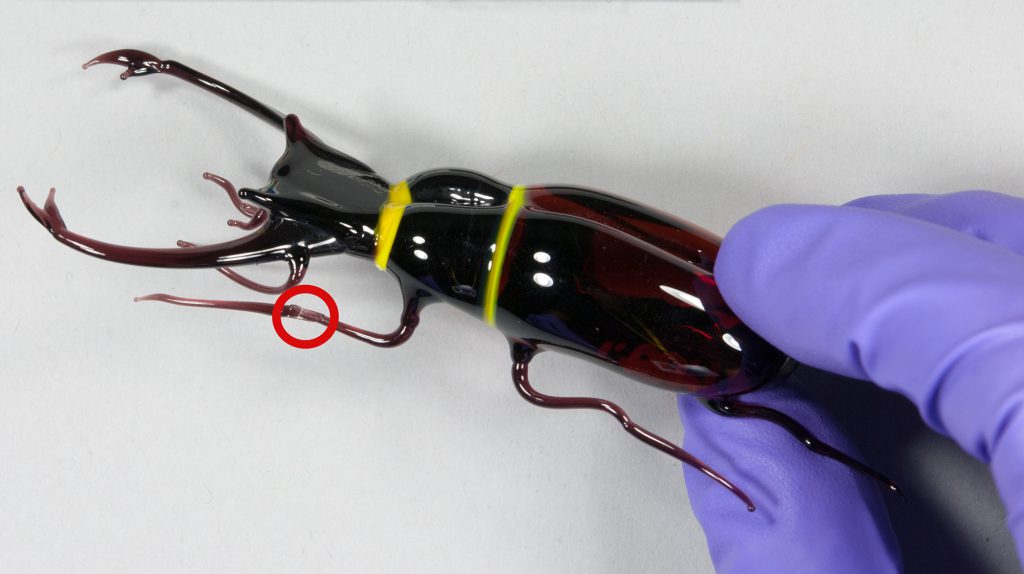
After curing for one-week, the excess epoxy resin was then removed by gently cutting it away with a fresh scalpel blade. However, on further inspection under the microscope, it became clear that the break interface of the join was too small to create sufficient support for the long leg fragment. It was thereby decided to create a small bridge overlapping the join using a small piece of Japanese tissue. The tissue was impregnated with epoxy resin, which gave it a translucent appearance, blending it in with the translucent brown glass of the leg.
As with Bug Boy, the beetle also received new packaging that allowed visual inspection without requiring direct handling, and avoided direct contact between the beetle’s thin, fragile legs and pincers and the packing material.
Sound, clean and packed
At the end of my internship, all five artworks had been their treatment completed and were structurally sound, clean and packed for safe storage and handling.
The varying conservation needs of the artworks I treated within the Dan Klein Conservation Project enabled me to hone my glass conservation skills for different challenges, and helped shape my interests in the conservation of contemporary art. I am very thankful to Stefka Bargazova for dispensing her extensive knowledge and experience on glass conservation throughout this project. I am also highly grateful to National Museums Scotland’s Modern & Contemporary Design Curator, Sarah Rothwell, for facilitating the project.
What’s Next?
Since completing the internship, I have submitted my dissertation and presented a poster of my dissertation project at the Australian Institute for Conservation of Cultural Material National Conference 2019 in Melbourne. I am currently focusing on various conservation projects based in Ireland, United Kingdom and Scandinavia, and have taken on a project position conserving archaeological and historic cultural heritage in Denmark.