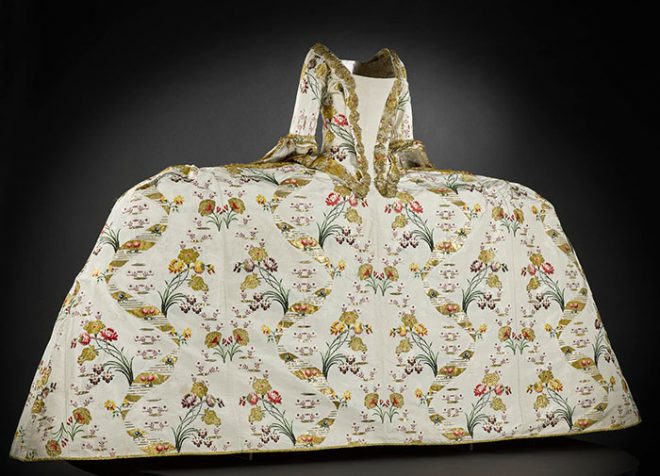
This amazing court mantua dates to 1750-1770. Comprising a bodice and petticoat, it has a ground fabric of cream silk brocaded in gold and silk coloured threads. The floral design depicts small blue flowers and pink strawberries, interspersed with bands of floral sprigs and bouquets of green, purple, pink, yellow and white. The gold thread has been applied in snaking bands of shimmering stripes throughout and the dress is trimmed with gold thread lace embellishment.
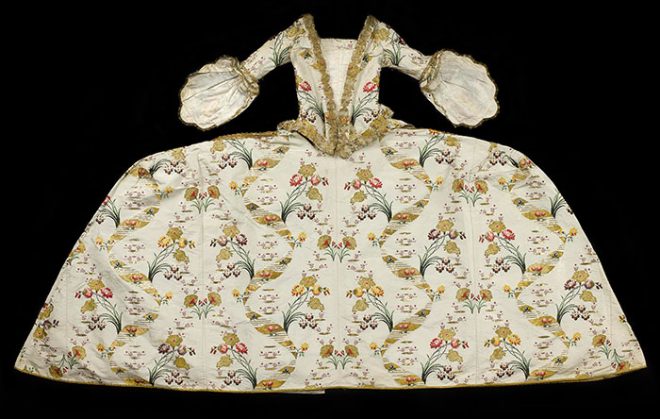
The mantua is in good condition, despite its age and the gold thread elements. Textile conservators have found that gold and silver threads tend to tarnish over time and blacken in colour, however these gold threads have mostly remained shiny and sparkly, showing how opulent the mantua is and was.
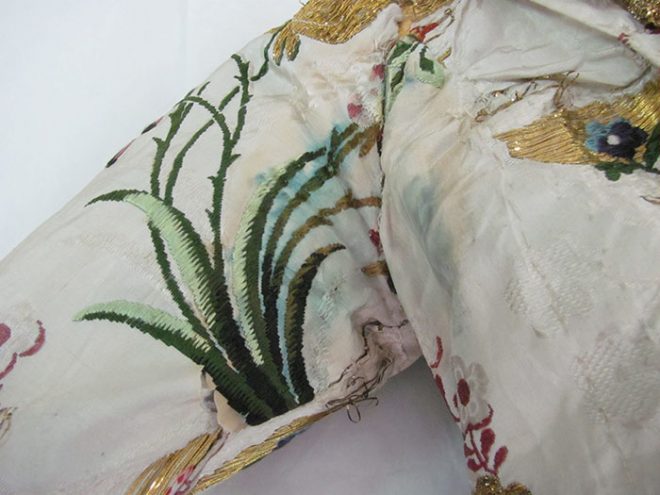
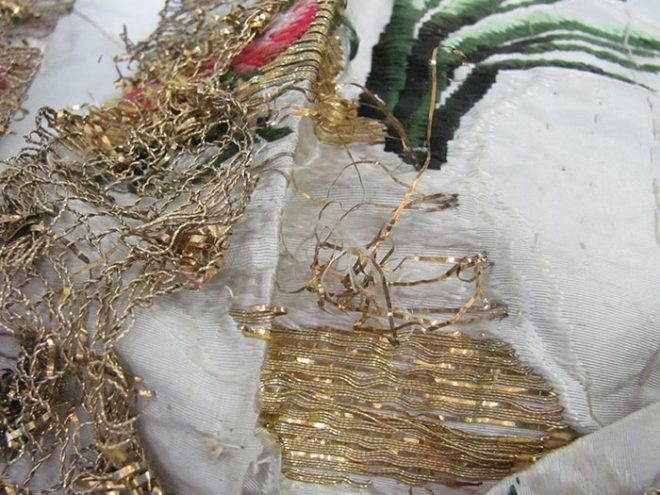
The bodice has most of the damage, with split and shattered silk, dye run and sweat staining under the arms. Both the bodice and petticoat have many broken gold threads that have become loose and tangled.
Here’s what we did to conserve this huge and important object, estimated at 240+ hours of conservation work!
Treatment commences
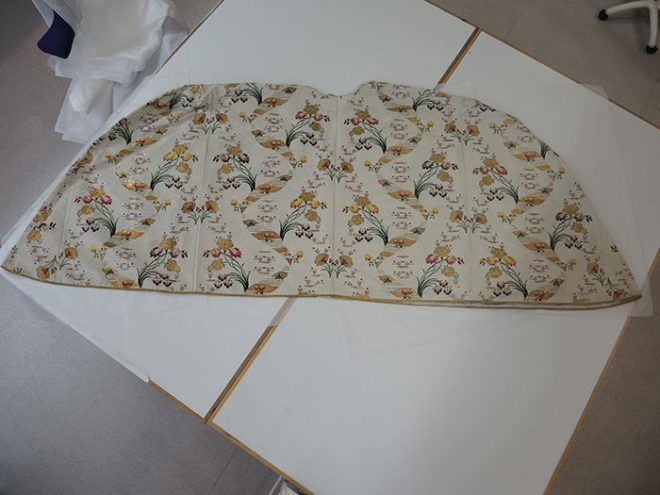
Due to the size of the court mantua it was sensible to work on one piece of the costume at a time. The petticoat had the least complex conservation work to do, so I started there. As you can see from the image below, the skirt alone takes up two large work tables, measuring in at just under 1.5 metres in width!
The first step was to surface clean the entire object, inside (if access does not damage the object) and out. We do this using a soft bristle brush and a museum vacuum. This lifts any loose surface soiling, fibres and dust and ensures these particles do not become further ingrained in the garment’s fabric.
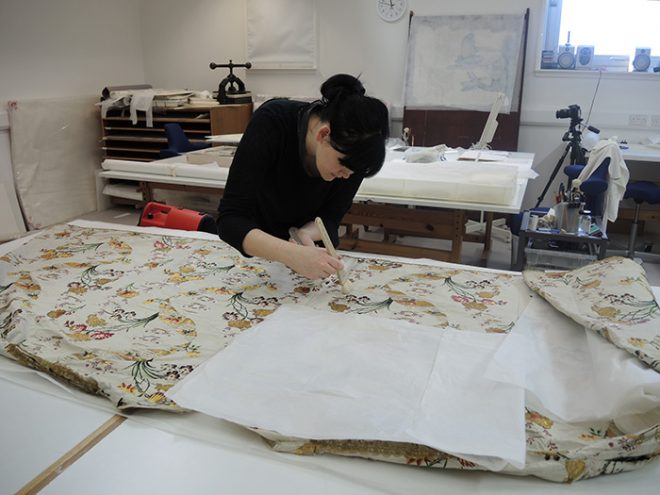
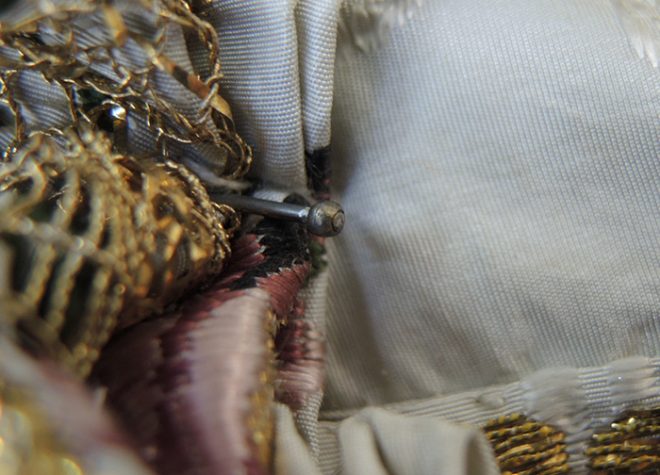
This part of the treatment can be laborious, especially on large objects, but it is a great opportunity for the conservator to become more familiar with the object, and this is usually when we notice other areas of damage we may not have seen during the initial assessment. For example, while surface cleaning the bodice, I found a metal pin still attached to the flounce decoration around the back of the waist!
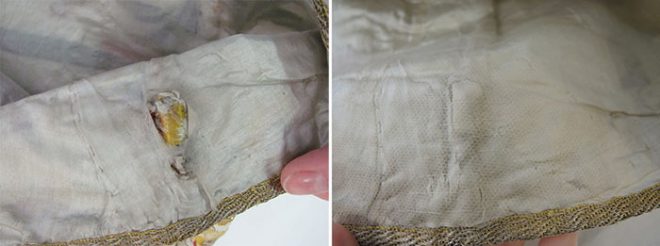
The petticoat had several small areas of damage and weakness to be conserved. There were holes in the silk inner lining, damage to the gold thread braiding along the bottom hemline and weakness at the waist seams. Also many areas of gold thread decoration throughout the petticoat that had broken and become loose and tangled.
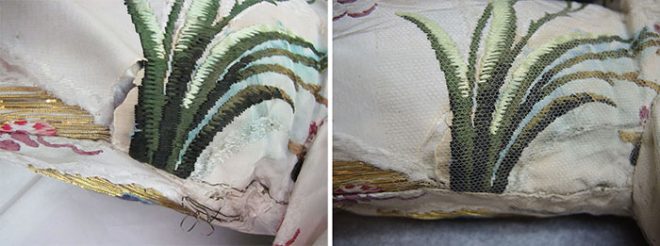
A good place to start, I felt, was with the holes in the silk inner lining. There were four in total and each was about 2-4cm in size. I chose a support fabric of silk previously dyed by conservation that matched as closely as possible to the weight, weave and colour of the silk inner lining fabric. The support fabric was pinned in place under each hole, then a piece of nylon net fabric, pre-dyed and colour matched again, was pinned in place over the top of each hole, effectively sandwiching the original material. All fabrics were stitched in place with laid thread couching stitches with pre-dyed, colour matched, fine silk thread using a small, fine, curved needle.
A tangle of gold
I next started on the daunting task of carefully untangling and stitching down the broken gold threads that are throughout the entire petticoat of the court mantua. You would think this would be a relatively easy and straightforward task, but with so many areas of broken, tangled and loose gold thread, as well as time constraints, I had to prioritise the worst areas only. This is great in theory but being a conservation perfectionist, it meant in practice that I couldn’t help myself straying from the agenda and trying to stitch down every little thread in its rightful place.
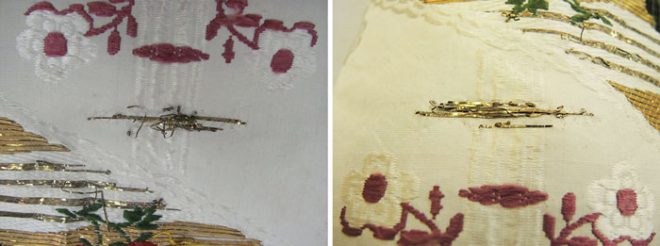
Overall the gold threads were strong and robust but the broken, loose threads tended to be a little fragile. I used a colour matched polyester thread, Stabiltex®, which is very fine but strong enough to hold down the gold threads.
Object complete! Well, nearly.
18th century underarm issues
With the conservation of the petticoat complete, and it being placed nicely back into storage, I could concentrate on the bodice of the mantua. The bodice had significant damage to both the underarms due to sweat staining (no antiperspirants in 18th century Britain!) and dye run. The dye run and yellow staining is due to the moisture during sweating and the splits in the silk fabric are due to sweat being acidic. As the bodice has never been washed, this acidity has degraded the silk fibres, making them weak so they split and tear very easily. This damage was also reflected in the silk inner lining of the bodice.
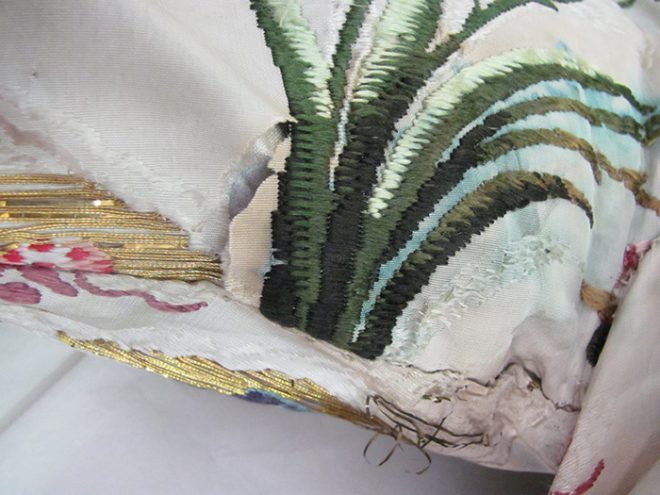
The conservation proposed for the bodice included stitching down the broken and tangled gold threads (as done for the petticoat), supporting the damage to the silk and reducing the dye bleed and staining under both arms. Stitching down the broken and tangled metal threads was completed first as I had had a little experience with this during the conservation of the petticoat!
Now on to reducing the appearance of the underarm staining and dye run…
In textile conservation we do “wash” objects with water and detergent (but not with the same detergents and methods you use at home!). We call this wet cleaning and it is never carried out without serious consideration and preliminary testing. However, the presence of metal thread, multiple fabric layers and fugitive dyes ruled this type of cleaning out for the bodice; something more localised was called for.
I trialled a cleaning method which is relatively new to textile conservation. It uses gelling materials to introduce cleaning aids such as water, detergents and solvents to specific areas of an object. The gel acts as a poultice, effectively sucking up the staining or soiling. Using a gel, in this case Agarose, allows me to cut it to any shape or size before placing it directly on to the selected areas. With the mantua’s bodice, I could cut the gel in a way that would avoid dyed and metal threads and areas without dye run or staining.
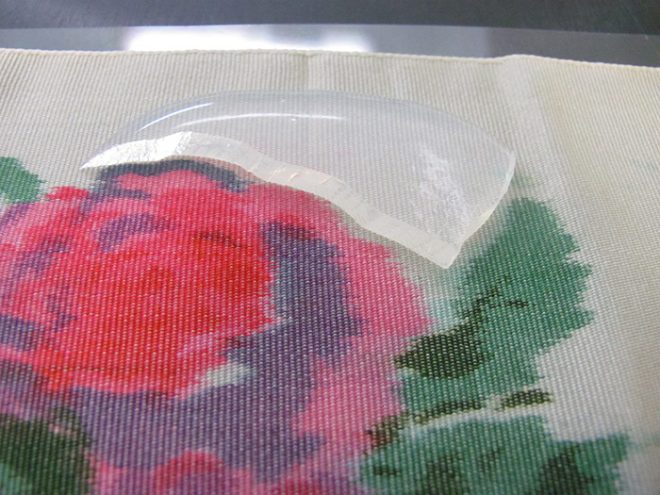
Tests carried out on a printed historic silk sample fabric yielded encouraging results, with the gel visibly taking up dye from the pattern.
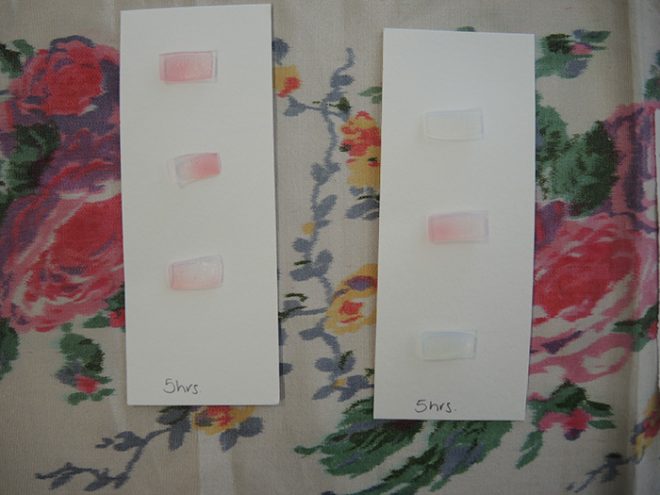
It was hoped that these results would be replicated when the gel was used on the bodice. I cut very small square blocks of the Agarose gel and placed them in a discreet place under both arms. I used gel blocks of water, chelating agents EDTA and Sodium Citrate and solvents Acetone, White Spirit and IMS. Unlike the historic silk sample fabric, the silk of the bodice quickly drew in the liquid from the gel and almost immediately caused a small ring mark around the gel block.
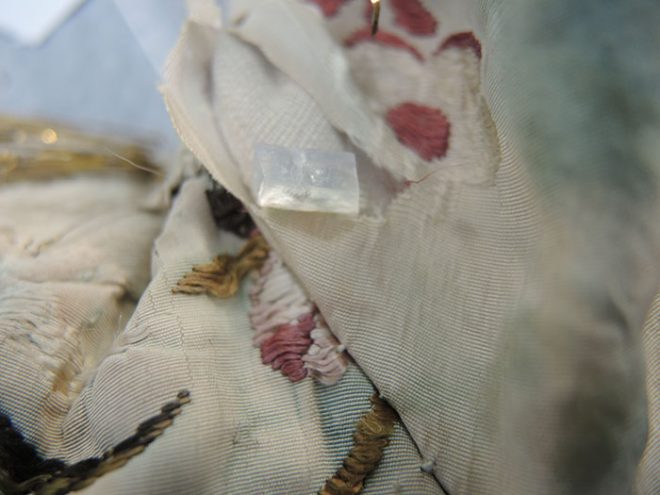
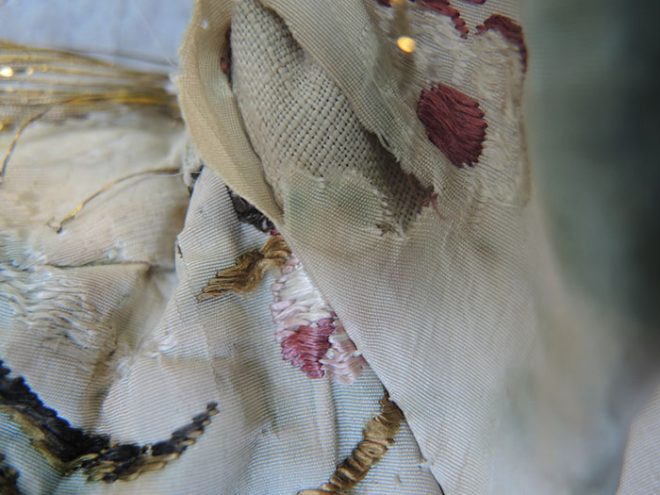
In addition to this, the test gel blocks did not take up any soiling, staining or dye run, and as they left a very small, faint ring mark, it was decided that the gel treatment would not be taken any further on the bodice. However, this is not to say that this method could not be tried again on the bodice in the future. There are many possible factors that could have affected the efficiency of the gel blocks, such as the thickness of each block, the contact between the fabric and the gel, and the ratio or percentage of gel to liquid. With more research and discussion into the use of gelling materials in the localised cleaning of textile objects, more useful and comprehensive information will emerge.
So on with the treatment…
The silk under both arms required conservation, so a support of colour matched silk was stitched under the damage, with a net support placed over the top of the damage and laid thread couching stitches in silk thread holding everything in place. This created a support “sandwich” around the damage, strengthening the area, making the holes less noticeable and preventing these areas from further damage through handling or abrasion.
The final part of the process was the mounting of the object on a bespoke mannequin for display. This was a complex part of the process as the underpinnings needed to give the mantua the correct support and historical silhouette. The completed mantua is now on display in the Fashion and Style gallery at the National Museum of Scotland.
