

Last year I encountered the most challenging object in my career as conservator so far – the James Bruce drinking horn. Dirty, cracked and broken into two distinct parts it was a long way from its original condition over 250 years ago. This is the story of the horn’s incredible conservation journey.
Due to the extent of work undertaken, this post has been split into two halves. This post deals with the full examination of the object and its cleaning, with the second post taking a deep dive into the main conservation tasks.
Introducing the James Bruce drinking horn
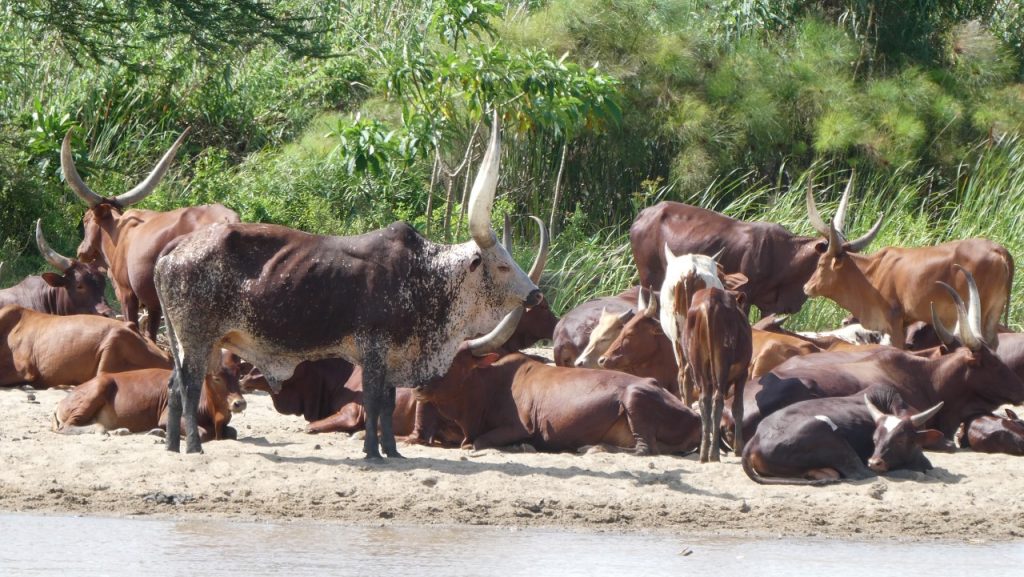
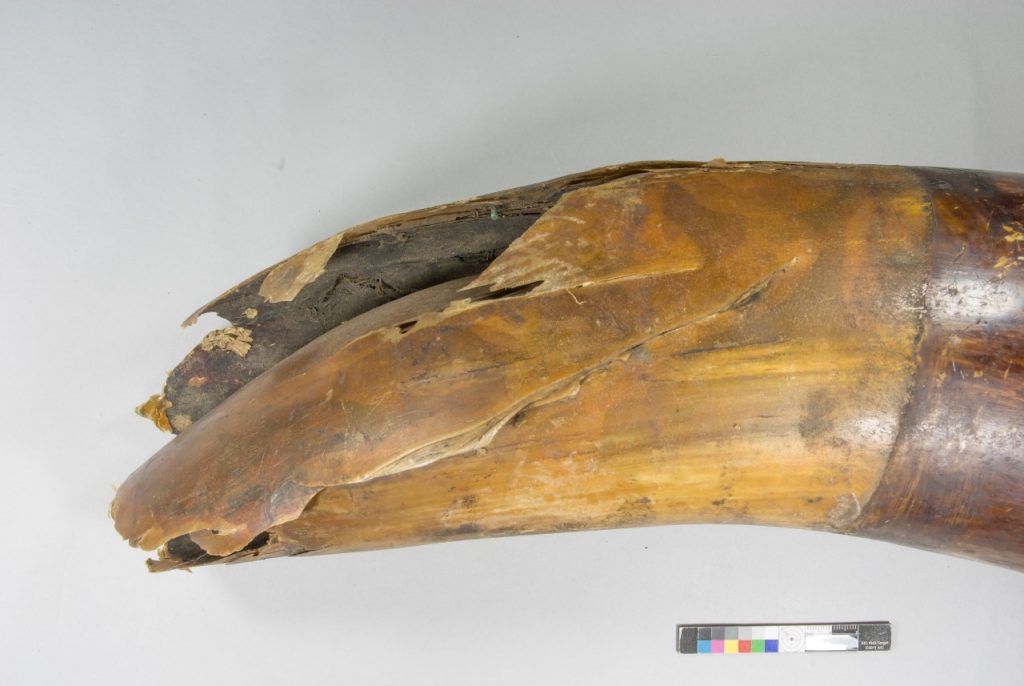
The horn is an impressive 92cm in length and has a maximum width of 15cm. After examination by Dr Andrew Kitchener, Principal Curator of Vertebrates at National Museums Scotland, it was identified as a domestic bull horn (similar to the Ankole cattle of East Africa). The horn originally served as a drinking horn, most probably for “tej”, which is an Ethiopian honey wine.
A violent history
The James Bruce drinking horn was taken by the Scottish explorer James Bruce of Kinnaird on 21 May 1772 after the Second Battle of Sarbakusa, Ethiopia. During his travels in North Africa and Ethiopia, Bruce had commanded Ethiopian troops in an internal conflict. He took the horn from the camp of Ayto Tesfos, the Governor of Samen, and later presented it to his future father-in-law to be adapted for use as a military bugle horn.
It remained in private hands until National Museums Scotland acquired it in 2018 and is one of a collection of objects James Bruce brought back from his Nile expedition, including the Bruce Nile cup in 1770 (acquired in 2006).
James Bruce describes how he took the horn as a trophy during an attack on the camp of an enemy commander in his book ‘Travels to Discover the Source of the Nile, in the Years 1768, 1769, 1770, 1771, 1772, and 1773. In Five Volumes.’. The detail is fascinating and provides an insight to how objects taken through conflict were viewed at the time:
‘I passed a large tent, which I judged to be that of Ayto Tesfos, which our people immediately cut open; … Upon a large tin platter, on a bench, lay one of the large horns, perfectly drained of the spirits that it had contained; it was one of the most beautiful, for shape and colour, I ever had seen, though not one of the largest. This horn was all my booty that night. Upon my return to Britain, it was asked of me by Sir Thomas Dundas of Carse, to serve for a bugle-horn to the Fauconberg regiment, to which, as being partum sanguine, it was very properly adapted. That regiment being disbanded soon after, I know not further what came of it; it is probably placed in some public collection, or at least ou[gh]t to be.’
Around 250 years later, the horn is in a public collection, and currently features in an exhibition at the National War Museum. ‘Legacies of Empire‘ (27 November 2020 – 30 January 2022) explores how military trophies were objects taken and kept as symbols of victory over a defeated enemy. In British and other European military cultures, the taking of trophies – or “booty” – on the battlefield was considered to be the right of the victor and they often became the communal property of regiments and other military organisations.
First impressions
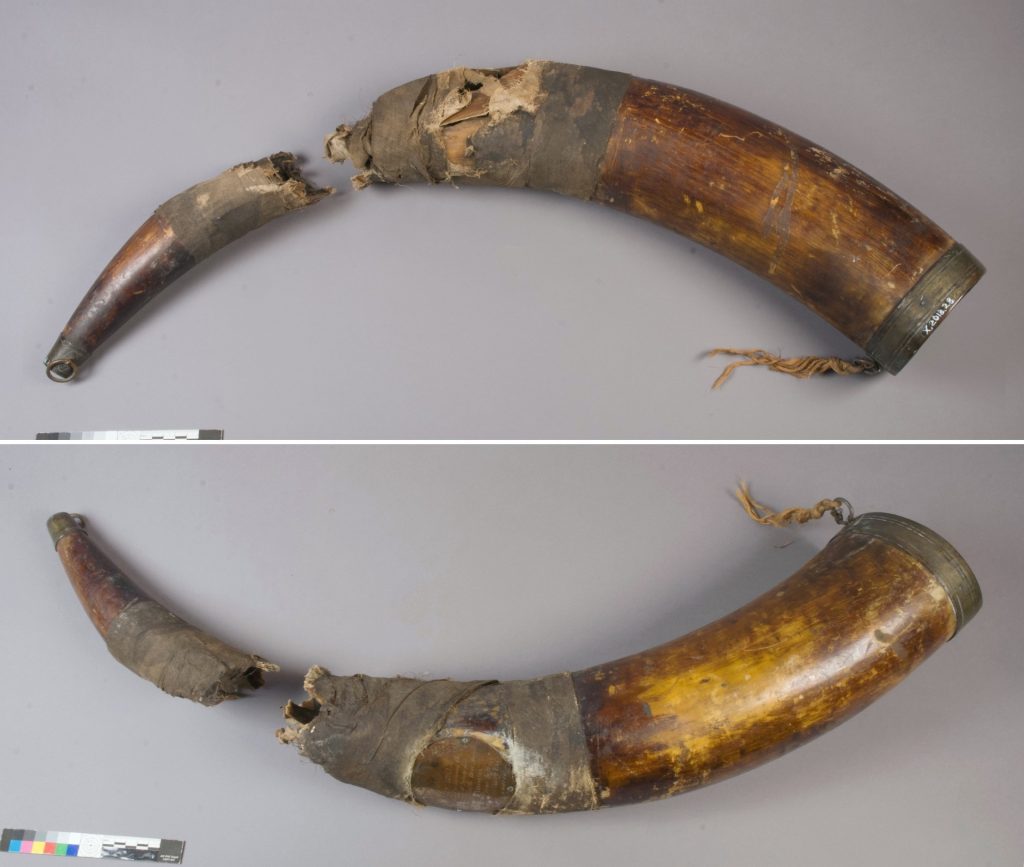
I don’t think James Bruce (or indeed the original owners) would have recognized the horn had they seen it in the condition it arrived at the National Museums Collection Centre: broken in two parts, the break edges were covered in stained brittle bandages and the original surface of the horn was obscured by a dark brown coating.
After being asked to conserve the horn and seeing it for the first time I remember being very excited – not least because I love challenges and finding solutions for the apparently impossible. I was also optimistic at being able to mend the broken pieces with relative ease. Little did I know what the bandages were hiding!
Unravelling to reveal the extent of damage
To assess and address the damage of the horn in detail, the bandages had to be removed. Conscious about not losing historic information, I documented the detailed position and layers of the bandages during the unravelling process by recording time lapse videos. You can see the removal of bandages on one part of the horn in the footage below.
The unravelling process revealed new information about the ‘repair’ itself. Three different bandages had been used and adhered with protein glue. I also became aware that the dark brown coating on the surface must have been applied after the bandaging, as it was not found underneath, but instead stained the top layers of the bandaging material.
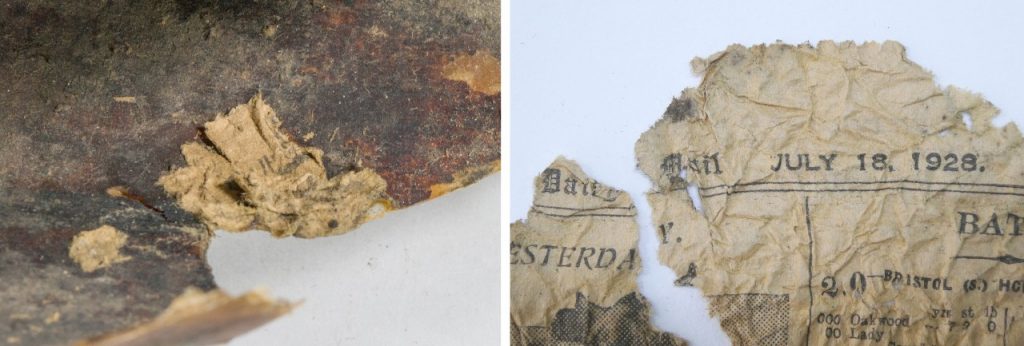
The bandaging could also be precisely dated: Newspaper fragments from the Daily Mail dated 18th July 1928 were stuck inside the horn and parts of it were trapped between the broken edges and the bandages!
Full examination of all types of damage
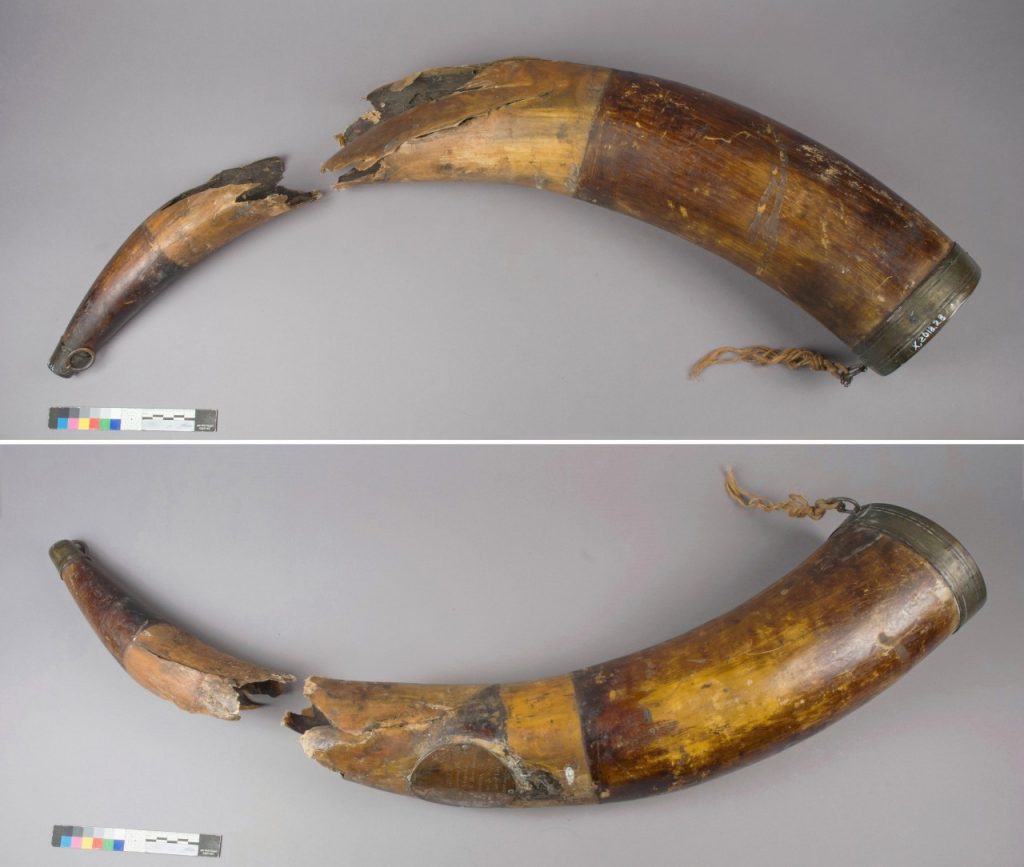
After removal of the bandages, the full scope of the damage came to light, inlcuding the following severe types of damage.
Material loss
Cracks
Compressed / deformed material
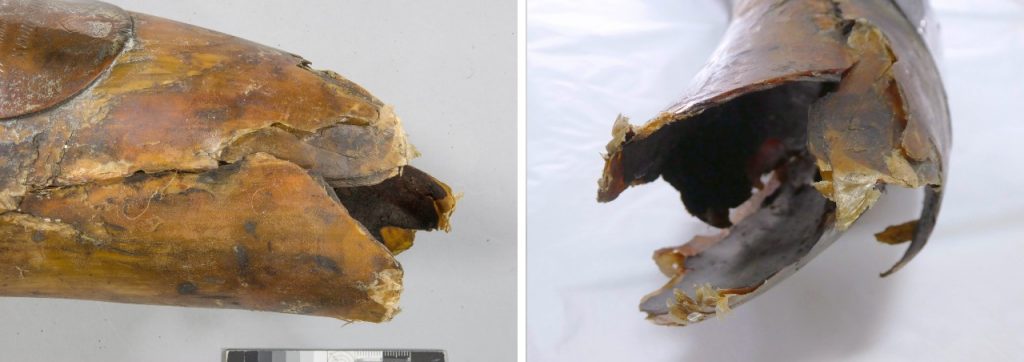
This caused the material to collapse inwards and to overlap along the break edges.
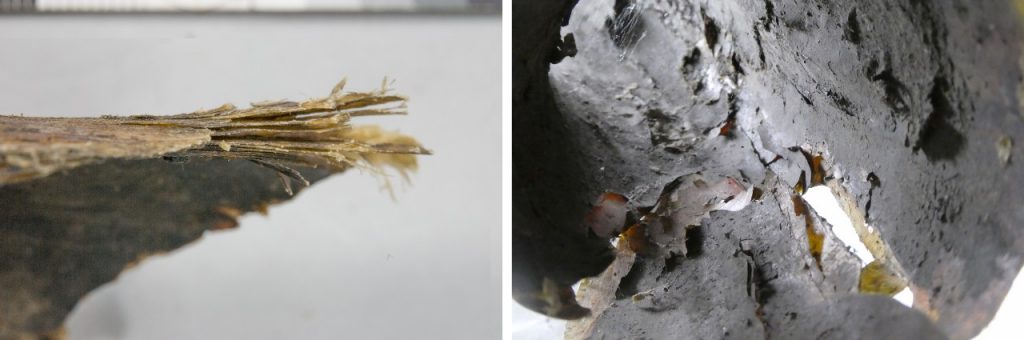
Delamination
Soiling
Old repair
Finding a matching break edge
With all this damage, deformation and huge areas of loss, I asked myself how I would be able to reattach the broken section onto the main body of the horn. At first I thought there was not even enough material to align both parts but I then spotted a 5cm wide area with matching break edges. These were not easy to identify because of a severe deformation in the large piece, which resulted in the horn material overlapping along a crack.
It was becoming obvious that this repair would be much more complicated than I first imagined. As is often the case in conservation, I was also under time pressure as the object had been selected for the upcoming special exhibition, Legacies of Empire. Over the next few months my nerves started to fray. Would I be able to conserve it in time and achieve a good result? Read on to discover how I worked my way through the conservation process step-by-step, starting with a very careful cleaning process.
Cleaning the horn – unusual circumstances require exceptional measures
18 years ago on my first day as conservation intern I learnt a very important rule: Every conservation starts with removing dust and dirt from your object. Facing the conservation of the horn I very clearly recalled my supervisor’s words. There was a significant amount of cleaning to do before I could focus on the main task – the reshaping and mending of the broken areas.
Three issues had to be addressed during the cleaning process: the heavy soiling inside the horn (perhaps the most challenging task), and two issues on the outer surface related to previous repairs – the dark brown coating, and an old fill which had started to fail.
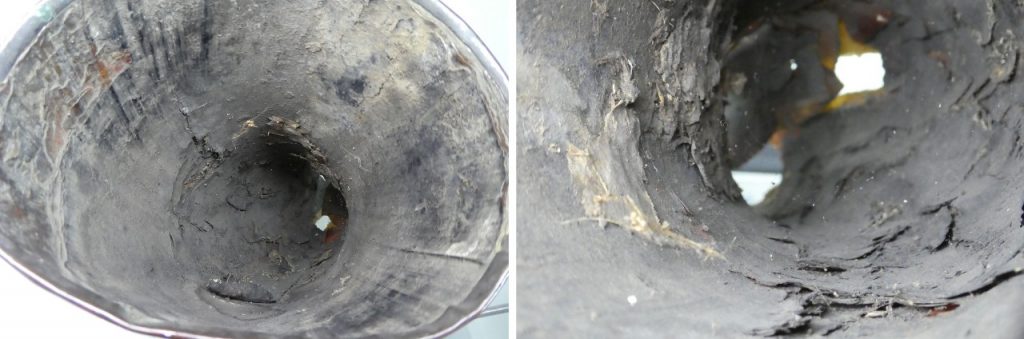
Soiling inside the horn
I ambitiously started to remove the dirt inside the horn with cotton swabs, a toothbrush and deionised water but quickly realised that it would take me several weeks to remove the thick and encrusted layer of soil.
A more rigorous cleaning method was needed! Reassessing the internal horn material I had noticed that, despite all the cracks and delamination, it was not brittle but rigid and flexible – stable enough to be able to clean the horn more thoroughly. The addition of water also helped to soften the horn material and reduce the risk of breakage. This was an unusual problem, requiring a more pragmatic – and perhaps non-standard – approach. I carefully carried the horn to our big sink in the lab, rested it on some padding, filled beakers with deionised water and got hold of the biggest brush I could find.
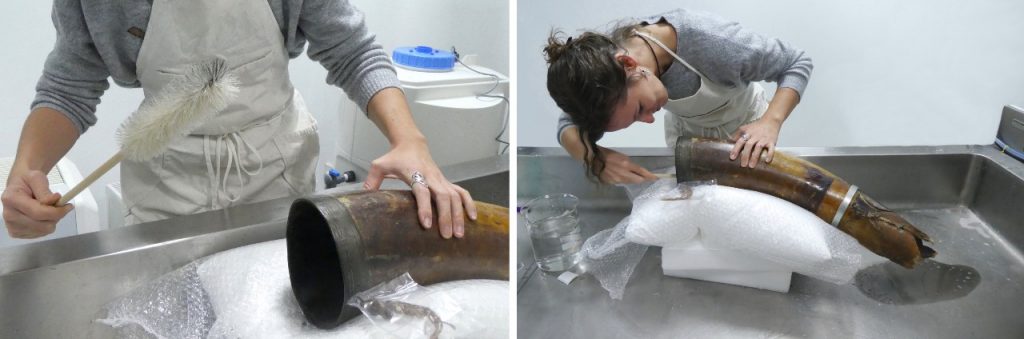
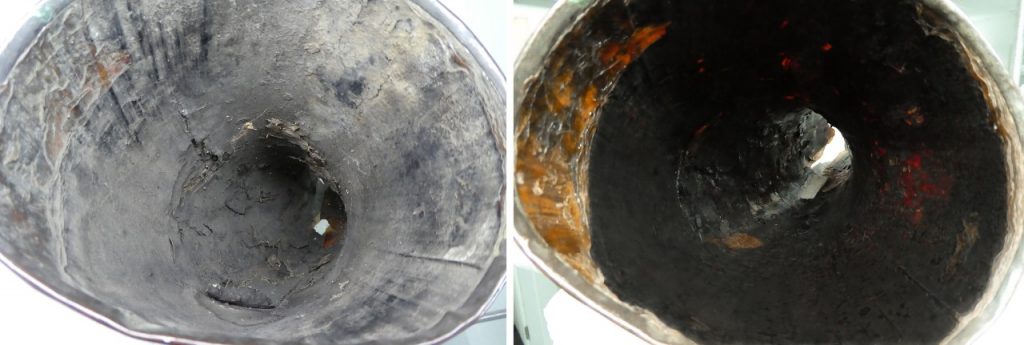
I then flushed the interior of the horn with water to soften the dirt, using the big brush to mobilise it in intact areas and a toothbrush in more delicate and delaminating areas. During this process I rinsed the interior with deionised water, repeating the scrubbing and flushing until the water running out of the other end of the horn had turned from a murky black/brown to clear. At the end of the day I was covered in black dirt splashes, but felt assured that I had removed all the dirt from inside the horn.
Removal of varnish
The horn’s coating had been analysed by our scientist Lore Troalen, who identified it as a mixture of oils and resins. This combination enabled us to assume that the coating was a varnish as varnishes tend to darken with time due to the ageing process of the oils. It is possible that the varnish had been translucent or of the same golden colour as the horn before it turned dark brown and opaque within the last 100 years.
I decided to remove the aged varnish to retrieve the horn’s original appearance that James Bruce had enjoyed so much.
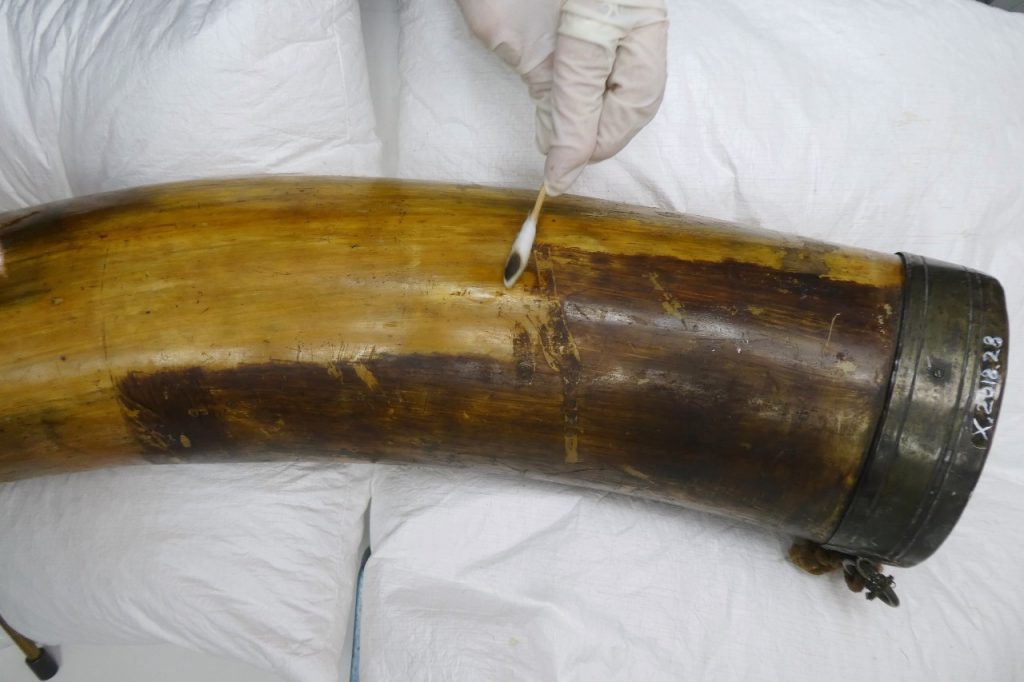
After the tough cleaning job I carried out on the inside, this process was very meditative and I was able to recover the horn’s original sheen and golden colour. It’s now very satisfying to look back and review the process in a timelapse.
Removal of old fill
Initially I didn’t plan to remove the old filling material, but to stabilise it and improve its appearance. However, during the attempt to reshape the deformed areas the fill prevented me achieving a good result and had to be removed. I realised again that it is inadvisable to do things by halves!

With the removal of the filling material, the full extent of the underlying damage was revealed. The fill was covering up a hole in the horn and had pushed the adjacent material inwards. This caused further deformation and was the reason for my failed reshaping attempts.
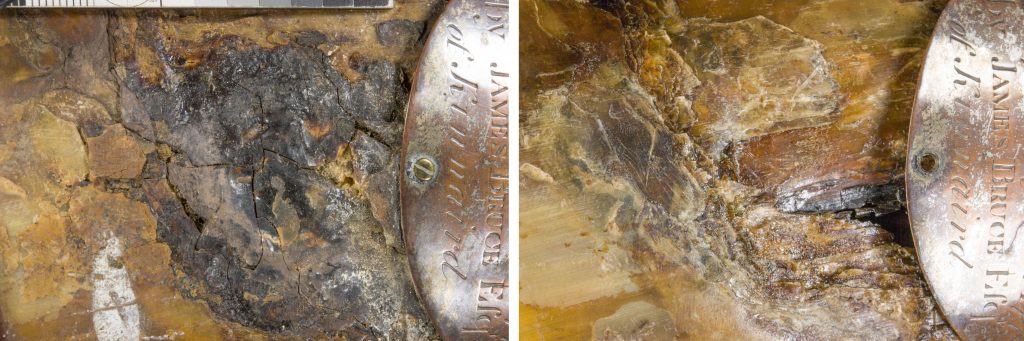
Further on, the horn material degraded in the contact areas with the filling material, which reconfirmed the necessity to remove the fill. The horn had delaminated into very thin and brittle layers that reminded me more of filo pastry than of horn material! Additionally, filling material had settled in between the delaminating layers and driven them further apart. Dental tools and fine brushes, in combination with a vacuum cleaner, helped to manoeuvre these back out. I consolidated these thin and fragile layers to help stabilise them.

There was much more to do to return the horn to its former glory and further to travel on my conservation journey. Watch out for my second post coming soon…