

I am a Los Angeles, California, girl who chose to do her Conservation training at University College London, Institute of Archaeology. Just as I thought the weather could not possibly get any colder, I applied to do my third year internship in Scotland. Since arriving in Edinburgh at the end of September 2012, I can honestly say I have seen it snow more times than I had ever seen before in my life! Now that my time here in the Artefacts Conservation section at the National Museums Collection Centre is ending, I thought I would write a blog post about what my MSc dissertation research into the potentiostatic reduction of lead corrosion has achieved.
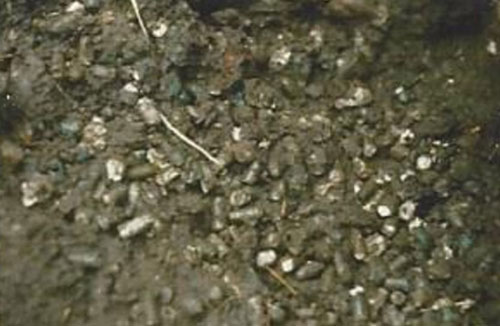
I have been working on 156 bullets and casings found near the Special Training Centre Lochailort (1940-1942; site near Inverailort). This was the first Royal Commando training centre set up during WWII. The bullets were found, buried in the ground, near a derelict building which is a possible site of the first ‘mystery house’. Trainees would have been sent into this building to test their new skills in an unknown scenario.
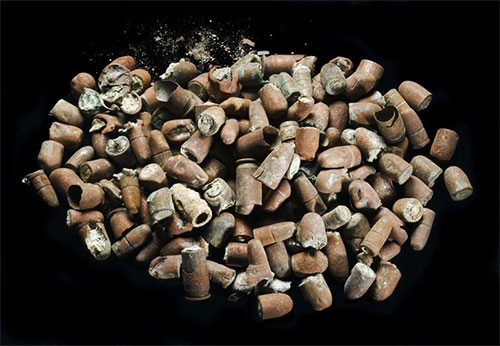
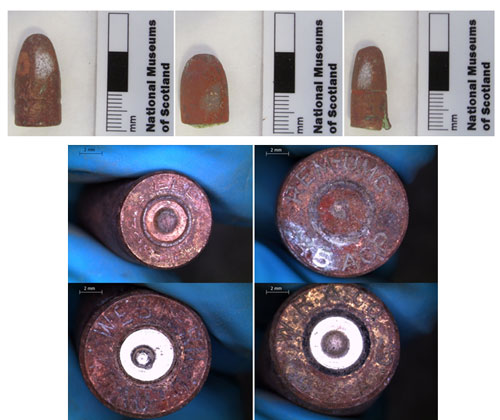
My work on the bullets was two-fold. First, by studying these bullets and the casing head stamps (impressed markings that indicate country and calibre) I could shed light on the types of ammunition and possibly also the weapons that were used at this site. Secondly, as Stuart Allan, Senior Curator of Military Collections, was concerned about corrosion to the bullets, I needed to determine a good bulk conservation treatment which could efficiently treat all 156 objects so that they could be displayed in the future.
Because these bullets have corroding lead (Pb) cores, which are very toxic, this presented a health and safety risk to researchers and visitors, and this needed to be resolved before they could be displayed (and before the metal corrodes completely to dust!). Therefore, when I worked with the objects I wore protective gear and used other equipment to contain the lead corrosion products so that I and the other conservators would be safe.
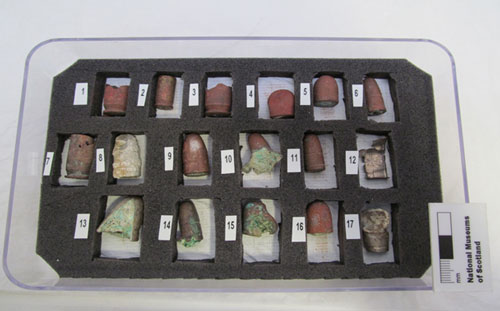
First, I sorted the bullets visually into sizes and types, then I chose seventeen samples (four casings and thirteen bullets) which were representative of the types and corrosion products present. These would be used to analyze for composition (to see which metal alloys were present) and to undergo potentiostatic trials.
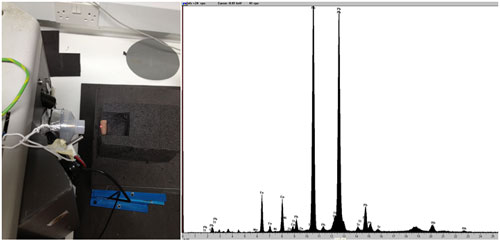
To understand the types of metal alloys and corrosion products present I turned to several analytical techniques in addition to the desk microscope to assist me. With the help and expertise of Conservation Scientist Lore Troalen, x-ray fluorescence (XRF) was utilized to provide me with an elemental composition of the bullet shells and the casings. With this technique it was determined that there were two alloys present: copper-zinc (‘.45 calibre’) and copper-nickel (‘.32 calibre’ and ‘rifle rounds’). The cores were determined to be lead.
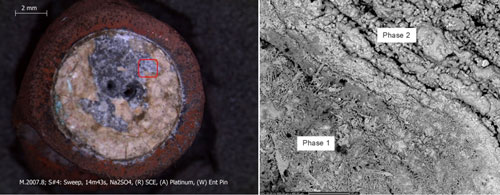
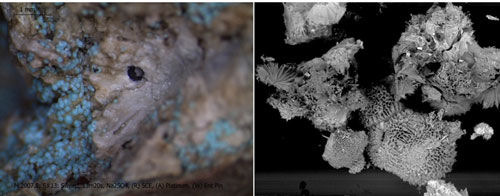
Two types of corrosion products were visibly present: a primary, white corrosion and a secondary green corrosion which appeared either as compact and dark green or as nodular and light green-blue.
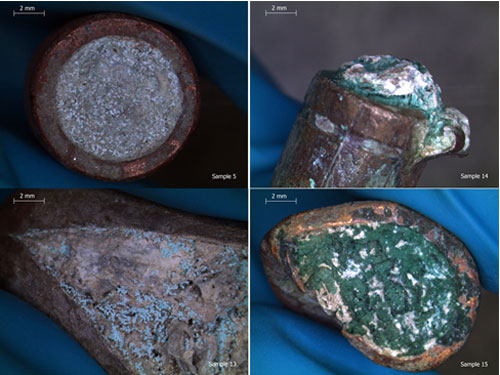
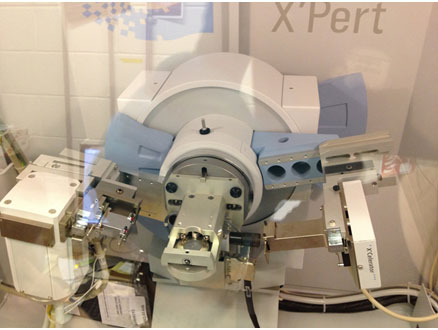
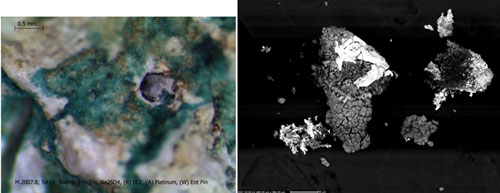
With the expertise of Peter Davidson, Curator of Minerals, x-ray diffraction (XRD) analysis was used to determine that the white corrosion was Cerussite (lead carbonate). However, the two green corrosion products were not as easily defined by this technique. In addition, after potentiostatic reduction trials were run on several sample bullets, XRD was used a second time to confirm that lead metal had been formed. This was the most exciting test as it showed that my project was successful!

Because the green corrosion could not be identified by XRD, scanning electron microscopy (SEM) was used to help determine which elements were present in the green corrosion products. The backscatter micrographs were truly amazing to me, as they illustrated how beautiful a mineral can look when viewed at such a magnification. This technique also indicated that these were copper-based minerals and possibly more non-crystalline in nature than previously thought. Therefore, future tests will involve Fourier transform infrared spectroscopy (FTIR) which can better identify non-crystalline and organic materials.
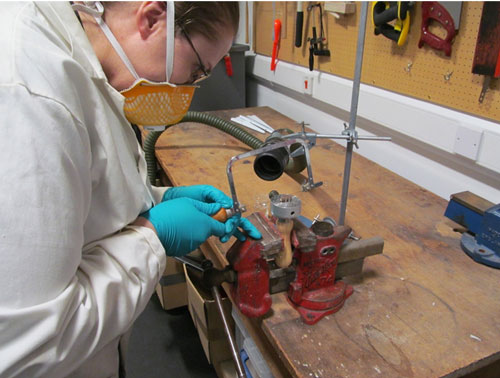
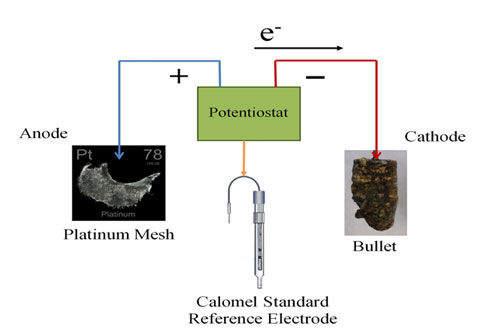
To treat the bullets I chose an electrochemical technique called Potentiostatic Reduction. This process utilizes a potentiostat machine which, with the aid of computer software, can help determine a safe electrical current to push through the circuit to reduce the corrosion to metal. Initially the software is set to run potentiodynamic scans which display a unique signature peak corresponding to the specific metal or alloy which is to be reduced. This allows me to be more selective in what potential difference (voltage) I should choose to run my trials. If I set the potential difference too low then nothing will happen and the electrolyte solution may attack the metal. If I set the potential difference and current too high hydrogen evolution (bubbles) may form.
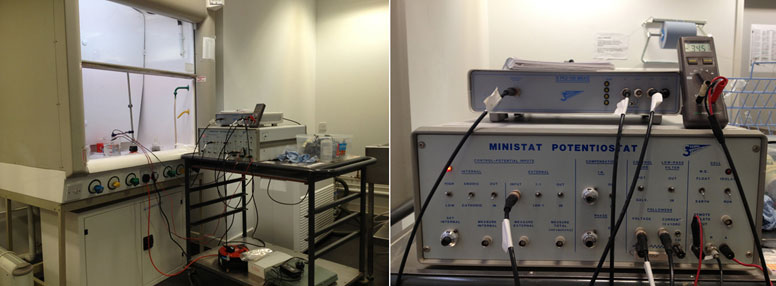
The aim of determining a safe current range for reduction is to avoid the rapid formation of hydrogen gas which evolves off the surface and within the structure as tiny bubbles. When the experiment is running correctly very few hydrogen bubbles will be formed on the object. Oftentimes the object to be reduced is extremely fragile, thus, the rapid evolution of hydrogen could be enough to shatter the object apart!
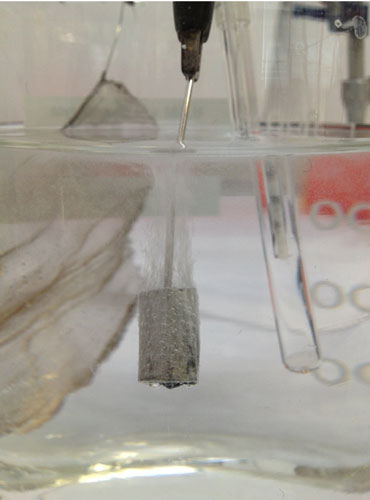
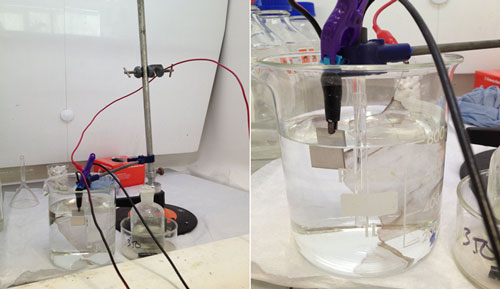
The bullet was connected to the system as the cathode, the platinum mesh was connected as the anode, and a Calomel Reference electrode was included in the cell to monitor the potential drop occurring at the cathode. This reference electrode allows the potentiostat to adjust the potential (voltage) at the cathode, in order to keep it constant. The potentiostat is set up so that I can monitor the current through the bullet (cathode). When it settles on a current for a duration of time, I can then assume that all the corrosion that will reduce to metal has done so and the experiment can be stopped. The bullet is then rinsed and dried and stored in an air-tight container.
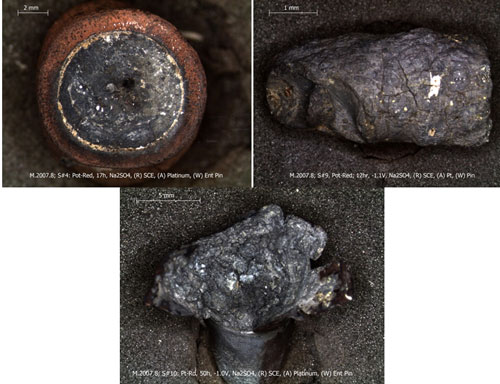
Well, if you have all stayed with me and read this far, then I guess the big question is: “Did I have any success?” My overexcited answer is “YES!!!” I was very happy to be able to reduce three different bullets and demonstrate that both copper-zinc and copper-nickel alloy shells in galvanic connection with a lead core could be reduced, as well as bullets with the secondary green corrosion. I was also able to set up a cell with two bullets and have both bullets reduce at once. This means that future testing can begin on creating multiple-cells, with 5-10 bullets, which will allow all 156 bullets to be reduced efficiently!
Thank you for reading through my blog post and many thanks to the conservators, curators, and site staff that made my time at National Museums Collection Centre wonderful. I wish I didn’t have to leave! Now back to typing up my dissertation!