

I felt some trepidation when I returned to my post of Artefact Conservator at National Museums Scotland after maternity leave last September. What objects would we have in the lab? What would my first project be? I was in luck – not that all my colleagues would agree with me! A massive 18th century porcelain lion is not to all tastes, but I was delighted.
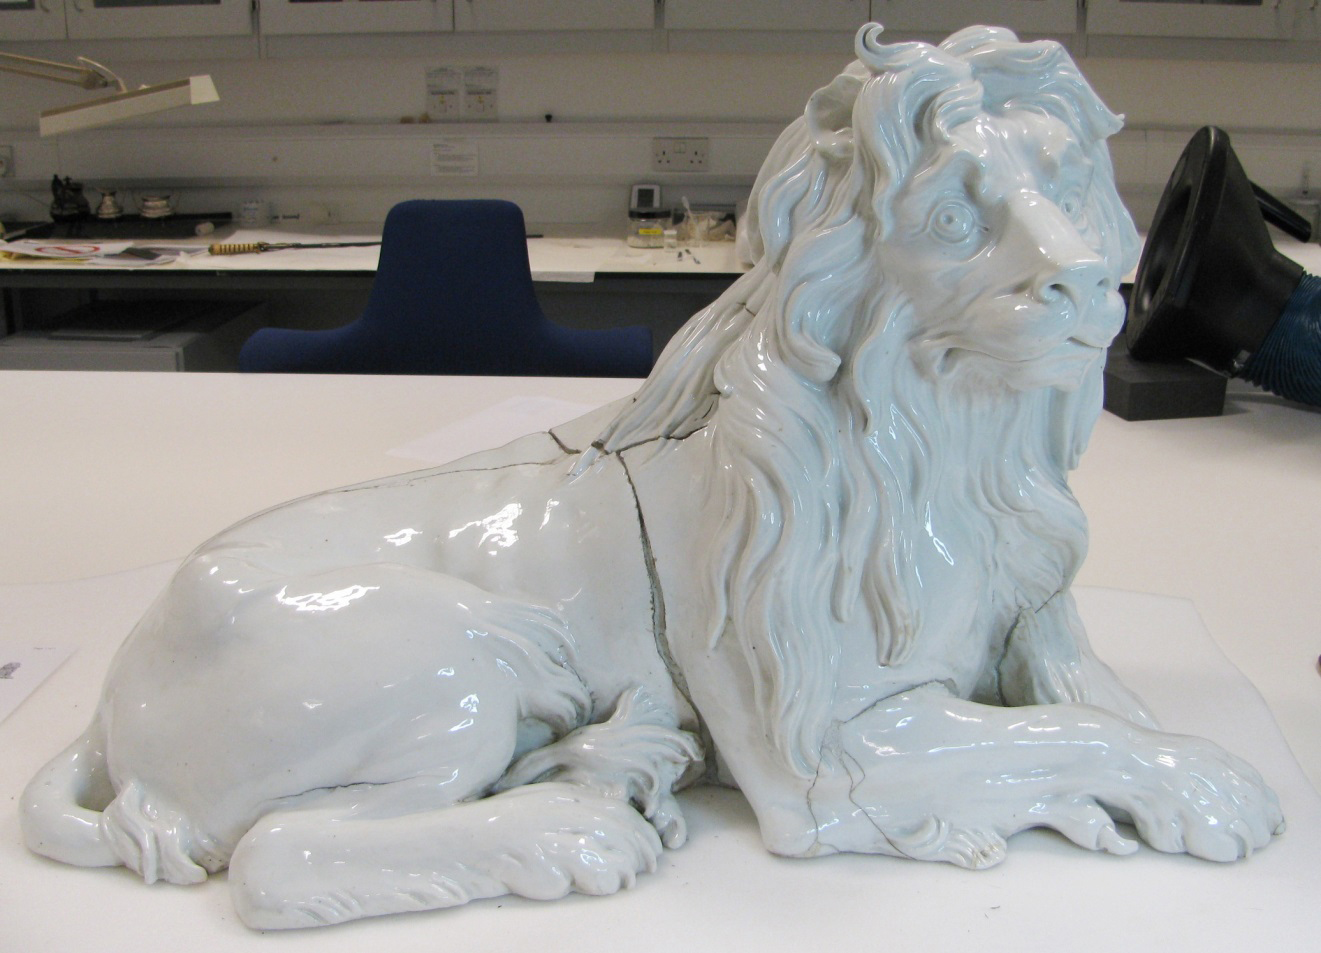
This was not any lion but one of the few survivors of the Meissen manufactory’s attempts to create a porcelain menagerie for the Elector of Saxony, Augustus the Strong. Never had porcelain sculptures of this size been attempted in the West or East and very few of them survived the kiln. The National Museum of Scotland’s lion, measuring nearly a metre in length, half a metre in height and weighing around 35kg, is one of a handful in existence anywhere in the world. My challenge was to ensure it was safe and fit for display in the new Art and Design galleries (due to open in 2016) and in the process, uncover more about its history.
The Problem
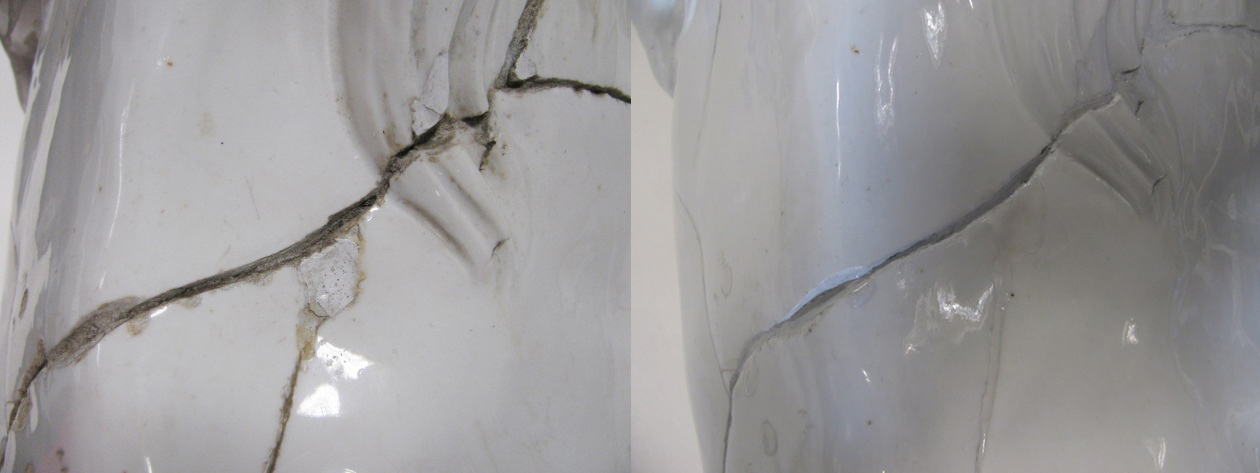
Very obvious when first looking at the lion were the massive cracks running all over it – these are firing cracks. All clay shrinks during firing, by as much as 6%. The difficulty of having an even shrinkage over a piece of this size and weight led to stresses on the clay in the kiln, causing these dramatic splits.

The lion had not been worked on since its acquisition in the 1960s, so the questions were how stable was it now? and what was holding it together? We needed to look underneath. Gingerly and with great care we lowered it onto its side, on to a soft padded surface…
What we found
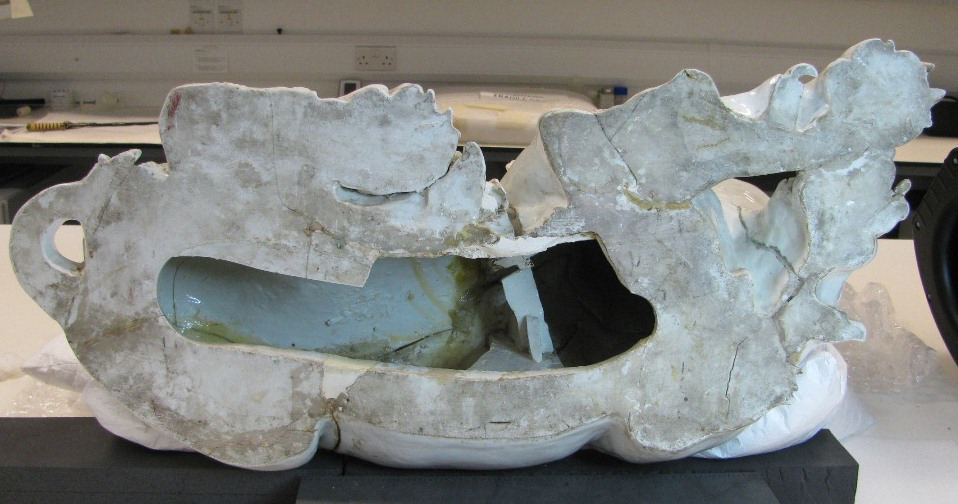
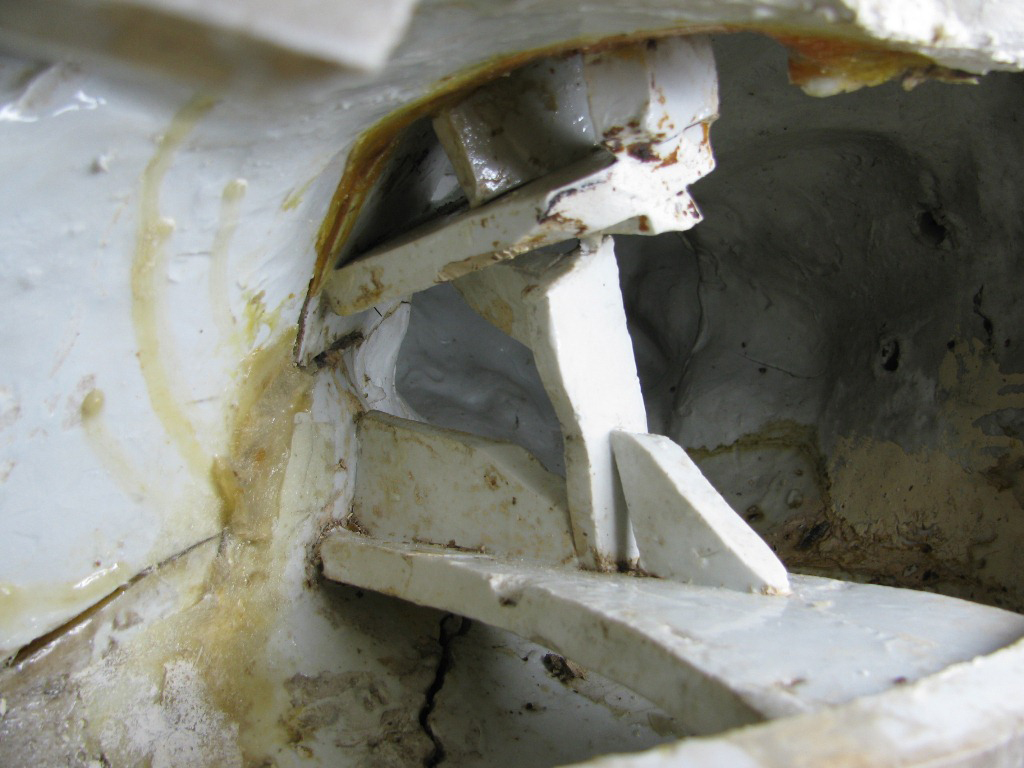
The lion was hollow, as to be expected with a ceramic of this size. The underside was unglazed but unusually, the interior was glazed. How it was possible to manoeuvre the lion to apply this paint-like liquid inside and out is rather a mystery.
Looking up into the head, you could see a join where the separately cast head and body were joined – this would have been done before the first firing. The glaze would then have been applied after this but the beast would have been very fragile at this stage and probably very hard to lift.
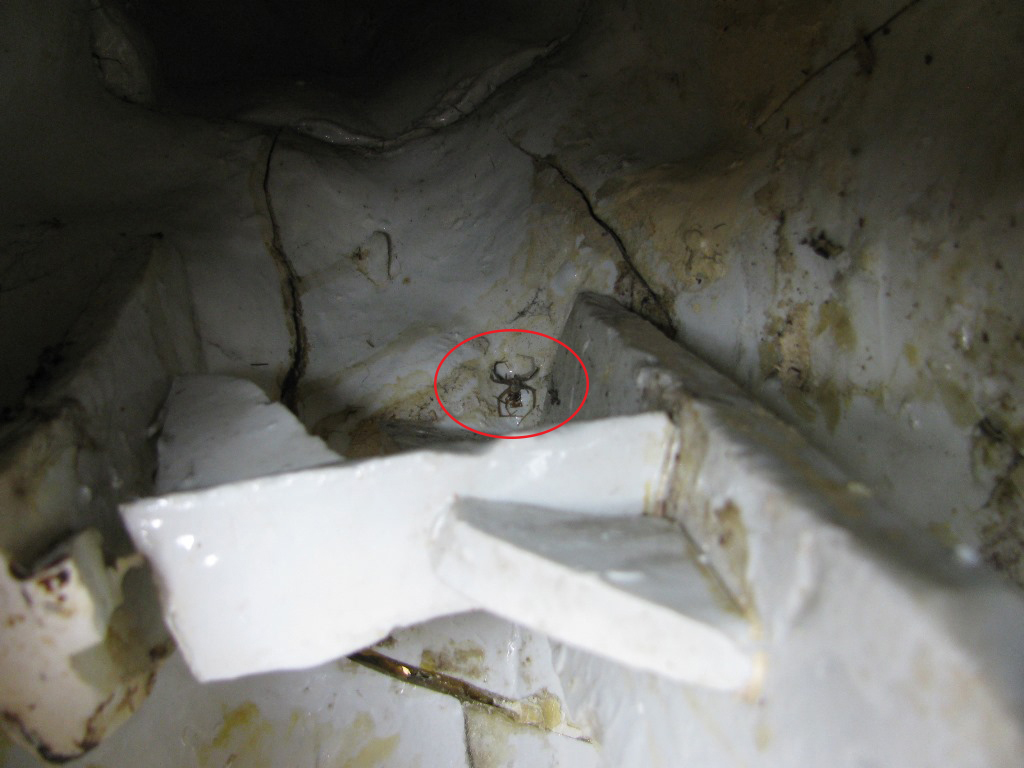
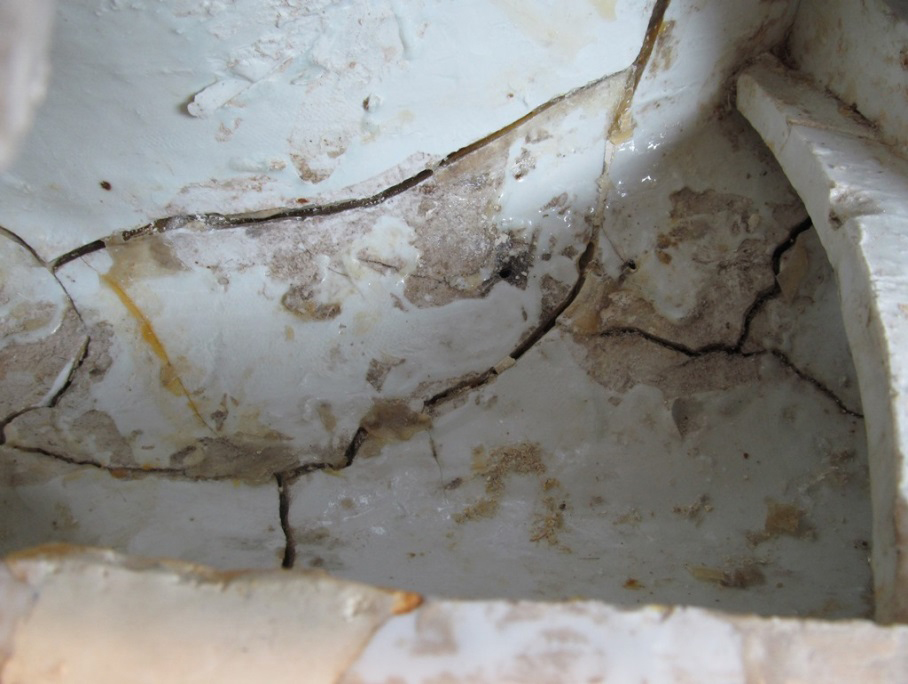
The interior was a mess: very grimy, and with various signs of insect habitation including pieces of spiders’ webs and even one unlucky spider, casualty of a previous restoration, who must have got stuck on some glue and ended its days inside the lion’s belly.
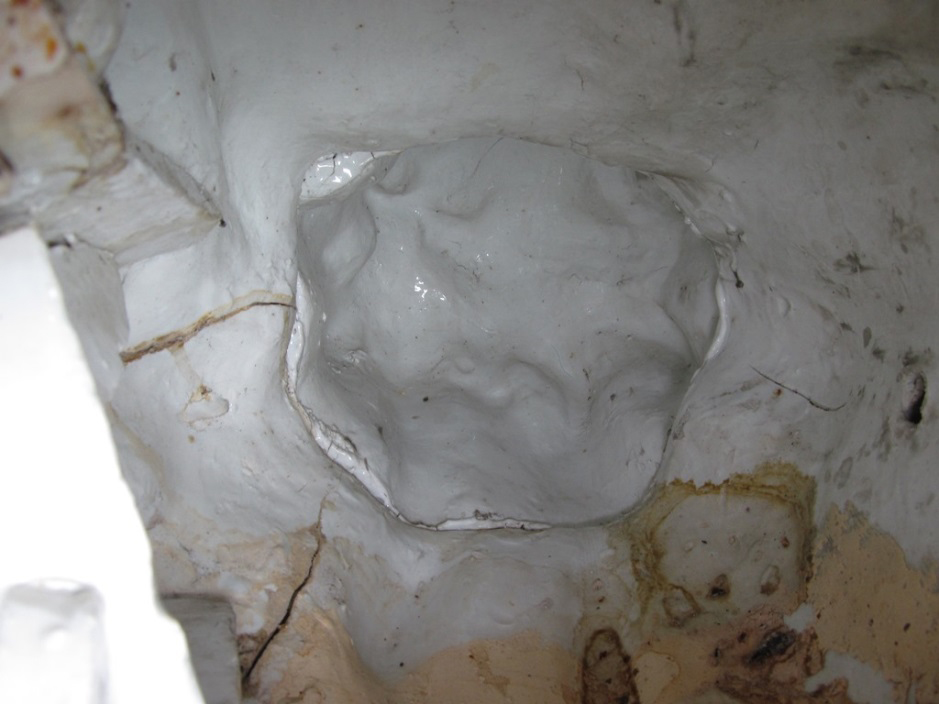
Another interesting sign of manufacture were these rather roughly constructed pieces of porcelain forming ‘buttresses’ attached to try stop the back and neck from sagging.
Repairs
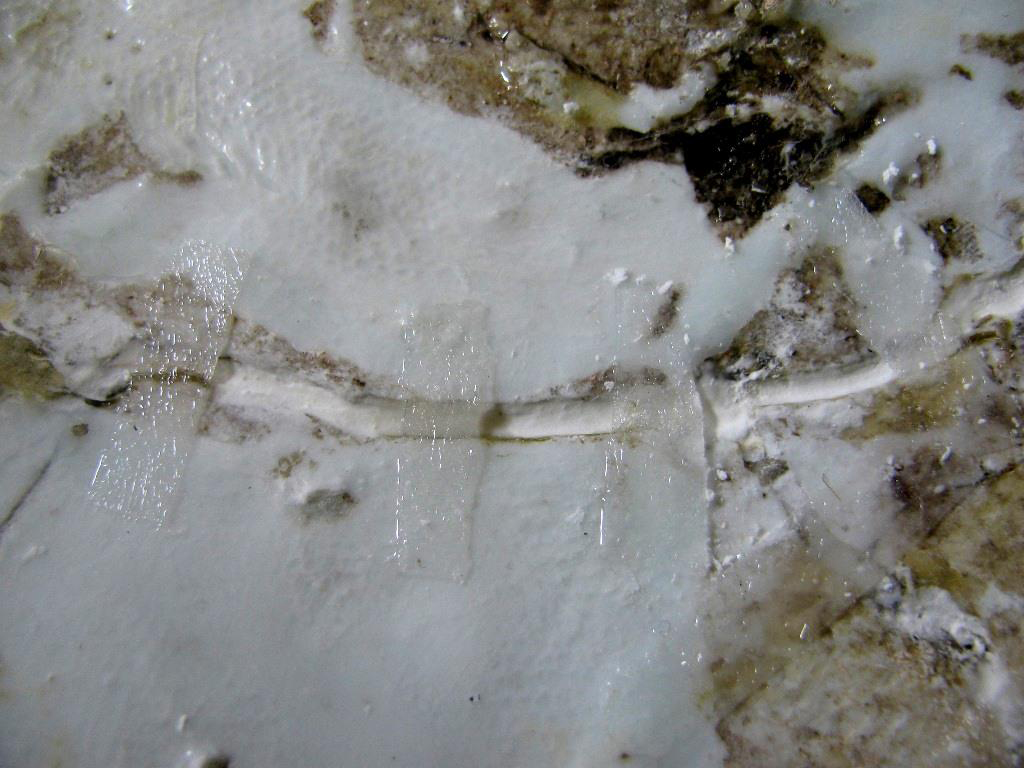
The cracks were covered in all sorts of old glues and adhesives: the most recent in appearance was this yellowed adhesive covering pieces of fibreglass. We found a record showing that this was done in the 1960s when the lion was acquired by the Museum.
There were also many white repairs – probably plaster – and a darker brown resin. In two places I found pieces of wood buried in the crack. The question was: could any of these repairs be original?
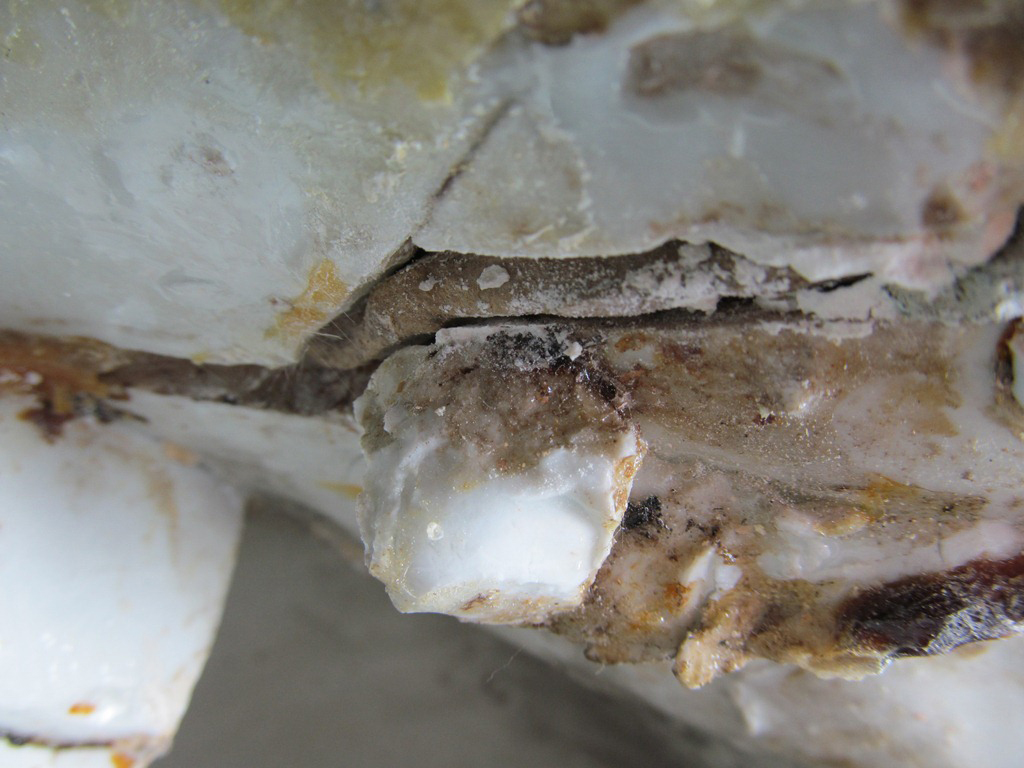
As the lion cracked in the kiln, it would clearly have needed to be fixed as soon as it came out. Archival sources described the use of a ‘resinous filling’. Paul Wildenstein, a Meissen modeller, wrote “I often did not know how to repair the cracks, which were so large that I had to fill them with wood and then spread the filling on top of the wood.” [Wittwer, The Gallery of Meissen Animals, (Munich, 2004), p. 93]
One of the guiding principles of conservation is to retain evidence of the history of the object and certainly to preserve anything which may be contemporaneous with manufacture. Although I was keen to remove old degraded repairs that were no longer functional and would hinder my application of new repairs, I did not want to remove anything historic.
The Science
We did not have the resource time to take a wood sample but I was able to take a small sample of the brown resin using a scalpel to give to Dr Lore Troalen, our Collections Scientist.
Using Fourier Transmission Infrared, a piece of equipment for identifying organic materials, Lore identified the resin as shellac.
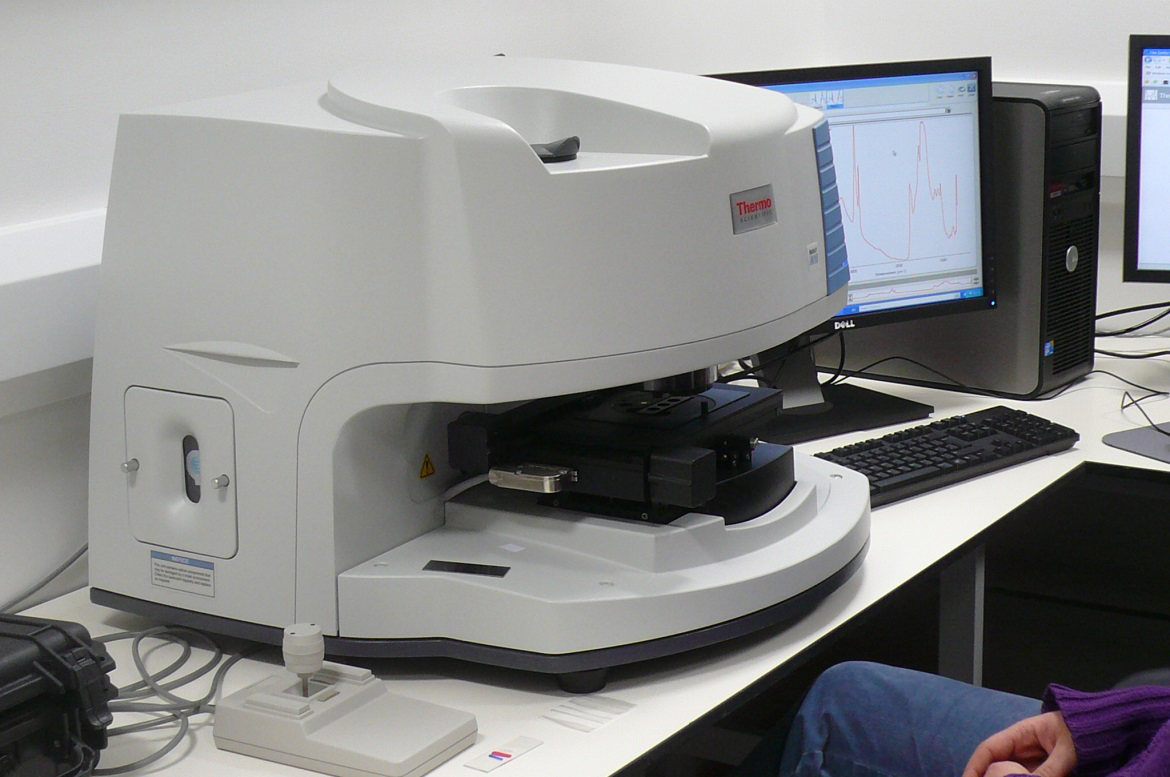
Shellac is a resin secreted by the female lac bug and very commonly used as a glue or lacquer during the 18th and 19th centuries.
I contacted conservation departments at a number of other museums to find out if anyone had analysed Meissen repair materials. It was generally agreed that shellac was likely to have been used. No one I spoke to had ever spotted any wooden infills so this was a particularly interesting find.
The Treatment
As both the brown resin and the wood, and possibly the plaster, could have been original I didn’t touch them, but felt it was time the 1960s repairs were redone: they were yellowed and no longer well-attached to the porcelain body. We certainly didn’t want any of the old repairs failing during transport from the National Museums Collection Centre in north Edinburgh to the gallery at Chambers Street.
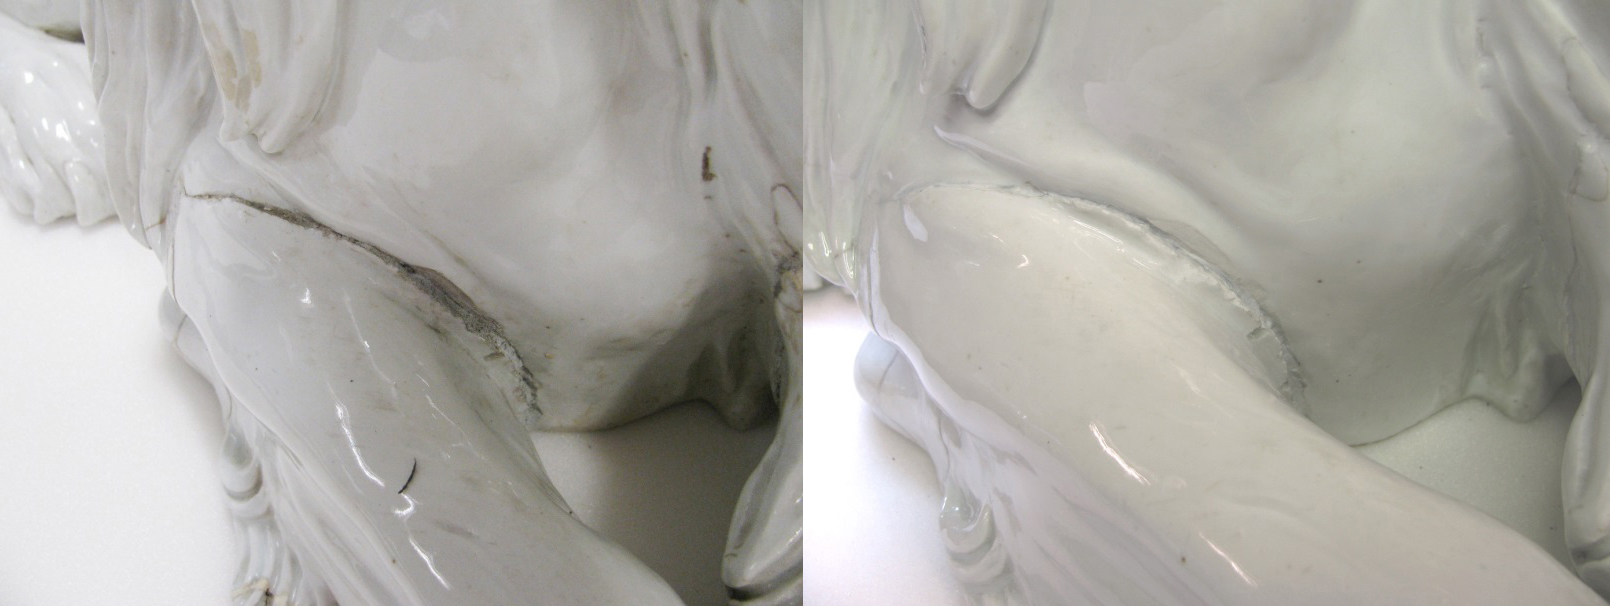
I used rolls of cotton wool dipped in acetone to swell the yellowed adhesive. I was then able to pick most of it off using a blunt scalpel – I didn’t want to use anything sharp in case it scratched the glaze.
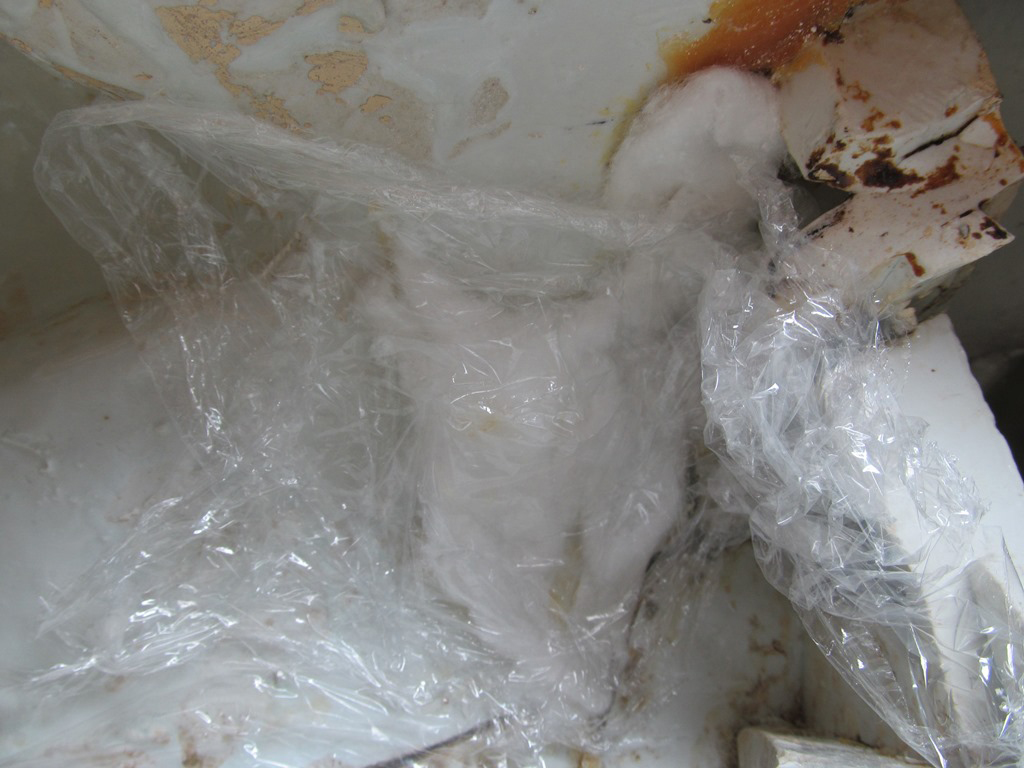
After this was finished, it was much easier to assess the condition of the cracks and the interior more generally. The brown patches are areas where the glaze did not fuse with the clay body during the second firing.
In order to provide as much structural stability as possible I decided to fill the cracks using a reversible filler. I then made small bridges across each crack – the conservation equivalent of medical steristrips. I used a very strong polyester ‘fabric’ which I cut into strips a few millimetres wide and about 20mm to 30mm long. I then stuck these strips perpendicular to the cracks at 10mm intervals all over the interior using a clear epoxy adhesive.
The lion was now safe to manoeuvre and we knew he could travel safely back to the Museum for display. However the next step was to ensure he looked his best.
Repairing the surface
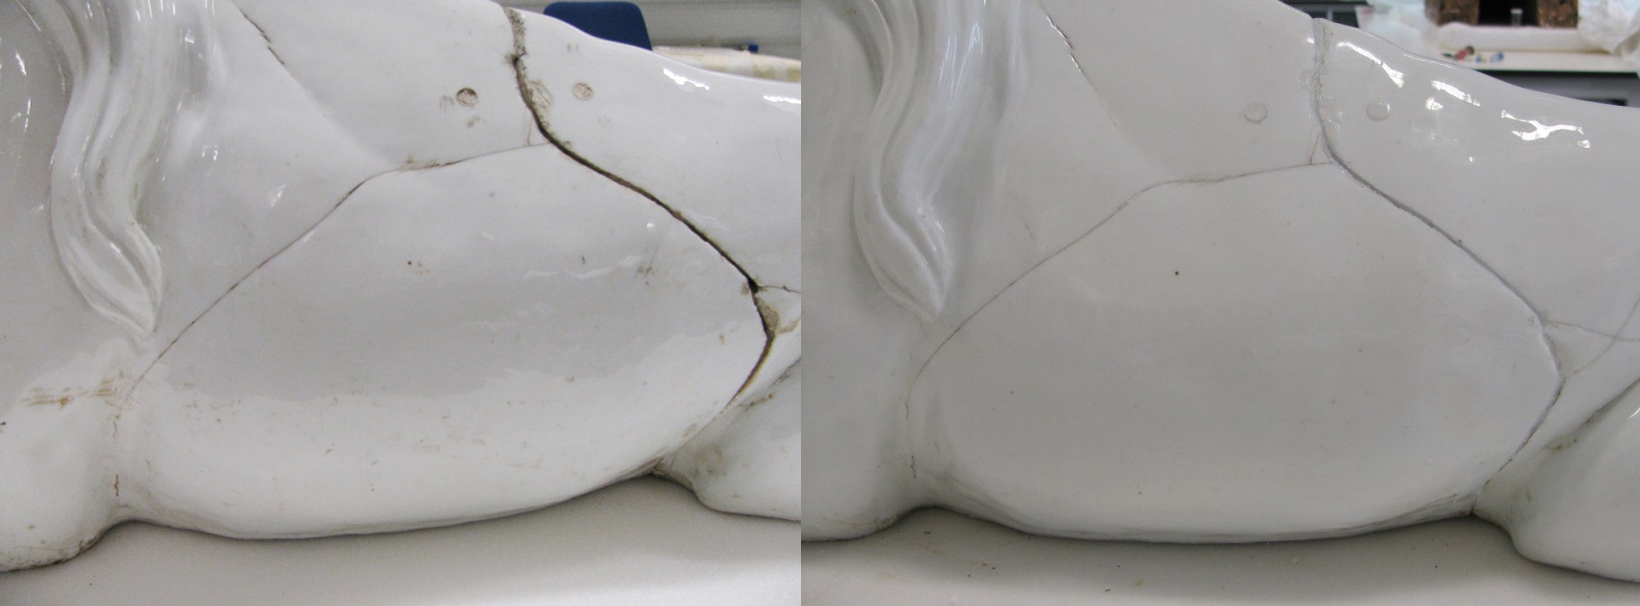
The surface of the lion had become very dirty and scuffed. As with the interior there were many old degraded repairs. After talking to our Principal Curator of European Decorative Arts, Godfrey Evans, I approached these repairs in two ways. We did not want to disguise the firing cracks, so we agreed I would fill the cracks up to a few millimetres beneath the surface and tone them to a neutral colour. This would mean they were not hidden, but neither are they too distracting.
Repairs relating to later damage I filled flush with the surface and used an acrylic varnish to match the original glaze. This included these two circular rivet holes which would once have contained an iron staple: this was a common ceramic repair technique before adhesives which were considered ‘strong’ enough were invented.
Colour matching a white glaze is particularly challenging especially on an object of this scale. You soon learn that every white is slightly different – if you hadn’t already noticed that from the many variations of white to choose from in the local DIY shop. All our team has been working on porcelain over the past few months, and there have been many discussions about what colours to include and how to apply the paint. Everyone has their favourite methods and tricks, but I think we are now united in a desire to escape white – at least for a while!
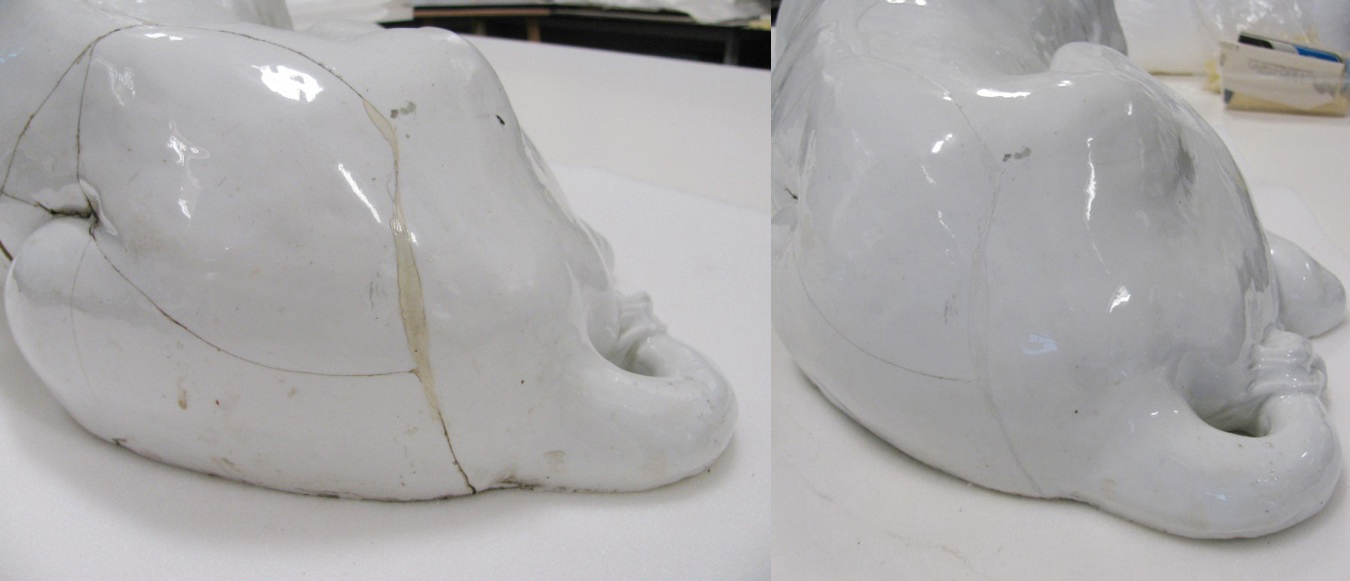
This has been a very rewarding project, and looking back at the images of the lion before I began the treatment and comparing with how he looks now, I feel the satisfaction of being able to see what I have done and the knowledge that the lion can be safely transported and displayed for the years to come. Look out for our Meissen lion in the Art of Living Gallery at the National Museum of Scotland in 2016.