

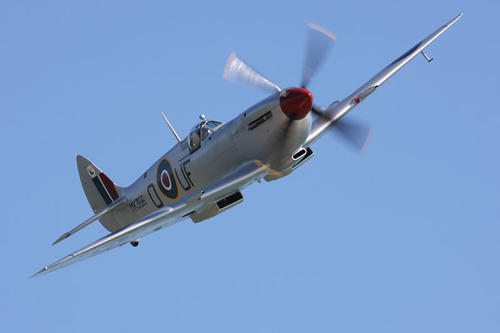
On Saturday 26 July 2014, Scotland’s National Airshow will be returning to the National Museum of Flight, East Fortune. This event is one of the biggest in the calendar in East Lothian, with Stars of the Show like Spitfire, Hurricane, and Mustang, legends that most of us ground-based spectators rarely get the chance to see up close and in person.
For a lot of people who know these names, and can recite from memory statistics and curiosities about these awesome flying machines, this fascination extends from a distinct rite of passage, the building of model plane kits. For some this is a small non-event, memories of Dad (usually) trying to persuade you that this is quality, productive time, and fun. For others this is a hobby that carries on well into adulthood. The only difference being that where once youthful enthusiasm and some relatively cheap injection moulded plastic could be vigorously mashed together with some glue and paint, and then destroyed with similar enthusiasm and a few uttered noises like “Vroooom! Kapow! Ratatatat!” a lot of more experienced modellers pour time, money and patience into building their own Spitfires, Hurricanes and Mustangs, to be lovingly displayed. If you have ever seen James May’s Toy Stories, where he attempts to build a 1:1 scale Spitfire, the urge to paint and glue and to proudly display is a strong compulsion. http://youtu.be/8g0b-fS8x0s Above: National Museums Scotland is not responsible for the content of this video but it has been selected as it is relevant to the National Museum of Flight. I myself probably lie somewhere in the middle. It’s been a couple of years (cough – decades), since I had my own squadrons of Spitfires, Hurricanes, and Mustangs (albeit in 1:72 scale). Up until a couple of years ago wrapped in newspaper and hidden in a box in my parents attic, until a clear out where, tarnished by time, and several hits from falling books, spare pots and pans, they were dispatched to the tip. I admit, I felt strange at the time, such a prominent piece of my childhood memorabilia, relegated to the attic, now gone after many years, but I felt that somewhere along the line I’d be the one trying to convince that this is quality, productive time, and fun. So occasionally it is good to keep in touch with these skills.
What do you need?
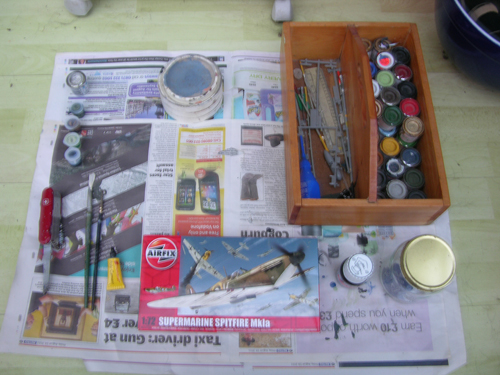
The best place to start is probably on the Airfix.com website. They have a good help and tips section, but here’s my take on it. You will need the following: For the bare basics 1 x Plastic Model Kit 1 x Tube of plastic cement (glue) Paints (dependent upon your model kit) Variety of paint brushes To do the job properly A flat steady surface that can be left undisturbed 1 x small sharp scissors 1 x pair of tweezers Emery boards or a nail file (I have an old Swiss army-style knife that combines scissors, tweezers, and nail file) Old newspaper White spirit / paint thinner Small jar (something like an old herb / spice jar) Toilet roll / kitchen roll Small roll of masking tape (scotch tape) Clear model varnish Optional Detergent Primer Weathering powder Required PATIENCE and adult supervision
Now let’s begin
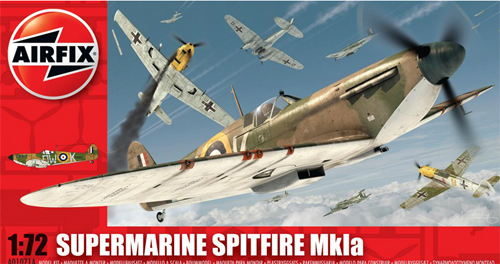
Starting with the basic kit. Remember once you have built it, you have to keep it somewhere. A basic 1:72 scale Spitfire is probably the biggest seller, and for good reason. A 1:72 (1 inch / cm on the model equals 72 inch / cm in real life) Spitfire is about 6 inches across when finished and has about 36 parts, anything bigger (e.g. a 1:32 model) will have more parts and be bigger on completion.
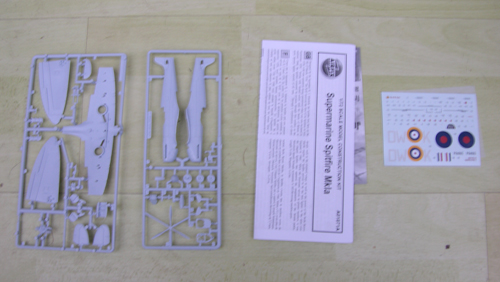
To start, resist the temptation to open the box and pull the parts off, keep them on their plastic moulds. Lay out the newspaper on a flat steady surface, and check the pieces for damage, dirt and grease. If they have any you may wish to wash them gently in a mild detergent solution and let them dry. Painting and gluing the model should always be done under adult supervision in a well aired room. While the parts are still all attached to their plastic moulds is the best time to paint the model, as you have something you can grip without getting paint all over your fingers. The paints are oil based, so the pigment and the oil will separate while it is in the tin so be sure to give it a stir before painting. Some modellers like to apply a base coat primer to their models. I never have, but it is always better to apply 2 or 3 thin layers, and let the paint dry between layers. When painting, watch out for bristles on the brush (particularly if it is an old brush) coming away and sticking to the model. If this happens, use the tweezers to remove it.
In addition to this, do not let the parts dry sitting on the newspaper, otherwise the ink from the newspaper can transfer onto the model. I used old clothes pegs, and balance the moulds on these to keep them off the paper. Keep some white spirit, or paint thinner in a small jar. When you are done after each painting session, dip the brushes into the white spirit and stir all the paint out of them before rinsing under water, otherwise you will get paint all over the sink. Ideally, use different clean brushes for each colour to prevent them mixing, and the colour deteriorating. Again, adult supervision may be required here.

Let’s stick together
When you are happy with how your model is painted, glue it together. Use a thin amount of glue, I’ve always found that the glue that comes with a needle is better, with less mess, and always, only have the cap removed from the glue when you are using it, and always put the cap back on again. If there’s excess glue once you’ve put pieces together, wipe it off with the toilet roll or kitchen roll. When you remove the pieces from the mould, cut them off using small, sharp scissors, don’t twist them off. Keep the plastic trim if you can. These are good for stirring paint as mentioned previously. Use a nail file to rub away any excess plastic. When you have assembled your model and let the glue dry, you may wish to touch up the paint, especially where it has been in contact with the mould. Wet glue can also affect the paint. You may also wish to use the masking tape to prevent painting over areas such as clear plastic canopy’s etc. Give the paint and glue plenty of time to dry. When you wish to apply the decals, cut them from the sheet one at a time and immerse them in a bowl of lukewarm water for about a minute. Then using the tweezers to position the decals and a dry clean brush to move them onto the model. Always do them one at a time. Give the decals plenty of time to dry. When a bit more experienced you may wish to try using some weathering powder to give the model an appropriate look. Finally finish the model with a couple of layers of clear varnish. After that, it’s up to you, display blocks are available, but I usually hang my models by fishing wire from the ceiling.
Take a look at some of the fantastic images on the air display and on the ground activity that were taken of Scotland’s National Airshow in our Flickr Group.